
We reach the third game in our Nunshigum Ridge campaign. This is the second attempt by the Lee tanks of the Carabiniers to cross the narrow spine of the ridge and drive off the Japanese defenders.
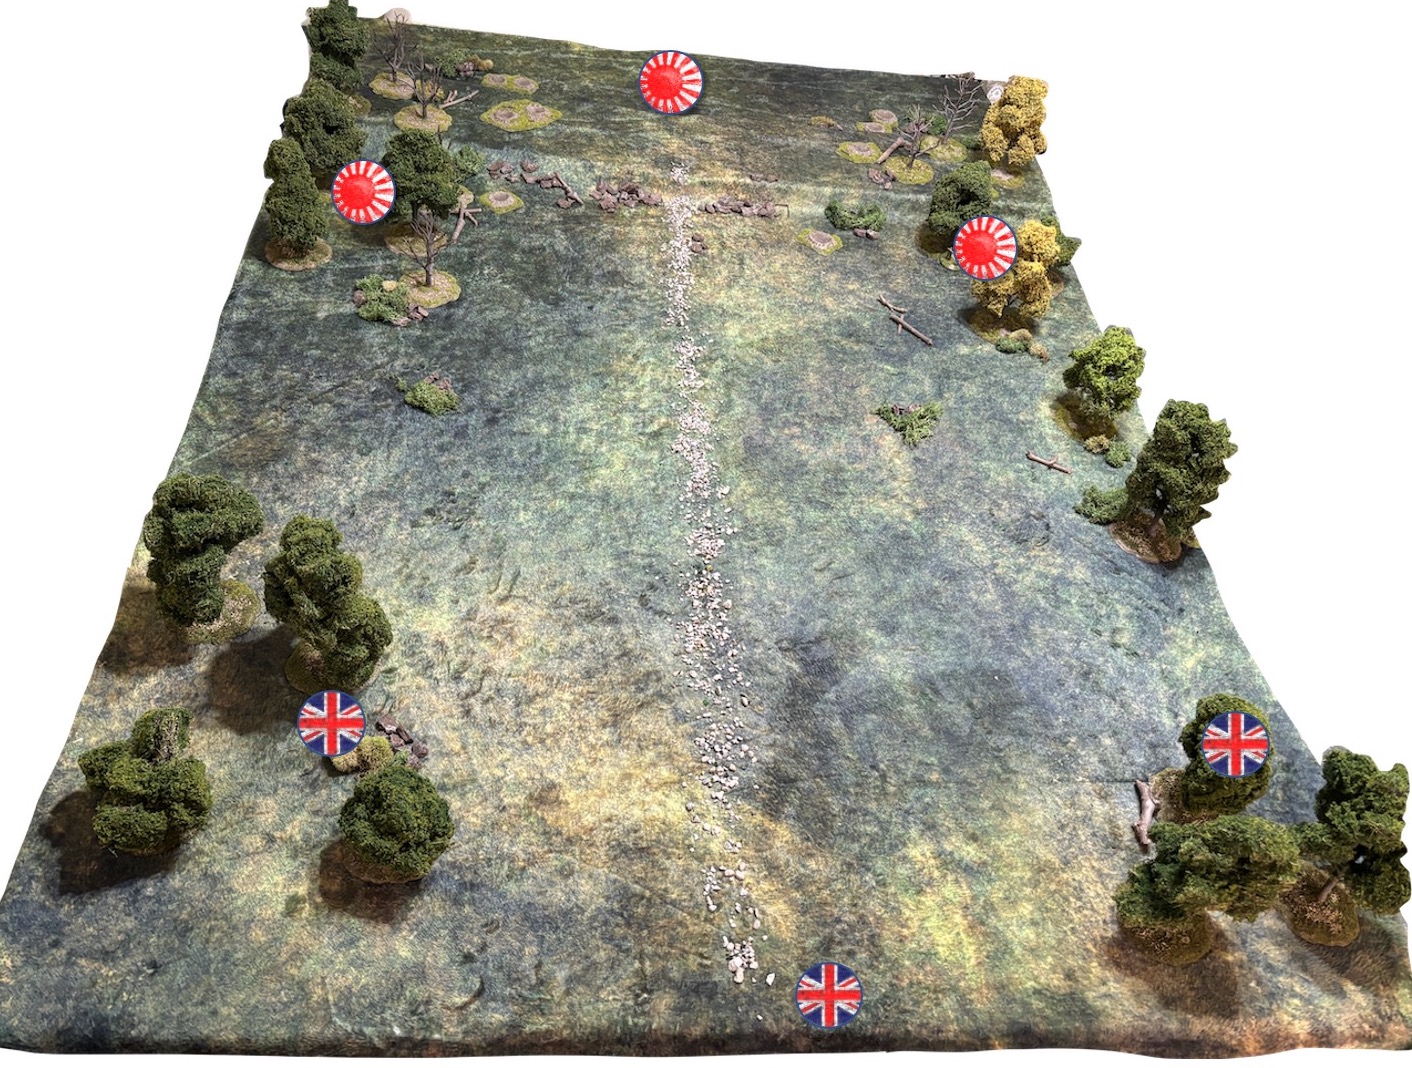
As I mentioned in the preamble to the previous game, we have struggled to recreate this part of the ridge on the tabletop. The solution has been to abstract it so that the stone track that runs along the middle of the table represents the spine of the ridge. Imagine this as a high point that divides the table, blocking line of sight much like a wide high wall.

Dennis Cunningham, a regular follower of the blog, very kindly shared a few pictures he took on a recent visit to the museum of the Royal Scots Dragoon Guards (into which the Carabiniers are now amalgamated). The museum houses a diorama of the action at Nunshigum. While I don't know how accurately it reflects the terrain it certainly conveys the narrow spine and the difficulty the tanks would have had traversing.


For this second attack I will call on the 1st platoon of the Dogras. They fought in the first engagement of the campaign and are in reasonable shape. Their wounded men are back in action and so they are down a total of four men. The Japanese have no replacements and must use the survivors from the earlier game.


Ideally the sections deployed on both flanks can now cover the open sides of the ridge and deal with any assaults on the Lee.


They open fire immediately.

It’s completely ineffectual. The section is on overwatch and they return fire.

It’s not much better, but they do inflict a point of shock on the squad's LMG team.


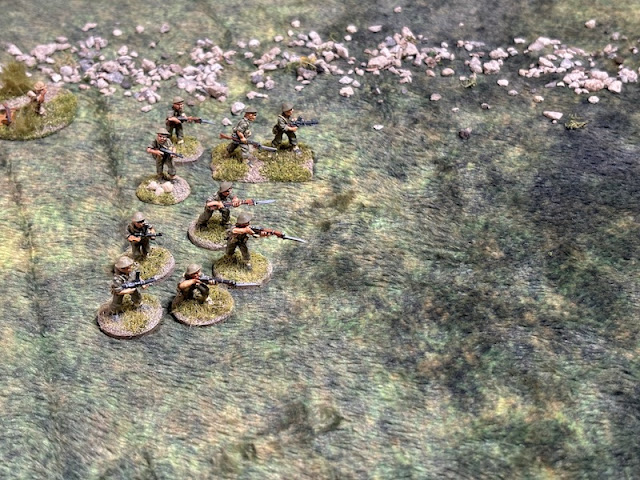
I'm fairly certain the Japanese have only three squads defending this map which means on the right the British are likely to be facing only a single squad. It's the reason I’m prepared to take a risk and have the section deploy in the open. From there they can cover the tank or add their weight of fire to any firefight should the Japanese deploy into the woods on this side of the ridge.


That brings the men close to the second wooded area where the Japanese have a jump-off-point.


I have no way to interfere with either of these moves. Withdrawing the section back into the woods may not have been the the wisest idea. I sense this could spell trouble.


Unfortunately the Japanese are not done yet and the Lee finds itself very exposed and a long way from any supporting infantry.


All three rounds land on target.

That effectively screens off the assault on the tank from the woods.

They carry a powerful pole charge and thrust it against the side armour of the tank. That doesn’t bode well.


The squad covers some of the distance and the Gocho rallies off a point of their shock. It looks like the Japanese have decided the best form of defence is attack.


Meanwhile over on the right flank the section moves cautiously toward the woods.


He moves with them.


The loss of the tank has certainly been a blow. Nonetheless the British do have superior numbers on the right flank and it might still be possible to push through.

The section near the ridge spine move at the double to bring them into line with the other units on that flank.


The following Japanese command roll is 65521, not the most useful in terms of command options but I'm soon to discover the CoC points are very useful for what Dave has in mind. He announces the Japanese will use a Ruse. The squad in the smoke has sent forward grenade armed crawlers.

They use three CoC points to throw three grenades. All of which land on target.

The British are fortunate and suffer only one casualty plus a point of shock on each team. That could have been much worse.

Dave then announces a second Ruse which is For the Emperor.

Using another three CoC points the squad will charge into contact with three dice of movement. This is a bold move and not without risk. The British are well armed with submachine guns which could prove deadly in close combat. However there are two leaders present, one of whom is the Jemadar, a senior leader. The loss of either or both of these would be a severe blow to British morale which is already teetering close to collapse. If their good fortune can continue this has the potential to be a game winning move for the Japanese.

Fortunately the British are on overwatch and the section has three submachine guns (two with the rifle team and the Naik has been armed with one as a support option). They hold their fire until the Japanese come within close range of all the section's weapons. Despite a torrent of gunfire there are only five hits. The end result is the loss of one rifleman, a paltry return for twenty fire dice. Let's hope they can be more effective in close combat.

The Japanese move into contact and it's only then we discover how much the odds favour the British. Defending light cover with a Bren gun, three submachine guns and two leaders, including a senior leader, they amass thirty two dice for this combat whereas the Japanese have only ten.

The British are down to three command dice which will prove a challenge. That said the Japanese have just lost 30% of their force in that close combat. Now the British really do have the numbers, but can they make it count before their morale drops completely?


From there they can cover any Japanese advance onto the ridge spine.


That brings them out of concealment and visible to the British.


The section on overwatch opens fire.

Only one of the squad is kit but it's the Gocho. He's lightly wounded and out of action for the remainder of the turn (which unfortunately for the British is about to end at the completion of this phase). Japanese morale holds steady.


He then has the whole section move to the treeline. From there they can target the grenade discharger squad on the ridge spine.


The section suffers only one point of shock.


Despite being in open ground the section survive unscathed.


A man in the rifle team is hit.


He has the section in the woods fire on the Japanese squad. Only one man is hit but it's the Chui who suffers a light wound. That takes Japanese morale down to five.

The squad suffer no further casualties but do accumulate more shock.


It has little effect other than to add further shock.


It manages to add only another point of shock.


The Bren team lose another man which reduces the team to a single gunner.


Only one man is hit but he's the remaining Bren gunner which means the team is wiped out. It's yet another blow to British morale which drops to two.

The British lose a jump-off-point. I begin to sense what little hope I may have had of rescuing this game is fast slipping away.

They don't have far to go.

They rush into contact. This times the odds are very even, with the British rolling sixteen dice to the Japanese eighteen. Now it’s in the lap of the gods. Who will fortune favour?

Unfortunately for me, it favours the Japanese. The British inflict four kills and three shock, but the Japanese manage seven kills and two shock. The Japanese leaders all survive but the Naik leading the British section suffers a light wound.

Having lost the close combat the survivors of the section fall back 12”. They suffer additional shock and that's enough to break them.

The section breaking and the leader wounding is more than sufficient to crash British morale down to zero!

That leaves the Japanese holding the table and seeing off the British for a second time. The withdrawal isn’t easy, a Naik and rifleman are captured and three riflemen are dispersed. With fourteen casualties that’s a further seven permanent losses to the platoon.

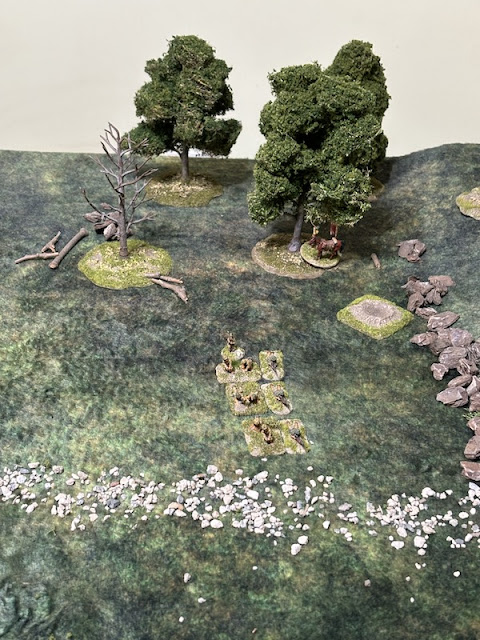
The patrol phase is fairly straightforward and jump-off-points are placed as shown below.
The British have ten supports points and I decide to make the exact same choices as before. I have a feeling the Japanese have revealed their full force and the way the ridge spine divides the table makes me think I may be able to build up a numerical superiority on one side or the other.
British supports are: a pre-game barrage to hinder Japanese deployment; an extra infantry section to give numerical superiority; SMGs for two of the section leaders for extra firepower, and finally, an additional command dice (Red dice) to improve command and control.
We begin with Japanese force morale at nine. Unfortunately the British are at eight and given the task ahead of them I hope it’s sufficient to survive the inevitable losses and setbacks. With that we start.
The Japanese have the first phase and to my horror Dave rolls 66641 with the command dice. The triple six will see a Turn End, which means my pre-game barrage will cease before the game has even started. That's a bitter disappointment and no doubt a few stern words will be had with the artillery commanders at the end of this action. Knowing that future Japanese deployment won’t be hindered Dave decides to hold off revealing any of his units.
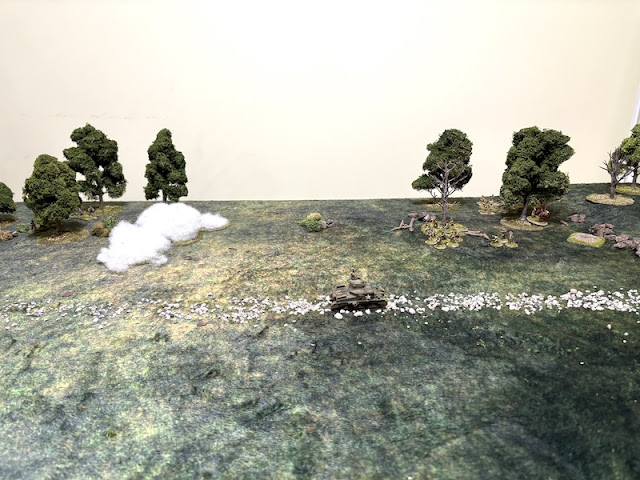
In the British phase the first M3 Lee appears on the ridge spine.

The Japanese elect to do nothing in their phase and so when the British phase arrives the Lee continues making its way forward.

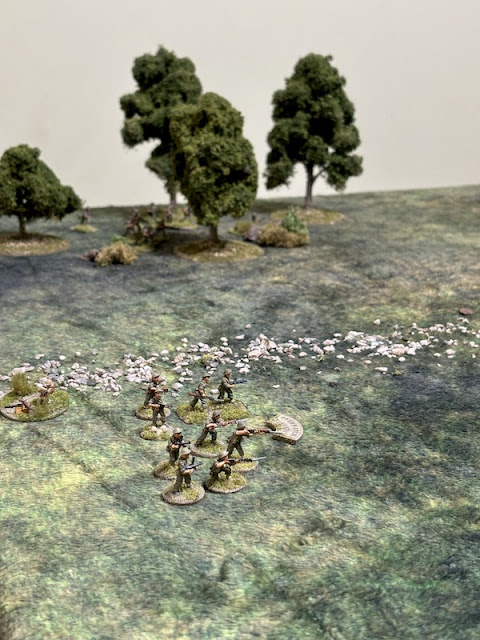
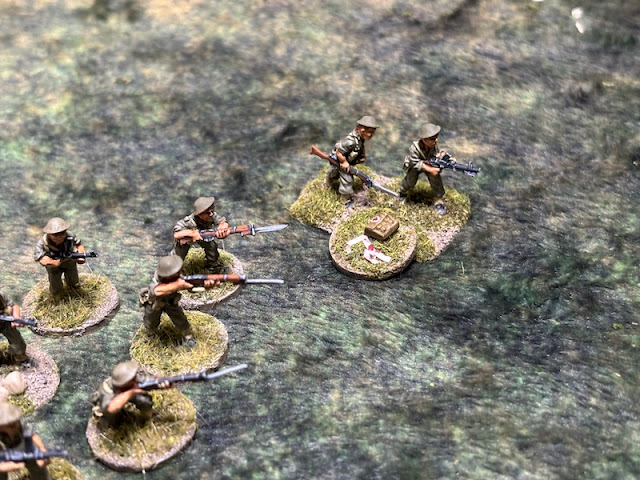
On the British right a section accompanied by the platoon’s Havildar (the second-in-command and a senior leader) deploy at the edge of a clump of trees.

Both teams are placed on overwatch.


On the British left, the Jemadar, the platoon commander, deploys.

He is also accompanied by a section and they are placed on overwatch.


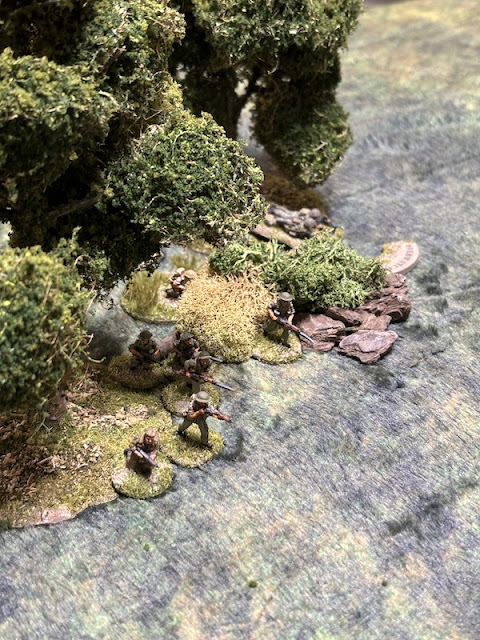
That provokes a response from the Japanese. The first of their squads makes an appearance in the woods opposite the British left flank.


The Japanese platoon's grenade discharger squad is next to deploy. They let loose an initial volley of grenades but once again the men on the receiving end are unscathed.

In the British phase the Lee keeps pushing forward along the ridge spine.


The opening round of Japanese fire proved ineffectual, but I doubt that will continue. The next volley from the grenade discharger squad will include six grenades and the section could soon find itself on the receiving end of a lot of Japanese fire. I decide discretion is the better part of valour and the section slip back into the woods and out of sight.

On a more positive note their presence has drawn out two of the Japanese squads and allows me to consider where the British might want to press their numerical advantage. A third section deploys on the other side of the ridge. That puts them out of line of sight of the two enemy squads. The Naik, their section leader, puts the men on overwatch.


With the British infantry no longer in sight the Gocho in the woods rallies shock from the LMG team and puts the team on overwatch.

The grenade discharger squad take up tactical positions.

In the British phase the Lee continues to make good progress and moves forward fairly quickly. It makes me wonder whether it has an opportunity to move the length of the spine before the Japanese can respond and attack it?

On the right flank the section leave the woods and move ahead. I want to ensure the Lee has adequate infantry support.

A fourth British section deploys behind them, in the position they just vacated. The Naik puts both teams on overwatch.

Just as I begin to think the attack is developing at a good pace the Japanese command roll is 66321. The double phase could prove to be quite a problem, especially with the Lee tank so far forward. Dave is quick to seize the opportunity and a tank hunter team deploys.


The Japanese rifle squad takes advantage of the fact the British section has pulled back into the woods and they too make a move toward the tank.


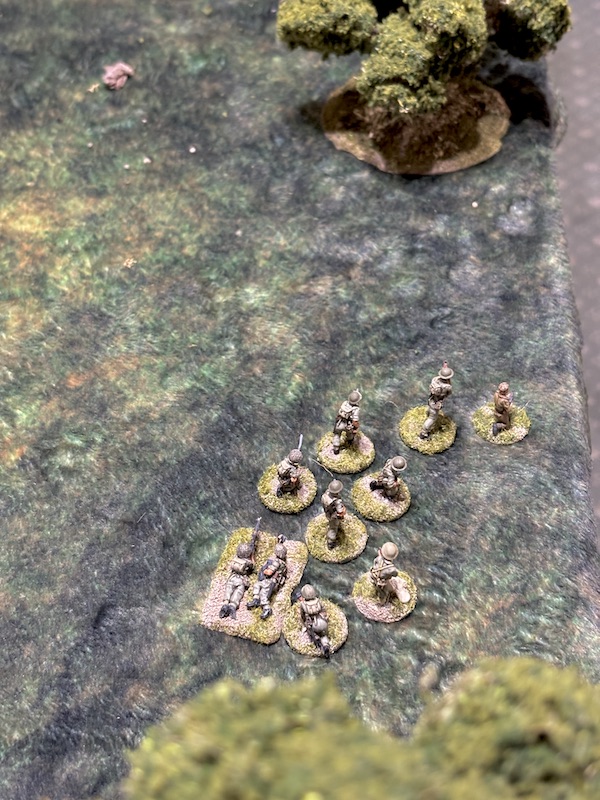
In the meantime, on the other side of the ridge, a Japanese rifle squad deploys deep into the woods. They take up overwatch positions. For now they cannot be seen by any of the British sections, but that will change the moment any of them enter the woods.


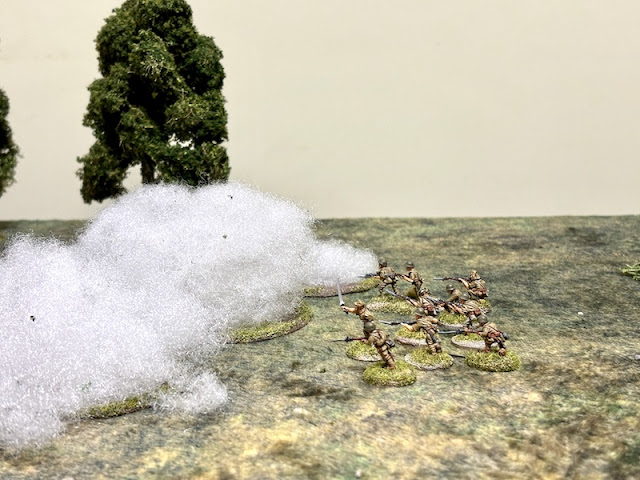
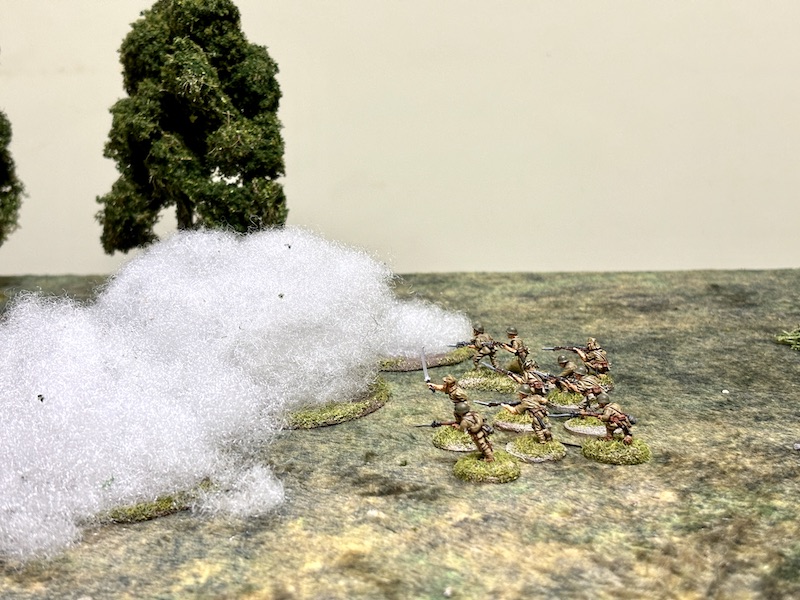
In the following phase the grenade discharger squad fires smoke at the woods opposite.


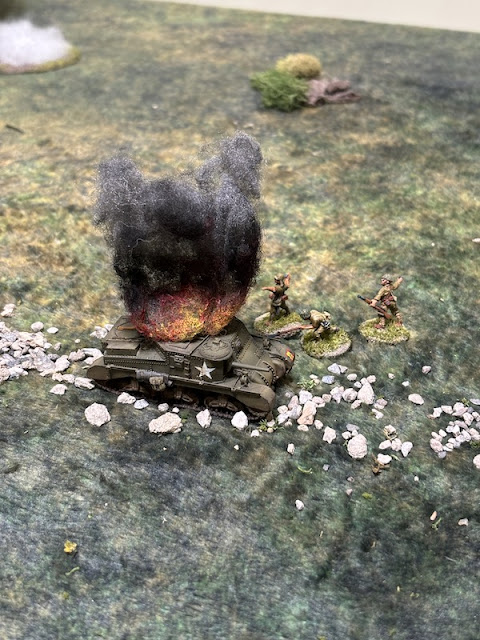
The tank hunter team then make a suicidal dash toward the Lee and manage to cover the distance in a single bound.


It detonates, inflicting eight AP strikes - with catastrophic results. The Lee explodes, killing the crew. The loss of a support and the tank commander is a huge blow to British morale which falls from eight to four in one fell swoop. The tank hunter team are swept away by the blast but that will have no negative impact on Japanese morale.

With the tank out of the way the squad's Gocho turns his attention to the British section in the woods. He has his men move at the double toward the smoke screen.


The slump in British force morale sees their command dice reduced to four and the loss of the Red dice. That leaves limited options when their phase arrives. Nonetheless the section in the woods prepare to receive an assault and the Naik puts both teams on overwatch.


In the Japanese phase they accrue several CoC points but that leaves few command options. The Gocho rallies off the remaining shock and has the squad move up to the smoke.

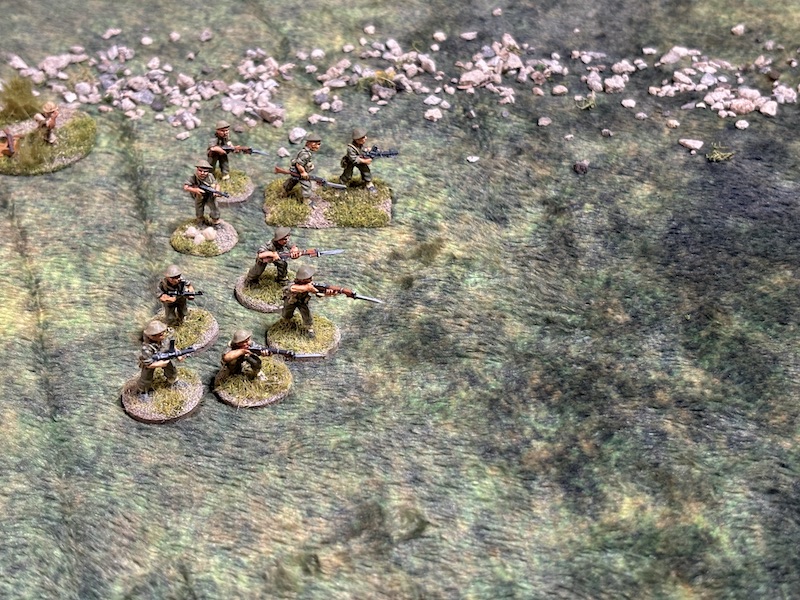
In the British phase the Havildar on the right flank orders the section forward out of the woods.


Once within command range he orders the squad nearest the woods onto overwatch.


I want to press ahead with as much as I can while the Japanese are preoccupied on the other side of the ridge.

Once again just as I think I'm making progress the Japanese command roll is 66532 and another double phase. It also brings up a full CoC die. Fortune seems to be smiling on them at the moment. The squad move into the smoke.

Meanwhile the grenade discharger squad head toward the spine.


Those odds prove devastating for the Japanese who see the entire squad wiped out. That takes their morale down to six. In return they kill one rifleman and lightly wound the Naik who is out of the action for the remainder of the turn. That was not quite the result they were hoping for but with the wounding of a leader British morale drops to three. The Japanese losses were not entirely in vain but they paid a heavy price without the full return they were hoping for.

The Havildar has two of the sections advance.

That brings three sections together in line across the right flank.

In the Japanese phase the grenade discharger squad move toward the spine.

The Chui, the platoon commander, deploys into the woods. That makes it clear the Japanese are very unlikely to have anything more to deploy.

Despite their numerical superiority the British need to act with caution if they are to preserve their morale. The Naik puts the section in the centre on overwatch.


Once again at a crucial point in the game fortune favours the Japanese with a command roll of 66621. Not just a double phase but a turn end that will see all the British units no longer on overwatch.
The Gocho in the woods has his squad move tactically toward the tree line.


With that the turn ends. Both the recently wounded Gocho and the Naik on the British left are back on their feet.


In the following Japanese phase the grenade discharger squad moves onto the spine.

The British are no longer on overwatch and cannot react. Then the squad at the edge of the woods opens fire at one of the section in the open.

It’s the support section and they lose three men.

Despite only three command dice the following British command roll is 433 which will allow a response. The Naik on the left rallies shock.


On the other flank the Havildar sends the nearest section into the woods.

If there is to be any chance of a British breakthrough I'm going to have to deal with that squad in the woods, so I might as well start now.

The Havildar then rallies shock from the support squad and has them place covering fire on the grenade discharger squad.


In the Japanese phase they respond to the arrival of the British in the woods. The Chui has the squad's rifle team open fire.


The Chui then has the LMG team fire at the section in the open.


The grenade discharger squad targets another of the sections in the open.


The following British command roll is 311. It's sufficient to have the Havildar issue a series of orders.


I'm hoping the two British sections can form a blitz party under the direction of the Havildar but I need to get him into the woods for this to be effective. Unfortunately he leads another section in that direction but their movement is tardy and they don't move anywhere near as fast as he would like.

The Bren team in the open returns fire into the woods.


In the Japanese phase the Gocho spends the phase rallying shock. The Chui then orders the rifle team to continue targeting the section in the woods.


The Chui then orders the squad's LMG team to fire at the section in the open.


The grenade discharger squad target the same section.


The following British command roll is 652. Almost useless but not quite. I sense I have nothing to lose and send the section in the woods charging into close combat. Can British superiority in automatic weapons make a difference again?


The early collapse of British morale played a major part in their undoing. Had they started the game with higher morale they might have been able to withstand the loss of the Lee and its crew, but with morale starting at eight that was a blow that set them back considerably. Fortune certainly didn't smile on them today. Losing the pre-game barrage after the very first phase was the start and events seemed to conspire against them from there. C'est la guerre.
That said, we do think the scenario needs more work. We have devised a few changes and will play this a third time to see if the British have any more chance of success. You can follow what happens next in this post.
It seems like it was another "back & forth" game. Thanks for another interesting report.
ReplyDeleteThe Dogras were really up against it, not only the immediate loss of any benefit from the barrage but also the double turns for the Japanese arriving almost as if they had been scripted. I wonder whether it's time for a different approach? I favour getting everything set, with a lot more anti-personnel support (MMG, Mortars, etc.) before setting off. I assume there's no time limit? Obviously I wouldn't bother with a pre-game barrage in this case as it will almost certainly stop before the off.
ReplyDeleteThat was... interesting. There's not much you can do faced with die rolls like those. Kind of ironic, the British force being shut down by smoke for a change. Looking forward to the next round.
ReplyDeleteA great read and see saw encounter very finely balanced. No plan survives contact with enemy and the dice😉 look forward to seeing how the next one goes.
ReplyDeleteVery interesting AAR, certainly the diorama photos from the museum make you wonder just how anyone did this sort of stuff at all--amazing. Looking forward to the next instalment.
ReplyDelete