One side of the table is a wide expanse of open fields. The other is a series of small orchards that lead up to the farm. They provide the only covered approach for an attacker. Unfortunately, the route is utterly predictable and it leaves the British with few tactical options. No doubt the panzer grenadiers have prepared a hot reception for anyone coming that way.
The platoon from the Royal Scots Fusiliers have suffered a number of casualties. Eight men are lost permanently and another two are recovering from wounds. They could replace the platoon with a fresh one from the Duke of Wellington's Regiment, but it seems too early in the campaign to do that.
Instead I will put in a request for replacements before this attack begins. The platoon can do this once in the campaign and with the CO's opinion currently at +3 now is as good a time as any. So it proves to be - the platoon is fortunate to receive sufficient men to replace all those lost permanently. That leaves them missing only the two wounded men.
As with earlier games the British continue to benefit from a heavy pre-game barrage and so with the platoon at almost full strength I've decided to rely on armour as the principal support for this assault. The German platoon still retains its PzIVH and with enough support points available to add another I need to be prepared to deal with these if they show up.
My plan is to call on a Sherman M4, a Sherman Firefly and a Churchill AVRE. The job of the Firefly is to act in an overwatch and tank hunter role. The Sherman M4 will push ahead and support the initial infantry assault. I'll keep the Churchill AVRE for the final attack on the farm. Well, that's the plan. Let's see if it survives contact with the enemy.
The British have two free moves in the patrol phase and unfortunately can't prevent the Germans from establishing a strong position around the farm.
Those Germans must be feeling confident, they start with their force morale at eleven. The British slightly less so, they start at ten.
With the higher force morale the Germans have the initial phase. Dave, fearing the unpredictability created by the pregame barrage, immediately sets about trying to deploy. In many cases there’s an advantage for the defender in delaying but under these circumstances that could be a high risk strategy. Instead he opts to establish his defensive position as quickly as possible. The first squad that tries to make it through the barrage fails, but a second is successful. They appear entrenched in front of the farm.
The initial British deployment sees the 2” mortar and PIAT team arrive in one of the orchards. They are joined by the platoon sergeant.
For now the restricted vision within the orchard and the intervening hedgerow prevents either side gaining a direct line of sight to the other. Until the British reach that hedge line they should be safe from German fire, however when or if they do, all hell is likely to break loose.
The Germans then enjoy a succession of phases. In the first they do nothing more than accumulate two CoC points to add to the one they received in their opening command roll.
In the following phase they add another CoC point, while the squad’s scharführer puts both LMG teams on overwatch.
In the third phase they add a further CoC point, but do nothing else. That puts them at five CoC points very quickly.
When it comes to the British phase a command roll of 66431 presents an opportunity to make some progress. A section deploys to the right of the mortar and PIAT teams.
The sergeant orders both those teams forward tactically.
He then joins the recently deployed section.
In the subsequent phase there are few command options and a second section deploys into the orchard by the PIAT and 2” mortar teams.
The Germans then deploy a second squad successfully. They too are entrenched and the scharführer puts both teams on overwatch.
The Germans may be showing their hand early but it's difficult to see how the British are going to deal with this ominous looking firing line.
It leaves me wondering how on earth I'm going to do it. The British can't match the panzer grenadiers for firepower, or for cover, so any firefight is heavily weighted in their favour.
All the panzer grenadier LMG teams are on overwatch so any approaching infantry would most likely be subjected to two consecutive rounds of fire. I don't fancy those odds at all. I can't envisage any scenario where the British are not swept away from the hedgerow in a hail of MG42 fire.
In the next British phase the sergeant has the two sections in the orchard move forward tactically. I suspect this is about as close to the hedgerow as I'm prepared to get until I can call up more support.
The appearance of such a strong German defensive position forces a pause. With little to be gained by pressing ahead I intend to hold this position until the armour arrives.
The next German command roll is 65532, which delivers the points they need for their first full CoC die. They take no further actions, but I'm certain it won't be long before Dave ends the turn and with it the effects of the pregame barrage.
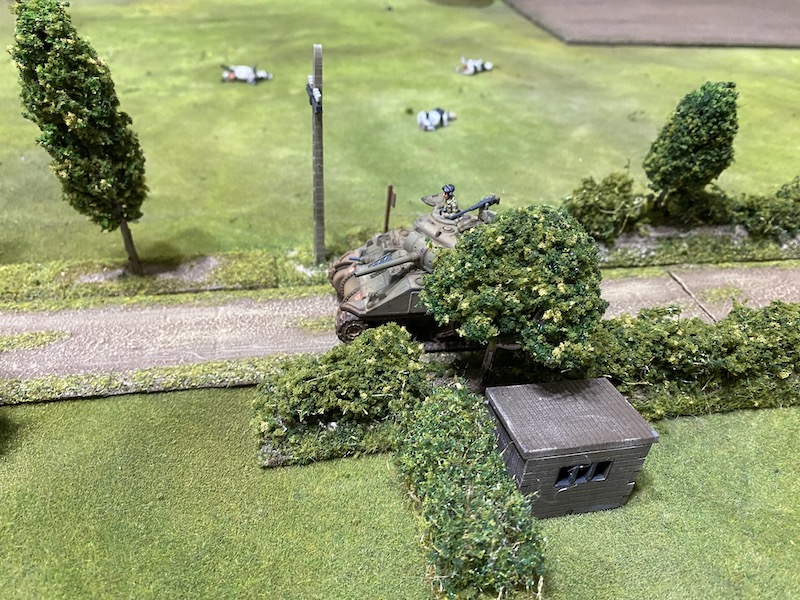
In the British phase the command options are limited but it's enough to have the Sherman M4 deploy into the orchard.
The defenders are equipped with a small number of panzerfausts, but their range is short. Once the Sherman has a line of sight it could sit out of range and make those entrenchments untenable. For that reason alone I expect the arrival of the tank to provoke a response.
Not unexpectedly, Dave decides to use the CoC die to end the turn. All the tactical and overwatch markers come off and it sees the end of the British pregame barrage.
The German command roll is 65521 which helps replenish a couple of CoC points. More significantly a dug-in PzIVH is revealed next to the farm and the commander puts the gunner on overwatch. What was previously a very intimidating defence now looks even more daunting, dare I say it, even unassailable. Much like the infantry, the Sherman is unlikely to win a duel in this situation.
The next British command roll is 65543. There may not be many command options but it does give them their first full CoC die. In a situation like this the chance to interrupt the enemy could prove critical and I intend to keep it for such a moment. Meanwhile the Sherman speeds forward to support the infantry and goes flat out through the orchard.
The sergeant orders the 2” mortar team to fire smoke at a gap in the hedgerow.
Now that the pregame barrage is no longer in effect the Germans are free to deploy and the platoon's oberscharführer arrives in one of the farm buildings.
He puts the three teams in command range on overwatch.
The following British command roll of 55521 provides many more CoC points but few other options. Nonetheless I need to rethink my plans.
The Germans may have established a formidable defensive line but they have also revealed a lot about their position. I can't see the point of bringing the Sherman up to the hedgerow, it won't take much for the PzIV to make short work of it. It's clear to me now that a frontal assault through the orchards is an invitation to disaster. I need to find a way around the flank. The Sherman turns and heads for the road.
The German command roll is 66654 and with nothing for the oberscharführer to do this phase the turn ends. That's not necessarily in the German's favour as it sees all their units come off overwatch.
The subsequent command roll is 66431. For a moment I can see Dave contemplating the orchard and I sense he's weighing up the feasibility of using the double phase to counterattack. Should he risk abandoning the very strong position he’s established and attempt to seize the initiative? If he can bring his units to the hedgerow and then follows that with another phase he could wreak havoc. On the other hand, if he fails to move fast enough he might find he weakens his position and suffers a damaging riposte from the British.
He opts for caution and the oberscharführer puts three of the teams back on to overwatch.
The tank commander instructs the gunner to do the same thing.
In the following phase the final LMG team is placed on overwatch and with that the Germans restore their formidable line.
In the British phase the Sherman leaves the orchard. The driver makes good going and the tank finds itself leading the advance.
I suspect the only way the British are going to make any progress is to support the infantry with all of the armour.
To cover the advance of the Sherman the Firefly deploys with the gunner on overwatch, he’s ordered to keep a sharp eye on the open flank.
It's joined by the Churchill AVRE which enters on the road.
The Germans then enjoy another run of phases. For the first two they opt to simply keep their positions, and why not? They have held the British advance in check.
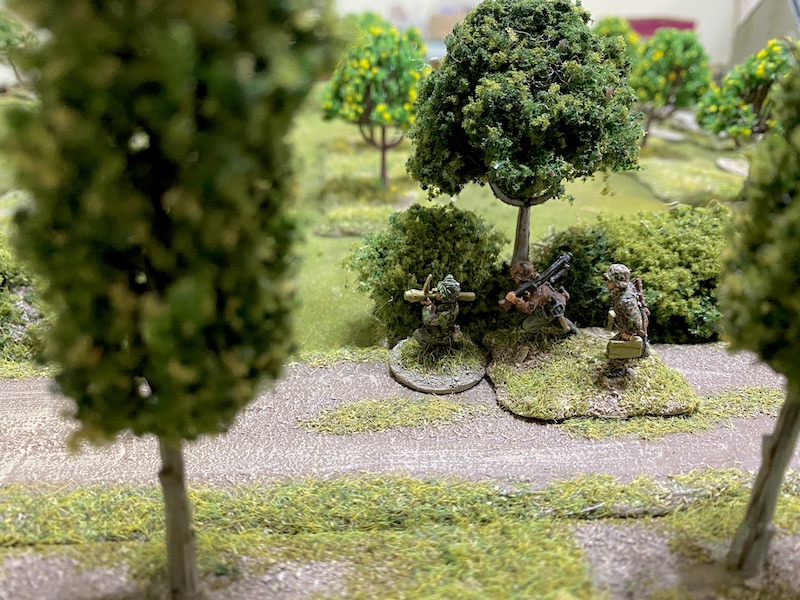
In the third phase their command roll is 55332 which gives them enough points to make up another CoC die. Dave identifies an immediate opportunity and wastes no time using the die to declare an ambush. A panzer grenadier team appears in a hedgerow lining the road.
They are armed with a panzerfaust and the Sherman crew are about to learn a lesson in the importance of close infantry support (as am I!).
Normandy conceals many perils for an unwary crew and this is one of them.
Fortunately, they will live to learn their lesson. The hollow charge hits the Sherman, pierces the frontal armour and knocks it out. Luckily the tank doesn't explode and the crew bail out hastily.
They abandon the tank and make for the rear. The sight of which takes British force morale down to nine.
With the Sherman disabled the final German squad deploys on the edge of the orchard.
The loss of the Sherman is disheartening. Despite that, I'm determined to shift the British attack to the flank and have it supported by the two remaining tanks. The platoon sergeant has the 2” mortar team fire smoke once again into the gap in the hedges.
The section nearest the road moves toward the hedgerow.
The sergeant retraces his steps across the orchard to join the section, 2” mortar and PIAT teams.
The third British section deploys into the orchard near the road and they are joined by the lieutenant.
In the German phase the recently deployed squad moves tactically (and very slowly) into the edge of the orchard.
In the British phase the Churchill AVRE moves flat out directly ahead.
The lieutenant orders the lead section into the road. He then advances with the third section to the hedgerow behind them.
The sergeant sends the 2” mortar team across the orchard to join the lieutenant.
He then has the PIAT team and the section move with him to the right.
That begins a stronger push onto the flank, but I can’t give the Germans the freedom to counter it. The British need to maintain a threat along the hedgerow with at least one or two sections and the PIAT team. If the Germans respond and weaken their position in front of the farm I need to be ready to exploit any opportunity that arises.
In the German phase the oberscharführer moves into the farmyard.
The squad on the German right advances into the orchard.
When it comes to the British phase the Firefly accelerates flat out across the field.
The Churchill AVRE turns and heads in the same direction.
The oberscharführer crosses the farmyard and from there he can command most of the platoon.
The squad on the right has a better line of sight now that it is in the orchard and takes up overwatch positions.
The Sherman Firefly continues moving rapidly across the field in the British phase. From here it has two options. It can cover the Churchill AVRE should the PzIV attempt to engage it by moving to the edge of the orchard. Alternatively it can stalk the German tank should it decide to come around from the back of the farm.
The section in the road moves tactically around the wreck of the Sherman.
They will soon have the support of the Churchill AVRE and this is something the Germans will have trouble ignoring.
Despite the growing threat on the open flank the Germans opt to hold their positions. In the following British phase the command roll is 53321. That adds a CoC point bringing them only one short of a third CoC die. Each of those could be critical if they can interrupt a German response.
Meanwhile the Firefly continues its wide flanking move through the field.
It can sit here and cover both the orchard or the rear of the farm, preventing the PzIV from having free rein to attack the Churchill AVRE.
The Churchill goes as fast as it can behind it.
The section at the road continues advancing cautiously and makes its way tactically around the wreck of the Sherman.
The 2” mortar team move up to the hedge ready to clamber over on to the road.
At this point both Dave and I realise that the two British tanks have a line of sight to the nearest German LMG team. It seems the Germans may have left it too late to react and pull back into the farmyard. Any move could be interrupted and yet staying in line of sight of the Churchill AVRE's powerful gun is not really an option.
Even if they did choose to fight on and fall back, there is little to prevent the Churchill AVRE chewing up the defence. The PzIV is in no position to respond quickly and any move out of the tank scrape and forward into the orchard risks the attention of the PIAT team and/or the Firefly. The only other option is to move back and take the long way around the farm. That could take several phases. By which time too much damage may have already been done and it must tackle the Sherman Firefly.
Whatever the Germans choose to do, they must face the prospect it will be interrupted. The initiative is suddenly well and truly with the British.
The position at the farm was one that looked so unassailable earlier but now it may have been compromised. If the Germans are not careful there's a danger things unravel quickly and they take unnecessary casualties for no obvious gain. Reluctant as he is to do it and as anticlimactic as it feels, Dave decides the best thing is to withdraw.
Things are not quite as bad as they appear. The Germans are able to play their wild card and launch an immediate counterattack using the Panther tanks from Wunsche's command. That could prove enough to recapture the table. In which case it would put the British back where they started and allow this same German platoon to make a second stand at the farm. By withdrawing now they have a much better chance of remaining in good shape to do that.
The end of the game came quickly and unexpectedly. I certainly didn't think I could capture this table without taking casualties. At the end of the game Dave summed it up best when he joked that he had formed an unassailable position and the only problem was that I had decided not to assail it. He was certainly right to think the orchard was the obvious approach and he put in place a formidable defensive line that could stop it in its tracks. In the end it left itself susceptible to a flanking move and that proved its undoing.
With no casualties on either side the men's opinion in the British and the German camps rises and in both cases now stands at +1. This is not the case with the opinion of their COs. The British CO takes a much more positive view of their progress and his opinion rises to +4, which is not the case with the German CO whose opinion drops to -2. For now the only impact all this has for the next game is the British will benefit from an additional 1 support point.
Next it will be turn of the British to face a German attack, do they have what it takes to stop that in its tracks? You can follow what happens next in
this post.