The British won a surprisingly bloodless victory to capture St Nicholas farm in the previous game. The German withdrawal has left a gap between 12th SS Division and Panzer Lehr, one that urgently needs to be closed. With that aim in mind armoured elements from the 1st battalion of Max Wunsche's 12th SS Panzer Regiment have been ordered to mount an immediate counterattack.
Wunsche's force is available for this game only and then it will withdraw to reserve positions. Even if the counterattack fails at the very least it will have succeeded in delaying the British for a full campaign turn. Should it force the British to withdraw then they will have to spend a further campaign turn trying to recapture it. Whatever the outcome, the counterattack buys the Germans extra time.
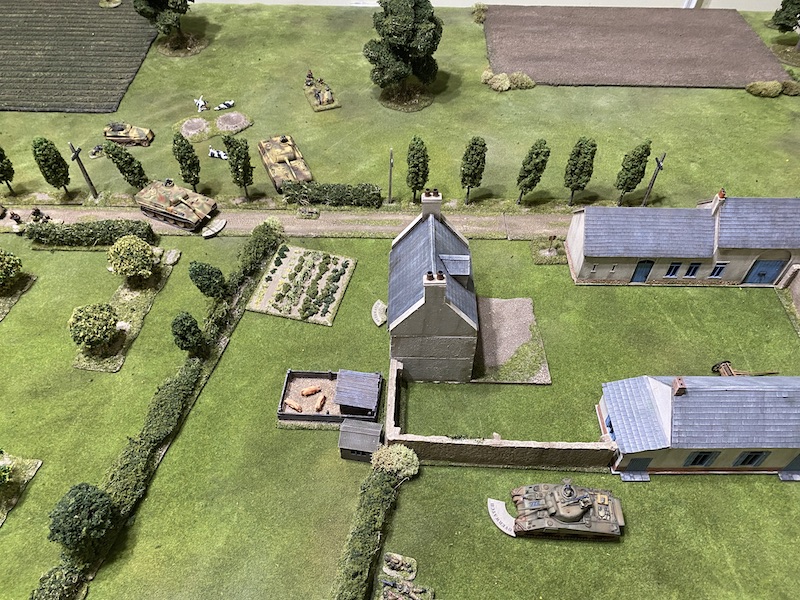
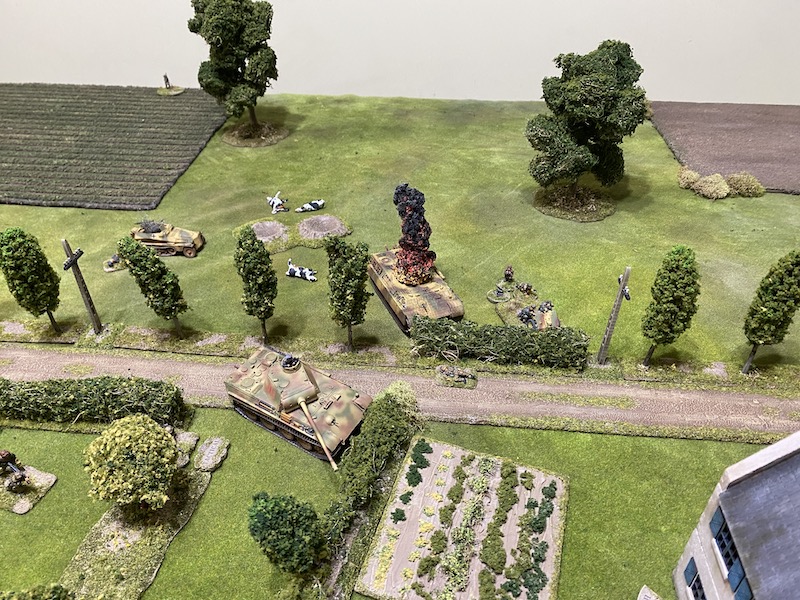
British armour has suffered already at their hands. A knocked out Sherman from the previous game sits forlornly on the road near the farm.
This is an Attack & Defend scenario and the Germans start the patrol phase with one free move. The majority of their force will enter on or close to the road. To some degree the placement of jump-off-points is of less relevance to them than it is to the British who successfully secure jump-off-points in key positions that enable them to defend the farm buildings.
The German counterattacking force is not completely unknown, the British can expect to see two Panthers and two Sdkfz250, each carrying an MG42 team and a scharführer (junior leader). They have an extra five points of support to add and exactly what that will be is not yet known.
The British have twenty support points for this scenario and with their CO's opinion at +4 will receive an extra one. With intelligence advising powerful German armour is about to arrive my choices are all focussed on anti-tank weapons - a Sherman, a Sherman Firefly, a 17 pounder gun and an additional PIAT team. The British will also benefit from the very heavy pregame barrage that is in effect for the first six campaign turns (of which this is the sixth).

Force morale for both sides starts off fairly low with the British at eight and the Germans at nine. This is set to be an interesting contest. Both sides are equipped with powerful anti-tank weapons so the game may hang on critical moments like the use of a CoC die to interrupt or the exploitation of a double phase. It's little surprise the opening moves of the game are cagey and cautious.
The first German command roll is 54322 and despite the range of options Dave chooses to pass. I do the same in the British phase. A Sdkfz250 then tries to deploy through the barrage but fails to do so. With no sign of the enemy the British choose to remain concealed despite rolling a double phase.
Then, quite unexpectedly, the game develops an interesting twist that neither of us could have foreseen. The following British command roll is 66662 and that sets in train a series of events that have implications for how the game may play out. Disappointingly from my perspective, the turn will end and with it the effects of the pre-game barrage. Similarly, a double phase this early in the game is wasted. However, the random event generated by the quadruple six sees the start of very heavy rain. That reduces visibility to 18" for the next turn and possibly beyond. It may well mean the armoured engagement takes place at very close range.
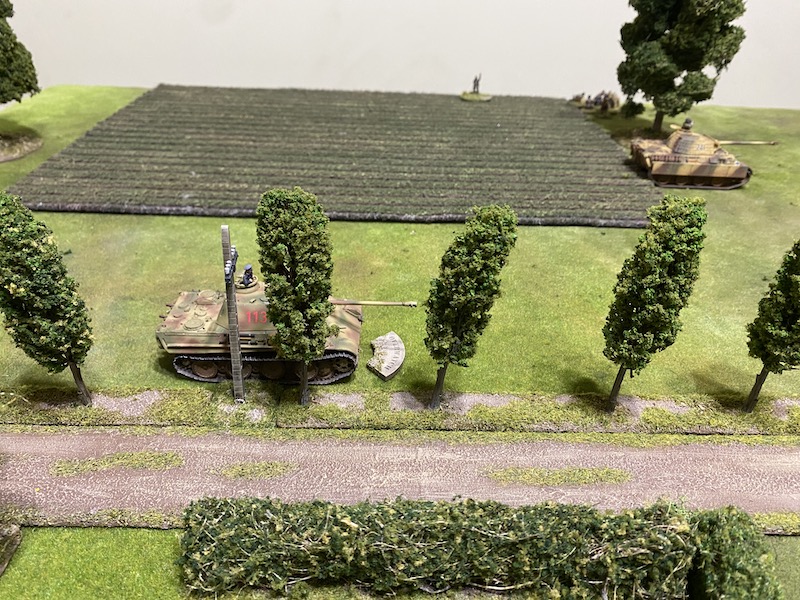
The following four phases see no deployment from either side, but the British do accumulate their first full CoC die. Eventually the Germans begin to make an appearance and two Panthers deploy to the left of the road with their gunners placed on overwatch.
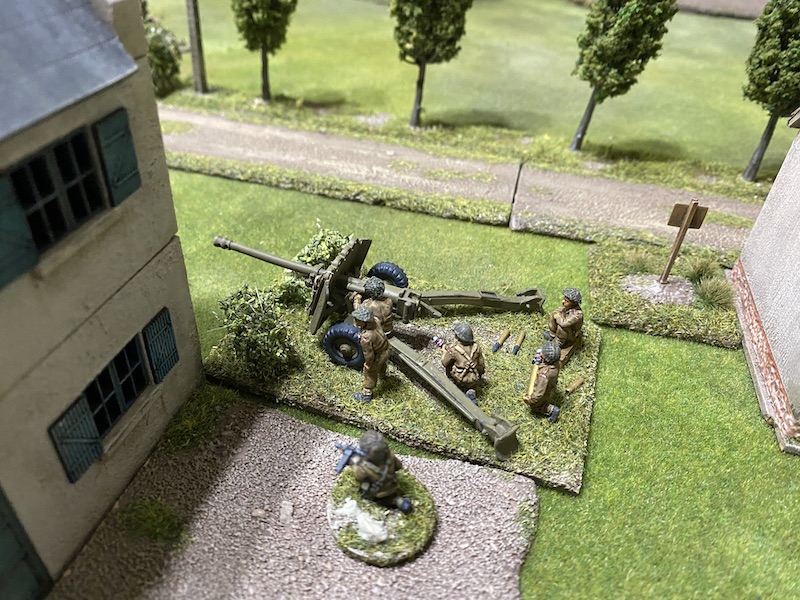
With the limited visibility it is too early for the British to reveal themselves and so the phase passes back to the Germans. They deploy a leIG18 infantry gun from the jump-off-point on their left flank and the crew are placed on overwatch. That's an interesting support choice by Dave. The crew are no doubt tasked with dealing with any anti-tank guns.
At the moment the rain means much of the table cannot be seen by the gun or tank crews. However, a sudden turn end will bring with it a 50% chance the rain lifts and visibility is restored. The situation could change very quickly.
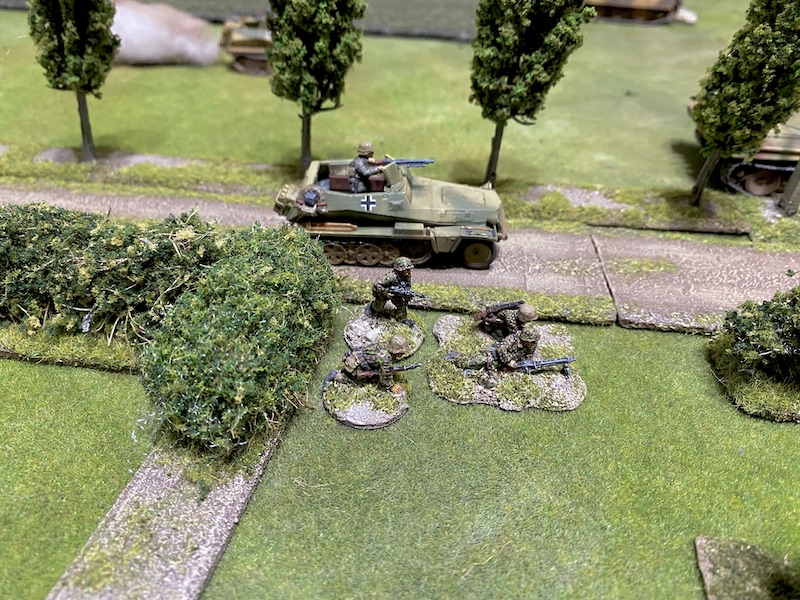
The build up continues and the second Sdkfz250 moves flat out across the open field toward the tanks.
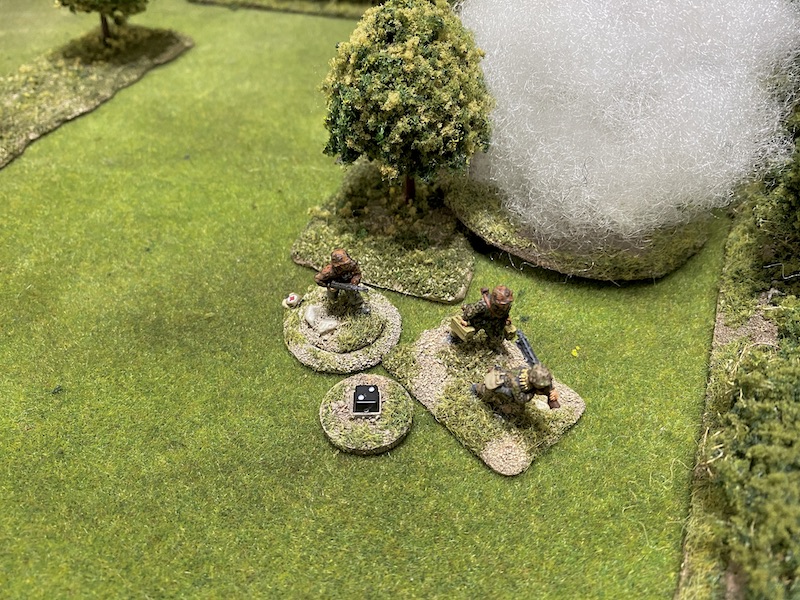
The crew of the half track on the road dismount and move into the orchard.
The next British command roll is 55442 which brings a second CoC dice, otherwise it offers few opportunities and so the phase passes back to the Germans. The Panthers continue to roll forward ominously. I know at some point I'm going to have to deal with them, but the moment will need to be right.
The panzer grenadiers stay in close contact with the armour and the second Sdkfz250 draws level with the Panthers.
With visibility so low the crew of the leIG18 gun push the gun forward closer to the farm searching for a line of sight. This particular model never fails to move briskly whenever it appears in a game and today is no different. True to form it covers 11" in a single phase.
On the other hand the dismounted MG42 team opt to take things more cautiously in the orchard.
With the Germans pressing forward I'll need to carefully consider the timing of the British response.
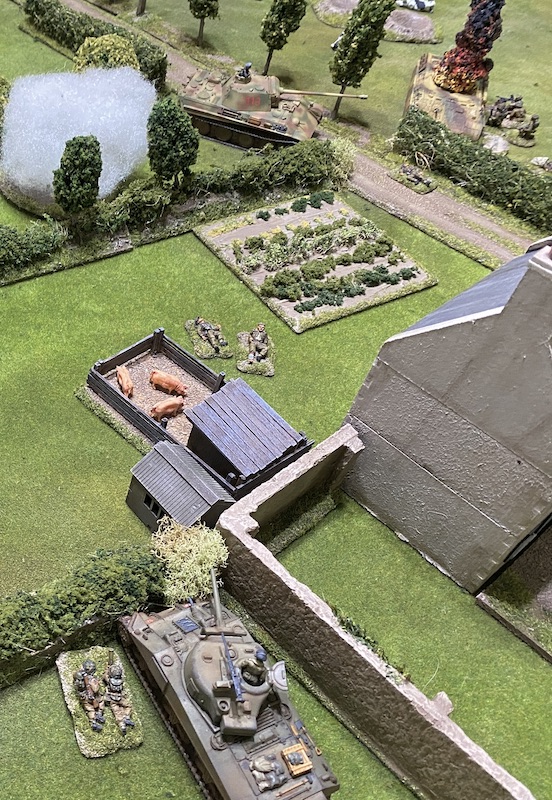
In their phase the Sherman moves flat out around the back of the farm.
A second section deploys tactically behind the hedgerow to the left of the farmhouse.
I'm not expecting the Panthers to come this way but I want to ensure the panzer grenadiers don't threaten the jump-off-points near the farm.
More critically I decide now is the time to strike and make use of a CoC die for an ambush. The chance of penetrating a Panther from the front is very slim but the Sdkfz250 half tracks are much more vulnerable. The support PIAT team appear in the hedgerow near the farmhouse.
They target the Sdkfz250 in the field.
The round sails through the air and lands on target. The thin armour of the half track offers little protection and the vehicle is knocked out. It doesn't explode and the crew abandon the AFV having suffered one casualty and a point of shock. German force morale drops to eight. It may not have been one of the Panthers that were crippled, but at least it's a start.
The nearby Panther gunner is on overwatch, he spots the ambushing PIAT team and opens fire.
The blast kills one of the crew, but the surviving man slips away to fight another day.
There is no escaping the fact that the Panthers will always remain the major threat but the loss of a half track goes some way to limiting the mobility of their supporting panzer grenadiers.
The following German command roll is 66531 and the double phase gives them an opportunity to recover and keep on pressing forward. The scharführer with the MG42 team rallies the shock.
The team then follow him towards the road.
The leIG18 crew continue wheeling the gun in the direction of the farm.
It won't be too long before they have a line of sight through the rain.
In the following phase the MG42 team cross into the road.
The senior tank commander orders the gunners in both Panthers onto overwatch.
In the British phase I contemplate what to do. The Panthers are working closely together offering mutual support and have the back up of the leIG18 infantry gun should I reveal the 17 pounder. To have any chance of damaging the Panthers each PIAT team will need to find a way to hit the side or rear armour. Somehow I have to find a moment to strike when the odds are more in my favour. I have to be patient.
The Sherman gunner has a line of sight over the hedges into the orchard opposite and so he is placed on overwatch ready to engage any German infantry trying to work around that flank.
The Germans then enjoy another double phase. I sense if I'm not careful my position could be overrun. The MG42 team in the orchard continue moving forward tactically.
The senior tank commander orders his driver to advance slowly across the road and he puts the gunner on overwatch.
He then orders the second Panther to drive towards the road.
That sees both Panthers bearing down on the farmhouse. This could get very sticky for the British.
In the subsequent phase the second MG42 team moves forward to join the other team in the orchard.
Once again the crew of the leIG18 prove swift and move their gun right up to the hedgerow next to the Panther.
The Germans can now bring an awful lot of fire to bear.
The senior tank commander's Panther moves into the orchard slowly.
Once it has a line of sight the gunner fires at the section behind the hedge.
The rifle team lose one man and the bren team suffer a point of shock.
The situation is becoming critical for the British. Something needs to be done. I'm hoping to take advantage of the poor visibility to draw German attention away from the farm. The Sherman Firefly deploys on overwatch to the right of the road.
The limited visibility means the Sherman Firefly can't be seen. I'm hoping it can work its way around the flank and threaten the Panthers from the flank and rear. If they are forced to respond they may then show a flank or rear that will allow the Sherman or a PIAT team to attack from the left. Somehow I need to break the concentration of German force.
In the meantime the remaining man from the support PIAT team deploys at the hedgerow on the left and tries to engage the Panther. This feels like a long shot but I don't think I can just sit here and take more punishment.
Unfortunately he fails to hit the target.
To make matters worse the Panther is on overwatch and fires back immediately, killing him. That sees a support team wiped out and British force morale drops to seven. Perhaps that wasn't such a good idea after all!
With the Sherman Firefly threatening their flank I sense now is the time for the 17 pounder to start engaging the Panthers. The gun reveals itself in the farmyard and engages the only Panther it can see. It's not a good start. They miss the tank completely.
That doesn't bode well. I'm not sure how many opportunities my powerful anti-tank weapons will get but they really need to make them count when they do.
Things take a turn for the worse when the next German command roll is 66643. Not only do they have a double phase but the end of the turn could see the heavy rain clear and visibility return to normal. Should that happen the Sherman Firefly is likely to find itself a sitting duck under the gaze of both Panthers.
First, the leIG18 fires at the 17 pounder crew.
Two of them are killed and they suffer a point of shock.
The senior tank commander's Panther fires at the section behind the hedge once again, but this time fails to inflict any harm.
The other Panther prepares to target the 17 pounder but I have a CoC die and use it to interrupt. This is a critical moment and exactly why I wanted a CoC die.
This time the gun crew make no mistake. Not only do they hit the target but they obviously find a weak spot, inflicting ten AP strikes. Even the Panther's thick armour cannot deal with that sort of hit and the tank explodes, killing the crew.
The leIG18 gun crew are close enough to be impacted by the blast. One of the gun crew is killed and they suffer three points of shock.
That's a much needed result for the British. The loss of one of the Panthers is a real blow to German ambitions and the casualties to the gun crew go some way to neutralising the danger of the leIG18. German force morale drops to six.
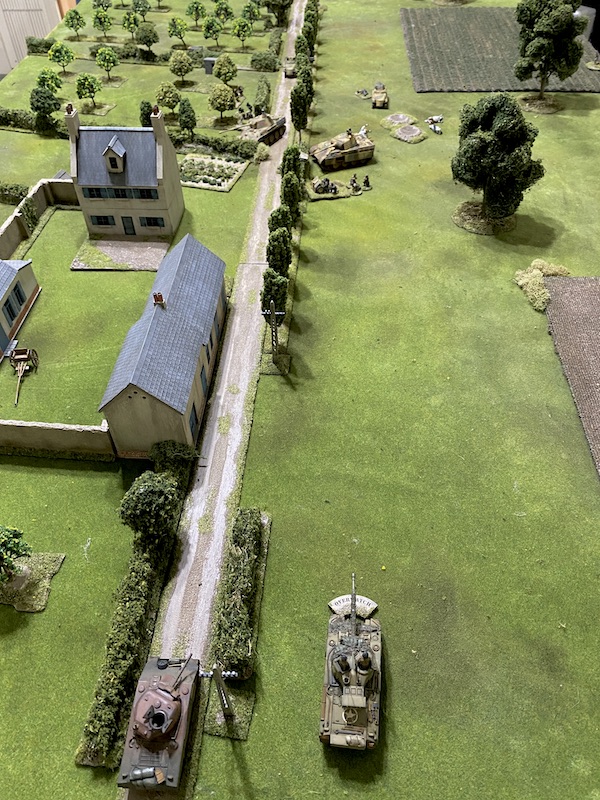
Unfortunately, it's not all good news. When the turn comes to an end so does the rain. Visibility returns to normal and the Sherman Firefly finds itself facing a Panther. Ominously the senior tank commander orders the driver to turn slowly.
The gunner has a direct line of sight to the Sherman Firefly and if he can hit the target the tank has a very slim chance of surviving. Unfortunately I used my last remaining CoC die to interrupt with the 17 pounder. At the time I was lulled into a false sense of security thinking the Sherman Firefly was safely concealed from sight by the heavy rain. Sadly, that's no longer the case and there's little I can do but hope for the best.
Hope won't stop a round from a Panther and the gunner makes no mistake. The AP round strikes the Firefly, knocking it out. Fortunately it doesn't explode and the crew bail out hastily. Nonetheless, that's a blow to British force morale which drops to five. More critically it leaves the 17 pounder as the only weapon with a good chance of dealing with the remaining Panther.
With the Panther distracted by the Sherman Firefly there is an opportunity for the platoon's PIAT team to take a shot into the side armour. They deploy from the farmhouse to engage the tank at close range. The target is partially obscured behind the hedgerow but the team have a reasonable chance of a hit.
It's probably the best chance they will have to disable the Panther but unfortunately their aim is off and the shot misses.
That was probably the team's best chance to damage the Panther. Having dealt with the Firefly the tank will no doubt return its attention to the other flank.
Meanwhile the 17 pounder fires HE back at the leIG18 gun crew.
The gun commander is hit and lightly wounded and the crew suffer another point of shock. This time German force morale holds steady.
As expected, in the German phase the Panther turns and fires at the PIAT team. It too misses. While the PIAT team may live to fire again they won't have the advantage of hitting the side armour.
The leIG18 returns fire at the 17 pounder but fails to have any effect on the surviving crew members.
In the British phase the platoon sergeant deploys into the farmhouse.
From there he orders the PIAT team to target the Panther once again. There's a slim chance of success so it's worth taking the shot.
The Germans don't intend giving them an opportunity to find out. Dave uses a CoC die to interrupt and the Panther fires its coaxial MG.
Despite being in open ground the PIAT team survive with two points of shock.
With that they fire back at the Panther. This time they hit and make four AP strikes but it's on the Panther's frontal armour and is unable to penetrate. Had they hit on the side armour it might have been a different story. If only they hadn't missed with their initial shot.
Things are now becoming very heated around the farmhouse. The sergeant instructs the 17 pounder to fire HE at the leIG18. Before they can do that the Germans interrupt again. The infantry gun fires and the 17 pounder crew lose another man and suffer two points of shock. They return fire and inflict a further point of shock on the leIG18 crew taking their total to five.
The game is resting on a knife edge. Without a doubt the 17 pounder now remains the only really effective anti-tank weapon in the British arsenal. Its loss could spell the end of British hopes to hang on to the farm. The platoon sergeant realises the desperate nature of the situation. He orders the section in the farmhouse to risk a bold move right under the nose of the Panther to drive off the remnants of the leIG18 crew.
It could be a rash move but speed holds the key. They need to move before the enemy has time to react. If they don't move fast enough and the Germans can respond they will find themselves exposed in open ground. Desperate times call for caution to be thrown to the wind. The section come storming out of the farmhouse right under the nose of the Panther.
They move swiftly and aggressively and reach the gun crew. In a vicious round of close combat each side suffers four kills. For the less numerous gun crew that proves a disaster. The gun commander is one of the casualties and he suffers a second light wound, this time he is out of action for the remainder of the turn. That takes German morale down to four.
One other gunner survives, but with six points of shock the crew break and fall back towards the knocked out Sdkfz250.
The British suffer a single point of shock but lose men from the rifle and Bren teams. Nonetheless, they now occupy the ground held by the gun and benefit from the cover of the hedgerow. That was a risky move that could have gone horribly wrong, but in one fell swoop the section's aggressive action has removed a major threat to the 17 pounder crew.
German force morale may be low but the lone Panther keeps them in the fight. The platoon's 2” mortar team deploys and fires a round of smoke in an attempt to blind it.
The smoke round misses the target and lands ineffectively in the orchard.
Now the Germans are down to four command dice and a roll of 6444 limits activations to the senior tank commander. The Panther's coaxial MG pours fire at the PIAT team.
They are caught in the open and the blast of machine gun fire wipes them out. They had a brief opportunity to hit the Panther in its side armour but were unable to land a hit when it counted most. Their chances of survival after that were always going to be slim. Nonetheless, British morale holds steady. That now leaves the Sherman and the 17 pounder to hold off the Panther.
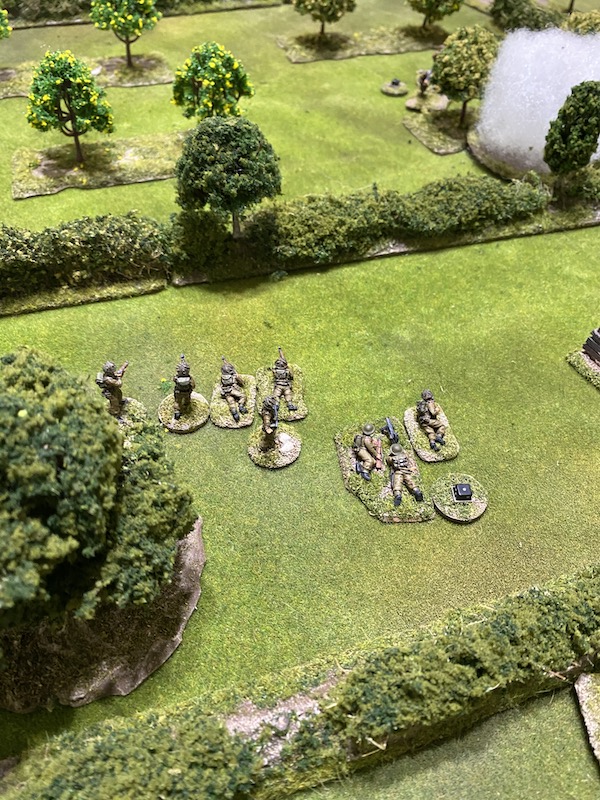
While the German armour may prove tough to deal with their infantry are far more vulnerable. I sense this is where the British can inflict the most damage. In the next phase the platoon's third section deploys on the right flank.
They have a line of sight to the remnants of the broken infantry gun crew and their commander. There is a chance to finish them off and the section engages them at effective range.
The gun crew are in open ground and make for easy targets. The gun commander receives a second wound which kills him. The last surviving member of the gun crew suffers a similar fate. With a support wiped out and a junior leader killed German morale falls perilously low to two. That's going to severely impact their command options.
The 17 pounder gun commander spends the phase rallying the shock from the remaining two men serving the gun.
By the road the section's corporal rallies the point of shock and orders the men to move tactically behind the knocked out Panther. They are slow to move and not all of them can make it to cover.
Similarly, the section at the hedge on the left flank seek better cover and take up tactical positions.
The Germans may be limited to three command dice but a roll of 443 allows them to react. The Panther pivots to target the section behind the hedge.
The fire is deadly and the section lose two men, one from each team. That leaves one man in the rifle team and two serving the Bren gun. They are now very brittle but fortunately they are not suffering any shock.
The scharführer leading one of the MG42 teams orders them forward in the orchard.
In the British phase I ponder how best to deal with the Panther. The Sherman could advance to the hedgerow and from there target the side armour. That said it's probably not possible to do that by moving slowly and firing in this phase. The chances are it won't move far enough. To move normally would most likely put it in a good position but then the Panther could have the first shot in the next phase. I don't fancy those odds, especially considering how easily the Germans dealt with the Sherman Firefly.
The Sherman has an alternative. The tank commander can see over the hedges into the orchard and the small MG42 team makes for an inviting target.
The commander orders the gunner to fire a round of high explosive.
It proves a wise choice of target. The team suffer two points of shock but more significantly the scharführer is wounded. That drags German force morale down to one.
I sense the British are very close to victory but it's not over just yet. The commander of the 17 pounder has the crew manhandle the gun around the corner of the farmhouse.
That puts them face to face with the remaining Panther. This impending gun duel could be the decisive moment.
The remains of the section at the hedge finally manage to find cover behind the knocked out Panther.
The Germans are reduced to two command dice and a roll of 61 gives them very few options. Most importantly from the British point of view, the Panther commander's attention is momentarily distracted.
All that can be done before the British have time to react again is for the MG42 team in the orchard to pull back and out of line of sight of the Sherman.
When it comes to their phase the British are quick to seize the moment. The commander of the 17 pounder helps the crew target the gun on the Panther.
Is this the moment the British beat off the armoured assault? It's not to be. The gun fires a round of AP and.....misses!
The Sherman moves forward to the hedgerow and gains a line of sight to the Panther. That puts the German commander in a tight spot, does he deal with the 17 pounder or the Sherman? The 17 pounder is the most deadly but the Sherman can target his side armour. It's a tough choice, assuming he has the chance to make it.
The section on the British right advance tactically forward.
On the left the section moves over the hedge toward the orchard. If I somehow fail to deal with the Panther then perhaps I can drive off the panzer grenadiers?
The German command roll is 32 and their low force morale is really inhibiting their ability to react quickly. Despite that, the second MG42 team moves slowly to the hedge.
From there they open fire at half effect at the crew of the 17 pounder.
It's enough to kill another member of the crew. That leaves the gun in a perilous state, served by a single gunner and the gun commander. With no shock those remaining two men must have nerves of steel.
In the British phase the 17 pounder crew has the chance to take a second shot. They need to make it count. The panzer grenadiers have them in their sights and could very easily wipe them out before they can fire again.
This time the gunners have found their aim and a 17 pounder AP round slams into the Panther inflicting six AP strikes. Despite the thick armour the round has found its mark and the tank explodes in flames killing the senior commander and crew.
The MG42 team and its scharführer are close enough to the exploding tank to suffer hits, but it won't make any difference, the loss of the tank and a senior leader is enough to bring German force morale to zero. In a game full of twists and turns the British have managed to hold off the counterattack and retain control of St Nicholas farm.
That was an incredibly tense game and very exhilarating. Towards the end my heart was racing as we traded final shots, knowing full well that any one of them could be critical and turn the game.
It finishes with British force morale at five and German at zero. The British suffered nine casualties from the core platoon but the difference in force morale means that five of those can be patched up immediately and returned to duty. That means the net loss is four from the platoon and six from support units. Those casualties have a negative impact on the men's opinion which drops to -1, however the victory sees the CO's opinion rise to +5.
The Germans lost seven casualties, all from support units so there will be no impact on their core platoons. Despite the defeat of the counterattack the men's opinion rises to +1 and the CO's opinion also goes up to -1.
Victory sees the British continue to press on to the next table, but the counterattack has cost them a campaign turn. That means to win a major campaign victory they must capture the last two maps at the first attempt. It's a tall order but failure won't spell complete defeat. A minor victory is still attainable if they can do that by the end of campaign turn ten (we have just completed turn six). There is still much to play for as we head to Scenario 5: Winning Your Spurs.
If you've enjoyed following along and would like to Buy Me a Coffee to help cover some of the costs of running the blog you can click through at the link or on the tab in the right hand column of this page.
You can find all the game reports for this campaign and for many others on the Chain of Command AAR page.


Tense game!
ReplyDeleteWas it ever! I came home and my wife asked how the game went and all I could say was that I was ready for a beer!
DeleteWell that was a real humdinger and no mistake, I think it had everything one would wish from a game. Well fought by both evenly matched opponents, the next games are going to be most interesting for sure.
ReplyDeleteYes indeed. It was full of twists and turns, a great gaming experience that hung in the balance and kept us both fully engaged.
DeleteI really thought you'd left that too late at one point although to be fair the rain made it difficult to anything much sooner. I really liked the way those two Panthers advanced so cautiously - the rules really enforce a more genuine approach to the employment of armour. On the topic of those tanks I was struck by how, with different stowage, marking colour/style, and the presence/absence of stowage and skirts they could look so different (the first photo) - or are they actually different kits as well?
ReplyDeleteAll in all another cracking game with a noticeable change in the German willingness to press on despite losses when it's not the core campaign force - this is why IMO campaign games are so much better than one-offs.
Two very different models. The one with skirts is from the Plastic Soldier Company, the other is a far more detailed model from new manufacturer Vespid, it’s a beautiful kit. The difference in colours was not that intentional, to be honest I’m not sure what happened as I thought I was using my usual colours for tritonal camouflage.
DeleteIt was a great game and could have gone either way, we both had a mix of good and bad fortune and games with this much armour often hang on the smallest of margins.
Very well played by you both and a joy to watch & read about!
ReplyDeleteThanks Joe, it was certainly an intense game to play in, so I hope I managed to convey that in the AAR.
DeleteWow! That was intense. The 17 pounder commander deserves the VC.
ReplyDeleteYep, it was a cracking game, my heart rate was definitely up in the latter stages, quite a game. Agree, those 17 pounder gunners earned their pay that day!
DeleteVery cool to see the rain shift tactics so dramatically!
ReplyDeleteYes, that was totally unexpected and completely changed the way the game played out.
DeleteThat was an amazing game and an amazing AAR! A simply riveting read that kept me glued to the screen. Also the scenery, the tanks, figures and the markers (especially liked the casualty markers) were all so excellent!! My hats off to all involved.
ReplyDeleteThank you, that’s great to hear, glad you enjoyed it.
DeleteBrilliant stuff, as always. Nailbiting, with both sides playing a really smart game. Thanks for the report, very much looking forward to the next one.
ReplyDeleteThanks Doug, it was quite an intense game, in all the best possible ways. I really hoped I could convey that in the AAR and judging by people's comments I seemed to have managed that. Onwards!
DeleteWe started Martlet last year, but the poor Brits were taking such a beating that we abandoned before the Punch, as 2 Panthers seemed like much too hard an ask. Very impressed with the win. Pyrrhic but impressive!
DeleteI am impressed with the basin mixer shower from Sagheer & Co. It’s elegant, works perfectly, and looks great in our bathroom. Highly recommend!
ReplyDeleteFor More Details: https://sagheerandco.com/