
It's fair to say a bridge is one piece of terrain that turns up regularly on a wargame table. Surely the 'fight for the bridge' is one of the truly classic subjects for a scenario regardless of the historical period you are choosing to play. Strange then that I don't own many and the two that I do are both scratch built.
One is very generic and is made from cork floor tiles. It's turned up in several games in various campaigns for Chain of Command.

The other I made more recently using wooden coffee stirrers and that's only seen use in a game set during the American War of Independence. It too is fairly generic and would work just as well for a 20mm Second World War game set in Russia or parts of the Far East.

I've been introducing a new player to Chain of Command and we embarked recently on the Road to Bremen campaign. This was one Dave and I played a few years ago and really enjoyed. While there is no certainty which tables will be fought over, there is one map with a bridge that I think the Germans will fancy as a good place to make a stand. With that in mind I decided it was time to acquire a new bridge.
I like the idea of a lift bridge that could also work for a small canal - a common sight across the waterways of northern Europe. I found an MDF version of one in 20mm on eBay but when it arrived I could tell immediately, even before I began construction, that the finished model would have that instantly recognisable MDF model look unless I made some changes. The base model was a good one and there were a few fairly straightforward things I could do to give it a facelift.
.jpeg)
The tell tale signs of an MDF model tend to be the sharpness of the laser cut angles and the lugs on the corners of the joins. I've found if you can find a way to hide these then a model can take on a very different look without too much effort.
The image on eBay showed a finished model built without embellishment and with a simple paint job. As you can see it gives you a very decent base to work from but has some very obvious laser cut features.


I used the two off cuts of the MDF rods to add more detail to the columns of the bridge. Thin slices of plastic rod were used to make bolts and rivets and applied at various points on the exterior.
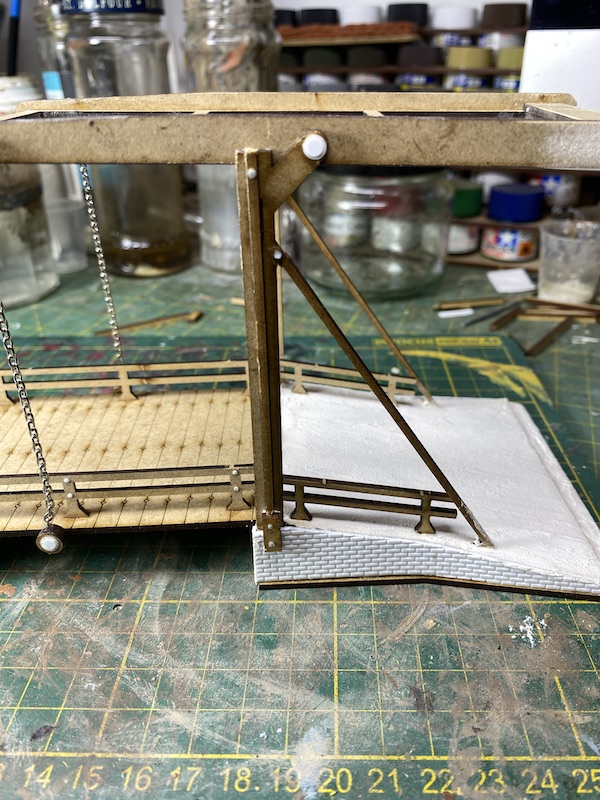
Obvious joins in the suspension structure that couldn't be covered directly were filled and sanded.


Excellent work I especially like the addition of chains
ReplyDeleteThanks Will. I bought the chain ages ago for a project in a different scale. Glad I hung on to it, I had a feeling it might come in useful one day.
DeleteSplendid work Mark, you have lifted it to another level.
ReplyDeleteI see what you did there!
DeleteA great job, the ramps definitely benefitted from the face-lift although personally I think the 'fences' still hint at the MDF origins. Will we get any AARs from this campaign? Just one or two would be great (getting withdrawal symptoms).
ReplyDeleteAgree on the fences but decided I would live with those. On a brighter note Dave and I have pencilled in next week for our next game in the Martlet campaign. Assuming that happens the AARs should start flowing once again.
DeleteGreat transformation; big improvement on the original.
ReplyDeleteThanks, worth the effort I think.
DeleteThat is nicely done! It really looks the business on the tabletop.
ReplyDeleteWell worth the extra effort, the model looks infinitely more "real". Some ideas here worth staling for sure. Bravo zulu!
ReplyDeleteGreat stuff, and your articles are always very instructive as to how to get the best out of MDF kits.
ReplyDelete