While I play the Second World War in 20mm for some reason I decided to start a First World War project in 28mm. While it wasn't a logical step I think I was seduced by the excellent figures from Great War Miniatures and the sense that platoon level action in this war would often be confined to relatively small spaces, particularly during the period of trench warfare. What it did mean was that a lot of my 20mm terrain, most obviously the buildings, would be of no use. Perhaps not the smartest of moves then.

Having painted up a British and German platoon for the 1916-18 period I soon had to give thought to making terrain, in particular the buildings which are the one element that you cannot fudge when it comes to scale.
I picked up the Warlord Games plastic Ruined Hamlet in a sale. It's a versatile looking set and I had in mind that a number of ruined buildings were just what I would need for this project.
The set comes with many modular parts that give you a fair degree of flexibility in the types of buildings/ruins you can create. It is essentially three sets of their
Ruined Farmhouse kit.
The components looked the part and my only issue was the narrow width of the buildings, I wanted mine to have a bigger footprint so they could comfortably accomodate at least ten or so figures. Fortunately this is where the versatility offered by the kit comes in most useful.
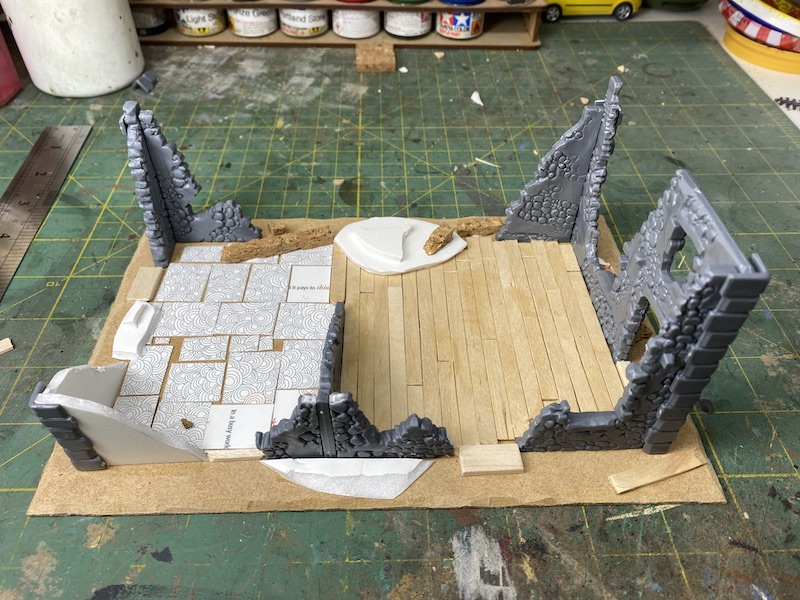
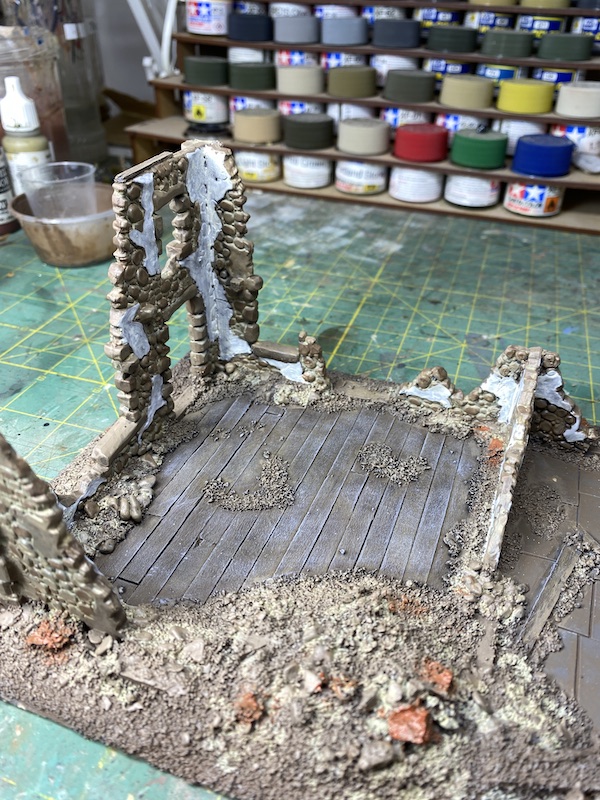
Having worked out the dimension I wanted I then cut a base from MDF. The walls were then arranged to give the basic shape I was after.
Where needed I made additional walls using foamcore.
Piles of debris and rubble would be built up over a base made of cut pieces of foamcore and cork floor tile.
The floors were lined with coffee stirrers to represent wooden floorboards and cardboard business cards were used for flagstones.
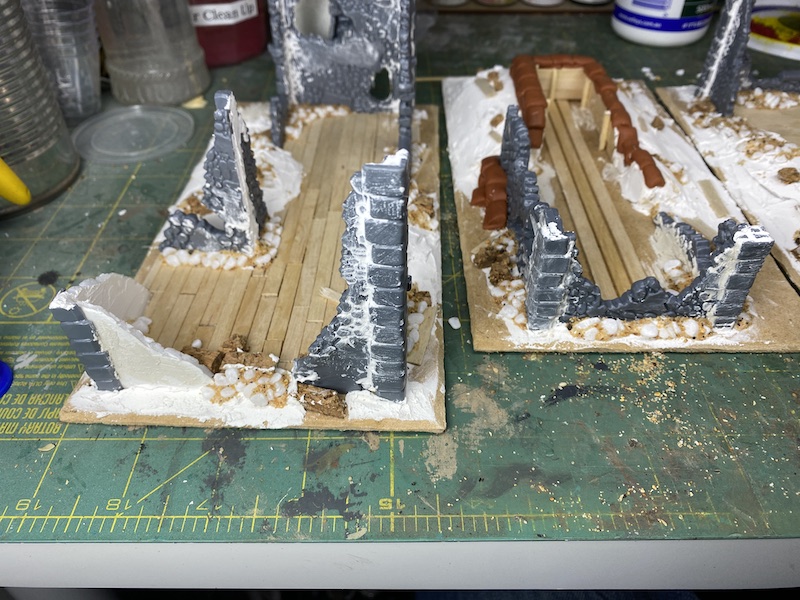
The same techniques were used for a second building utilising other parts from the Warlord set.
As I found the buildings a little narrow for my needs I worked with the pieces to create the impression of larger buildings. In this instance I created an L shaped house.
Where needed I added extra sections of wall using foamcore.
By stripping off the covering paper I was able to then etch stone shapes into the foamcore so that it matched the pieces of wall from the Warlord set.
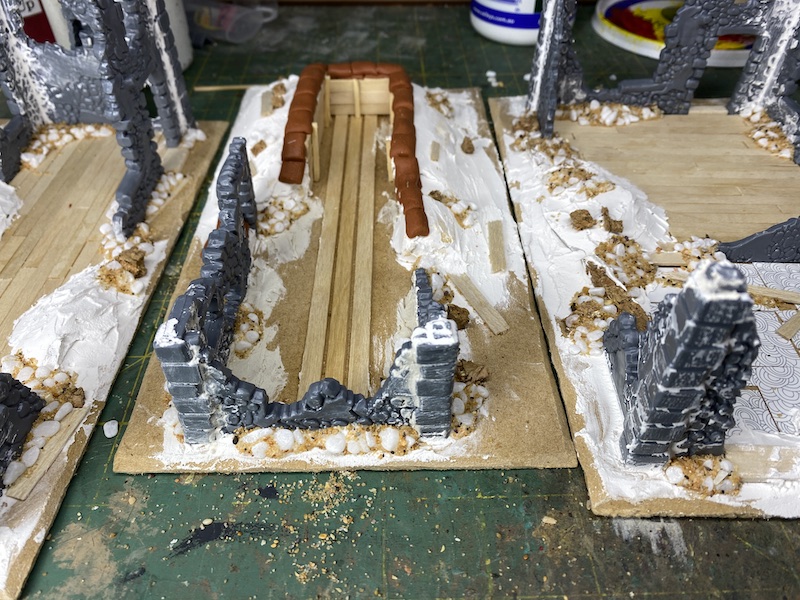
There is one much smaller building in the set that I couldn't see a use for until I realised it would make a good piece into which I could build a defensive position with a section of trench. That way it could accomodate a full squad or section of figures.
I used XPS foam to sculpt a shape for the trench and then ran it into the open side of the house.
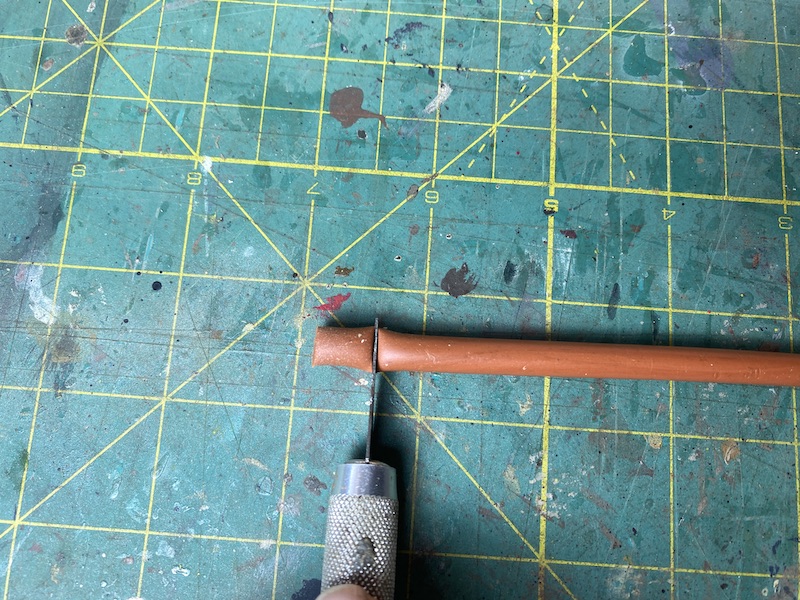
Coffee stirrers and matchsticks were used to make a wooden buttress to line the trench and planking for the floor.
With the basic structures in place the next task was to use filler to tie things together and build up the piles of rubble.
The filler was also used to fill any gaps in the joins in the walls.
In a similar way the filler was used to texture the area around the trench.
Sandbags for the trench were sculpted from Milliput. I made a ball and then using a piece of MDF it was rolled into a cylindrical shape.
Sandbag sized sections are cut with a knife.
These are then pressed down into place.
The sandbags are then built up in layers.
With a second layer in place the next task was to give them some texture. For that I use a piece of gauze bandage and press it gently onto the Milliput while it is still soft.
This gives them a coarse fabric-like texture.
I had enough spare to add a few extra sandbags at the door so that it can also work as a firing position.
I then moved on to building up the rubble. First I started with bigger pieces using broken up sections of balsa wood and cork floor tiles.
These were glued randomly across the ground with PVA glue.
This was done across all the buildings.
The one things I always keep in mind is that these models are not dioramas, they will be functional game pieces and so I need to consider the practicalities of figure placement. In reality there would be much more rubble than I will create but I'm aiming to find a balance between a reasonable amount that still allows the piece to accomodate figures.
The Warlord models have exposed stonework and it's not dissimilar to aquarium pebbles that I find handy for various terrain projects.
I thought these would work very well as fallen stone and so poured PVA glue in areas along walls and in corners.
Pebbles were laid in obvious places where rubble might fall. Again, keeping in mind that I want this to be a functional wargame model I'm using the rubble sparingly.
Coarse sand is then sprinkled over the pebbles to fill the gaps.
This was done in locations around all of the models.
With the larger pieces of rubble in place the next thing was to add coarse sand and cat litter to the groundwork and generally scatter it around.
With the construction complete and once the glue had dried they were all primed ready for painting. It's at this point I find I can really start to visualise how the finished models are going to look.
I was particularly pleased with how well the acquarium pebbles matched the stone work on the Warlord plastic wall sections.
Painting began with a coat of Dulux emulsion Brown Land. Given how so many paints have the most exotic of names I'm always amused how this one was named as if Dulux had terrain makers like me in mind. The sandbags were painted khaki and the wood was given watered down coats of Brown Land mixed with yellow ochre.
The wood was then washed with Agrax Earthshade which does a good job of bringing out the wood texture in the coffee stirrers.
The wood was given a dry brush with light grey and the mortar between the building stones was applied using Vallejo Stone Grey.
The sandbags were also washed with Agrax Earthshade.
The brown tones were broken up by adding Terracotta craft paint to various pieces of rubble to represent brick work.
The stonework was wet brushed (very similar to dry brushing but with a slightly wetter brush) and the plaster work on the interiors was painted with Vallejo Ivory.
The final bit of painting is to tie everything together with a dry brush of Dulux Arava.
Small amounts of flock were added, mainly to break up the colour and offer some contrast to the brown tones. With that the pieces were complete.
I think I've found the right balance between the amount of rubble and enough space to place figures.
I'm particularly happy with the defensive position, it's a good solution for the small building which, on its own, isn't large enough to house more than a few figures.
While making these I also made up a trial section of trench and five 6" lengths of barbed wire. Above ground trenches are not my preference but until I come up with a solution for not just making terrain boards but storing them somewhere this will have to suffice. Other than using corrugated cardboard to line the trench walls I used all the same techniques as I did with the ruined houses.
I'm introducing a few members of the club to the First World War variant for Chain of Command this week and so all this terrain will have its baptism of fire then.