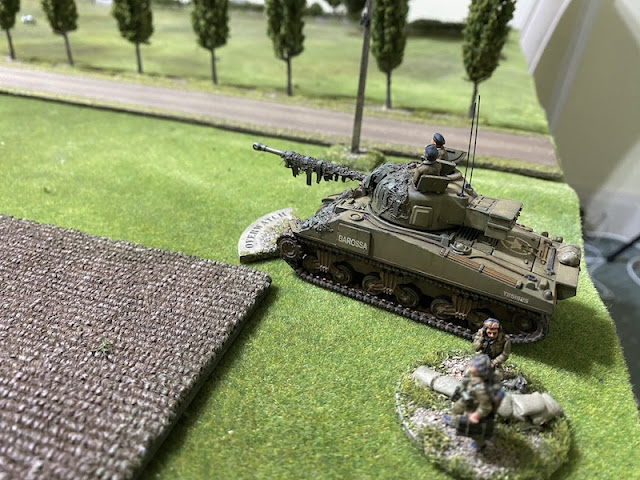
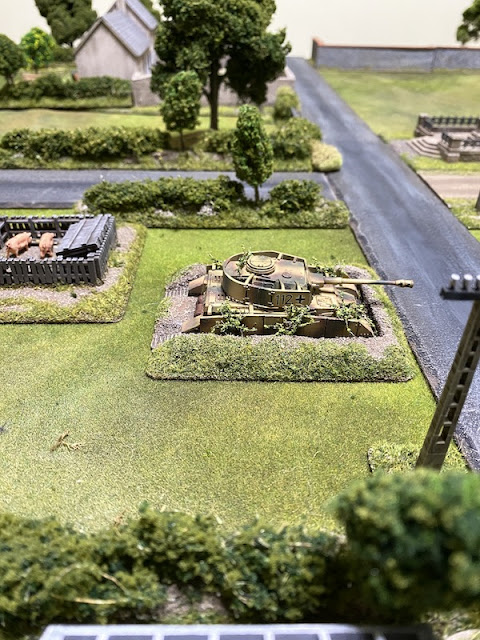
This is the first game in the Operation Martlet campaign for Chain of Command. I will be playing the British and attacking the Germans who are commanded by my regular opponent Dave.
This opening scenario sets up an interesting situation where both sides will find their deployment hampered in different ways. The British will commit a platoon from the 11th Royal Scots Fusiliers. They face a thick morning mist which could disorient units as they make their way to the start line. The Germans from the 26th SS Panzergrenadier Regiment could find their deployment disrupted as the result of a particularly heavy pre-game barrage. Both of those make the outcome of the scenario very unpredictable.
Time is on the side of the Germans and so any delays imposed on the British work in their favour. On the other hand if the mist does little to impede the British and the Germans have a difficult time making their way through the pregame barrage this map could fall quickly. In that sense this game could easily go either way.
One factor to consider is that the position of all jump-off-points as they are at the end of this game will be their location for any following games on this map. That means that even if the British fail to take the table at the first attempt there could be something to gain from moving one of their jump-off-points forward or perhaps capturing a German one.
Given all that, I've identified a few possible objectives the British might be able to attain even if they don't manage to take the table at the first attempt. Much will depend on how the game pans out.
I know the Germans have armour, but they don't have much of it. If I can try to write down their tanks early in the campaign it may make things easier as we progress. With that in mind I'm looking at calling on support in the form an M4 Sherman and a Sherman Firefly.
If those tanks fail to make an appearance through the mist then my second objective will be to focus on jump-off-points.
It’s tempting to push forward with the aim of capturing one or more enemy jump-off-points. That's an opportunity that might arise should the pre-game barrage prevent the Germans deploying fast enough to stop me. Alternatively, if I can gather enough points for a CoC die I will also look at the option to move a British jump-off-point as far forward as possible. The one thing I'm determined not to do is attack aggressively without an adequate force.
My plan for the patrol phase is to use three markers and push fast on the right flank in the hope of positioning a jump-off-point in the farmhouse or behind the wall.
The British have three free moves at the beginning of the patrol phase and that proves enough to ensure there is a jump-off-point in the farmhouse. It’s about as far forward as the British are likely to position one, so I sense that's a good start.
I intend to lead the way with armour and so the thirteen support points are used to call on a M4 Sherman and a Firefly. The key question is, will they turn up?
Force morale begins with the Germans at nine and the British at eight. That's a less auspicious start than I would have liked. With the higher force morale the Germans have the opening phase, however they choose to hold off their deployment until they see what the British have planned.
In the British phase both the Sherman and one of the infantry sections fail to find their way through the mist. That doesn't bode well. I was really hoping that between both Shermans I could deal with a lone PzIV should one appear.
The following German command roll is 66421 heralding a double phase. With their deployment uncertain Dave holds off committing any of his force just yet. The following command roll is 66214 and despite the temptation to try and close down a British jump-off-point he refrains once again. The run of phases ends with the next command roll but again the Germans choose to bide their time.
Even with the benefit of hindsight it's not easy to see how the Germans could have capitalised on that run of phases and closed down the nearest British jump-off-point. First, they have to deploy successfully through the barrage. Assuming they do so at the first attempt, it would require at least three phases to get there and most likely more. At no stage was Dave aware what the next command roll would bring so the risk of finding a squad caught in the open and exposed to British fire was not one worth taking.
The British on the other hand have no reason to hold back, but once again the mist puts a stop to those plans. A second section fails to appear, as does the platoon's 2” mortar team. That's now 60% of the platoon lost in the mist in the first turn. I have a horrible feeling this may be a very short game.
On a brighter note there is one successful deployment, but I fear it may be too little and too late. The Sherman Firefly makes its way through the mist and the gunner is placed on overwatch.
The platoon's PIAT team also arrive and they deploy into the farmhouse on the British right flank.
Fortune favours the Germans once again with a command roll of 66421. This time they do show themselves and a concealed, dug-in PzIV appears near the crossroads.
The commander helps aim the gun, which is just as well as the hit roll was only 4 which was the minimum required to hit the Firefly.
There are five AP strikes and the Firefly's armour can only negate one of those. The tank is knocked out. Fortunately it doesn't explode and the crew make good their escape but it’s enough to see British morale drop two points to six.
Game over? I suspect so.
Having dispatched the Sherman with relative ease the Germans have no other targets and in their next phase they choose to sit and wait.
Come the British phase it's plain to see the writing on the wall. There really is no point continuing, so I elect to withdraw and start afresh. It's a small setback, after all. Other than the delay of a campaign turn the British suffered no long term losses. The Scots Fusilier platoon barely made an appearance and the allied arsenal can quickly replace the damaged Firefly.
The mist is a nuisance but it results in only a minor delay and one that was not entirely unexpected. The jump-off-points are as well positioned as they could be, I just need the units themselves to turn up next time. I have the option to simply skip the next campaign turn and wait for the mist to clear, but I'm determined to press on. So rather than lose a campaign turn without the chance to inflict any losses on the Germans we will try again in campaign turn two.
The low casualties on both sides means there is little impact on the opinions of men or COs. The German men's opinion is 0 and their CO's rises to +1. As for the British the men's opinion actually rises (there were no casualties after all!) and is now +1, although the CO takes a dimmer view of events and his opinion drops to -1.
So we move on to game two and the AAR for that game can be found in this post.
If you've enjoyed following along and would like to Buy Me a Coffee to help cover some of the costs of running the blog you can click through at the link or on the tab in the right hand column of this page.
You can find all the game reports for this campaign and for many others on the Chain of Command AAR page.


As usual, you have provided an interesting narrative. I'm looking forward to seeing this extended campaign play out. Thanks for sharing.
ReplyDeleteThanks Dennis, hopefully the future games have a bit more action to them LOL.
DeleteA quality AAR as always, and sensible decision making all round. Looking forward to the next game.
ReplyDeleteThanks. This opening has been very cagey but I'm sure a lot more action is about to unfold.
DeleteA short but sweet game, finely reported as always.
ReplyDeleteYes short indeed, but off with a bang, if only the sound of an AP round smashing into a Sherman. More action on the way, I'm sure.
Delete