

Having driven back the counterattack the Germans now resume the advance. Fortunately for them the Dutch engineers have been delayed, so time is on their side. They may need it. The route to the bridge is through a built up area where the Dutch can construct a defence in depth. This is a tough table to attack.
My intention is to use brute force and blow my way through that defence. The German support roll is 3D6+2 but a roll of nine gives a total of only eleven. I think this is the right time to call for a Stuka bombardment. It can interdict Dutch deployment in the first turn, making it unreliable. If it can also succeed in destroying some of the buildings then that should further restrict the options for a coherent defence.
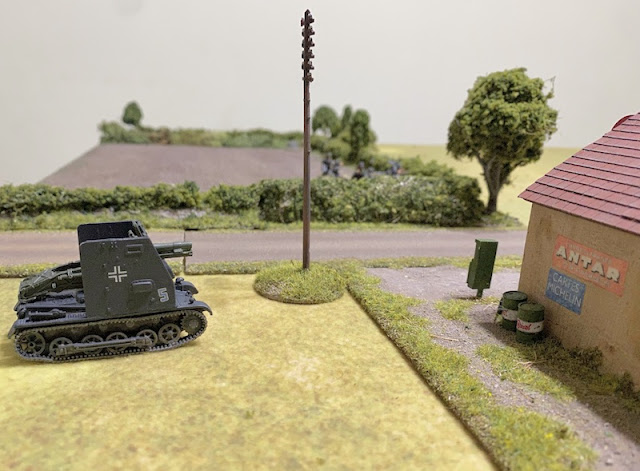
I'm going take a risk with my only other support choice - a Bison sIG33. At seven support points it may be putting all my eggs in one basket, but with a 150mm gun (HE13) it has the sort of punch the Germans need to blast a hole through the Dutch defence. The main risk lies with the Dutch Bohler 47mm anti-tank gun which has been the panzers' nemesis throughout the campaign. Yet the Bison doesn't have to survive for too long, just enough to unleash a few critical shots that unhinge the defence.
I won't know the Dutch support choices before play begins. However they still benefit from the barbed wire and the roadblock, which remain in place from the previous time we played on this table.

Before the patrol phase the German Stuka bombardment begins. However, the dive bombers won't have it all their own way - the Dutch are prepared and have AA machine guns.
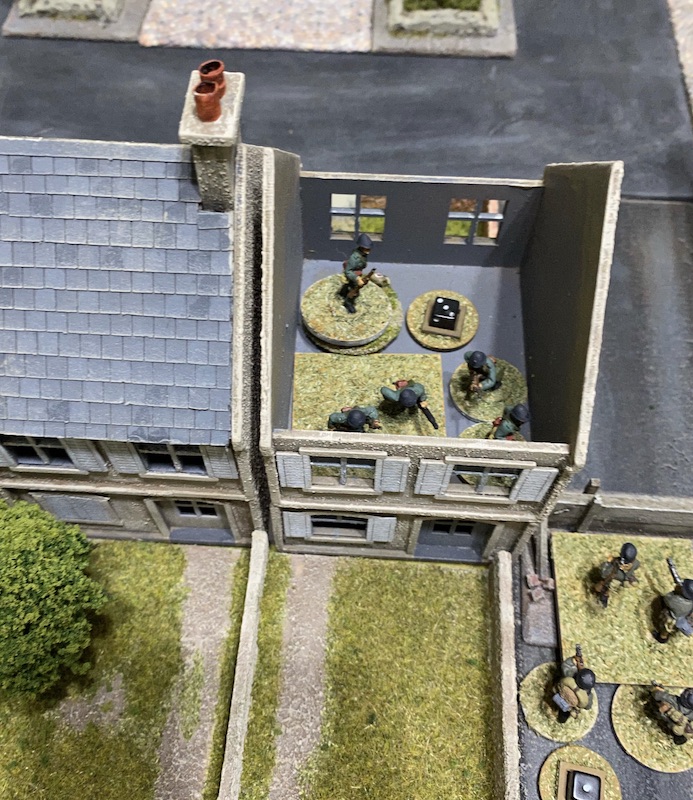
There are a number of buildings on the edge of the town that make for good defensive positions and the row of terrace houses in the centre is one.

Unfortunately the dive bombers fail to strike them.

The first building they hit is on the Dutch left flank.


This time the Stuka bombs land directly on target and the building collapses into a pile of smoking rubble.

From a German point of view that's a great result as it significantly alters Dutch options to hold this side of the town.

Another bomb lands in the adjoining building, but it fails to explode. Nonetheless the UXB is liable to do so without warning which makes the building a very risky proposition for any occupier.


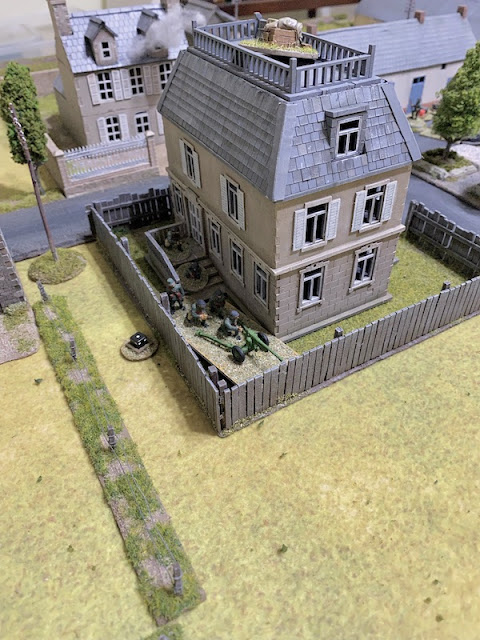
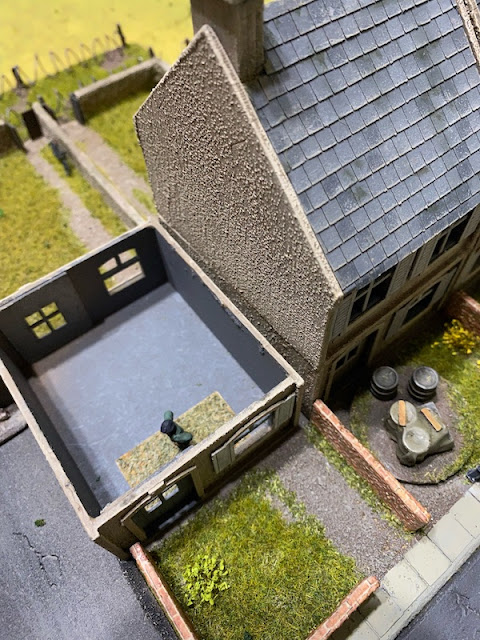
The only other building hit during the bombardment is a large house in a walled garden near the bridge, which also becomes unstable.


Their Sergeant rallies the shock and then has the men open fire on the recently deployed Germans.


They open fire at the terrace houses.

The MG34 fire is quick to find its mark and the Dutch lose one man and suffer two points of shock.


That's put the Germans right on the edge of the town. While I'm pleased to reach here so quickly it does leave the squad positioned directly adjacent to a building left unstable from the Stuka bombardment. As if that's not dangerous enough there is the possibility that a lucky shot from the Bison collapses the terrace house on the other side of the road. Oh well, there is no victory without risk.


The gun is positioned astride the road leading to the river bridge and facing the roadblock. Immediately it fires a round of HE at the schützen squad opposite.

The Germans suffer a single point of shock.


He then commands the squad to engage the crew of the Dutch infantry gun.


The Dutch command roll is 65542 and that gives them a total of five CoC points. I need to be careful here as a full CoC die will allow them to end the turn. Dave has a great deal of incentive to do so - not only will it bring to an end the interdiction effects of the Stuka bombardment but the damaged building by the roadblock could collapse, with dire consequences for the nearby German squad.

The battered survivors are horribly exposed to fire from the Germans at the roadblock.


They fail to inflict any further losses, but do add five points of shock.

Once again it targets the schützen squad at the roadblock.


Their first shot misses the Bison entirely. Up until now the Dutch anti-tank gunners have proved unerringly accurate but not so today.

Once again a mitrailleursgroepen tries to deploy through the bombardment but yet again it fails.


The bombs land close enough that the structure is rendered unstable and liable to collapse. That's a good result. The first time the Germans attempted to take the town the Dutch defenders holding this area caused them a lot of trouble. Anything that reduces their potential to do so again is very welcome.

The next target is an adjacent shop. It offers Dutch defenders good lines of sight to cover any approach along this flank and has already demonstrated its potential as a strong point.

This time the Stuka bombs land directly on target and the building collapses into a pile of smoking rubble.


The Stukas are having an absolute field day on this side of the town and the warehouse building across the road is also struck. That sets the building ablaze and sends smoke billowing towards the German lines.


The Stukas have succeeded well beyond my expectations and caused significant damage on the Dutch left flank. The Germans will have to be careful if they do attack in that direction as it is not without its hazards, several of the buildings are unstable or liable to sudden collapse. Regardless, I can have no complaints.
The Germans then have two free moves at the start of the patrol phase. The Dutch are able to prevent too much progress and so jump-off-points are in similar positions to the first game except this time the defenders are denied a suitable location for one on their left flank.

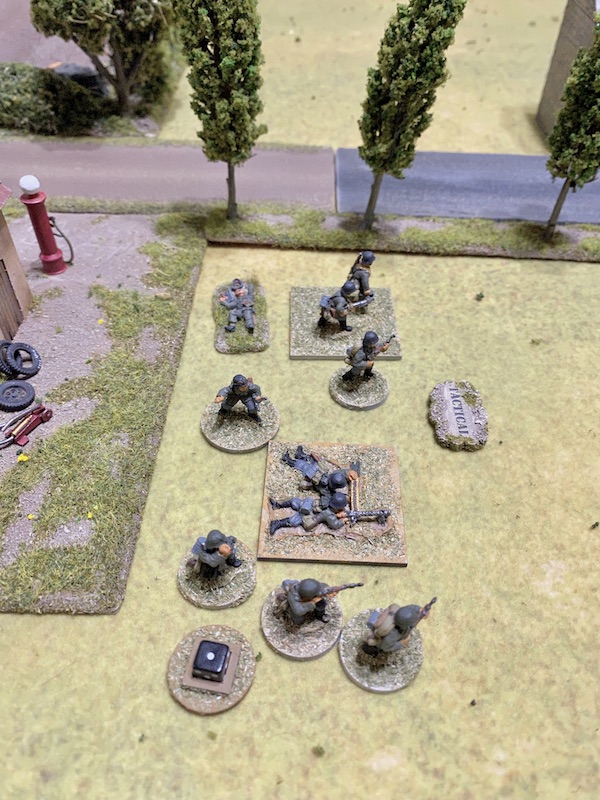
The game starts with Dutch force morale at ten, while the Germans are only at eight, mainly due to the very low opinion of the men. They have the opening phase and a schützen squad is the first unit to appear, taking up tactical positions in front of the garage on their right flank.


The Feldwebel joins them. He's in the garage but within command range.

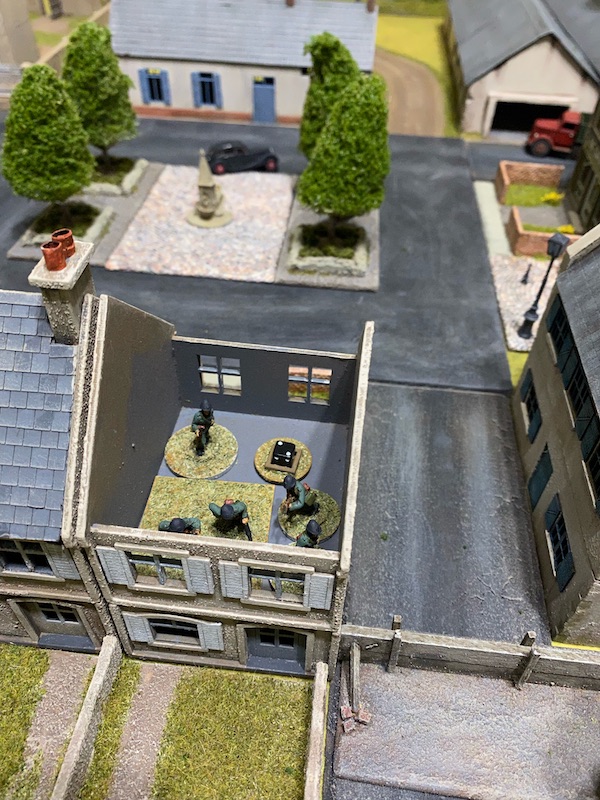
In the Dutch phase the lingering impact of the Stuka bombardment continues to cause problems. One of the platoon’s mitrailleursgroepen is unable to deploy. The platoon Luitenant does make his way through and he takes up a position near the centre of the town.

A second mitrailleursgroepen is more successful. They suffer a single point of shock from the bombardment and deploy into the terrace houses in the centre.


One of the schützen squad is hit and they suffer a point of shock. First blood goes to the Dutch.
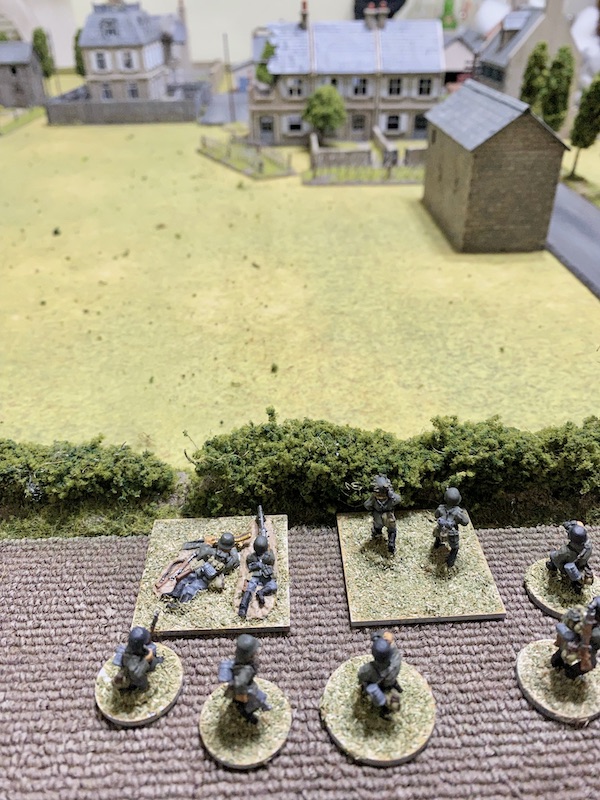
The following German command roll is 66332 and I think the double phase presents a great opportunity. There is no time to waste. The Obergefreiter orders the schützen to jump to their feet and move forward at the double.

They move swiftly covering 13".

On the other side of the road a second schützen squad deploys behind the hedges.

This is the perfect moment to call forward the Bison. Due to its unwieldy nature it cannot fire in the same phase that it moves, but hopefully this sets it up to do so in the next phase.

The subsequent command roll is 65532, which means the Bison will be able to fire.

The gunner targets the terrace houses. I'm a little disappointed when it only results in four hits, nonetheless it inflicts the first Dutch casualty.

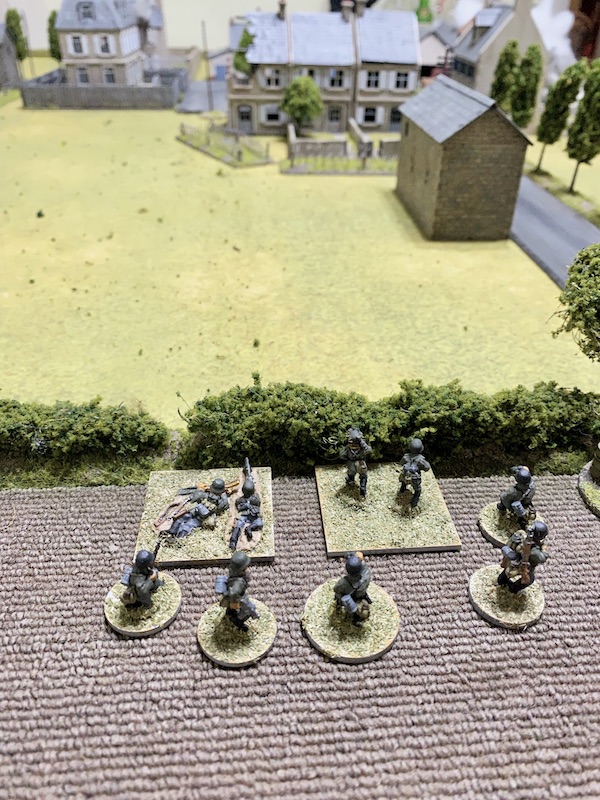
Meanwhile the schützen continue their advance and makes it as far as the roadblock.


The Dutch command roll is 65111. Not the most useful of rolls given the speed of the German advance. They are already finding that the Stuka bombardment is making deployment unpredictable and so Dave tries to make the most of the situation. Making up a command roll of two he attempts to deploy a support mitrailleursgroepen, but it fails to find a way through the bombardment.
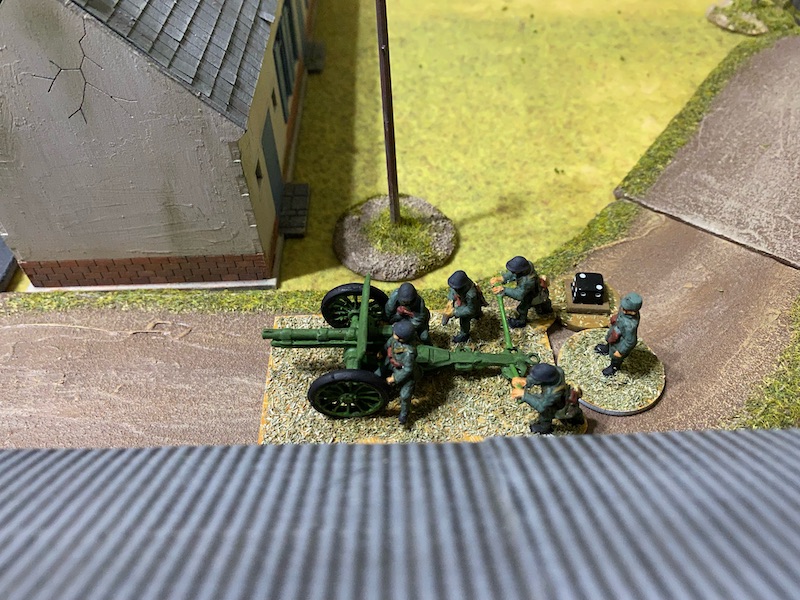
Using the remaining roll of one, a 7-Veld infantry gun and crew manage to deploy successfully, although they arrive with two points of shock.


In the German phase the Bison fires once again into the terrace house.


One of the men is taken casualty and the Sergeant is lightly wounded and put out of action for the remainder of the turn. Dutch morale drops to nine. The Bison might not be as destructive as it could be, but at least it is having the opportunity to fire.

The Obergefreiter at the roadblock rallies a point of shock


The fire from two MG34s inflicts a further three points of shock, kills one of the crew and the commander suffers a light wound. That brings Dutch morale down another two points to seven.

The Germans appear to have real momentum and so I want to make the most of this opportunity. The Feldwebel leaves the garage and moves towards the hedged field.

Once within command range he has the schützen squad open fire at the terrace house.

Despite the hard cover the Dutch lose another two men and suffer a further point of shock. German fire is proving very effective.
I'm expecting to see the Dutch withdraw from the terrace house and so I'm surprised when the Luitenant actually moves into it.
He joins the mitrailleursgroepen and rallies off a point of shock before commanding them to fire at the Germans behind the hedge.

The Lewis gun and rifles fail to inflict any damage on the schützen.

Once again a mitrailleursgroepen attempts to deploy but yet again they are unsuccessful. While the Stuka bombardment hasn't hindered all Dutch deployment it has certainly slowed it down and made a coordinated defence very difficult.


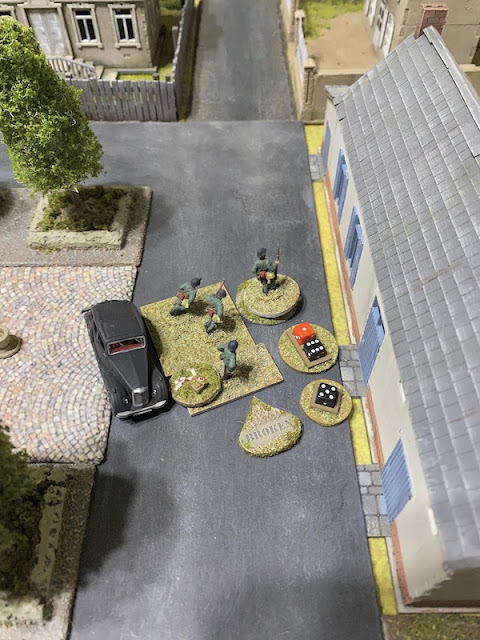
This is a dispiriting sight for the defenders - a broken mitrailleursgroepen accompanied by their wounded sergeant and Luitenant fleeing the house. It's a further blow to Dutch morale which drops to five and to make matters worse, going forward they will be reduced to four command dice.


The German phase is another opportunity for the Bison to fire at the terrace house.

This time the 150mm round strikes with full impact. The building is damaged and becomes unstable. The platoon Luitenant is lightly wounded, bringing Dutch morale down to six, and he is not the only one hit. The mitrailleursgroepen lose another man and suffer two points of shock.

I'm determined to clear the house and the Feldwebel commands the nearby squad to continue firing at the same target.

Once again German fire proves lethal. The mitrailleursgroepen loses two more men and suffers two points of shock. Luckily for the Dutch neither the sergeant or the Luitenant is hit.

However it leaves three men remaining and with six points of shock that's enough to see them break and fall back into the centre of the town.


The Feldwebel runs up the road to spur them into action but he can't go fast enough to get within command range. I had hoped he could activate the squad so that I could use the remaining 2 in the command roll to deploy the third German squad, but that won't happen this phase.

That leaves me with two options with those men at the roadblock. Either they take the opportunity to fire on the Dutch in the town centre or they move to avoid the impending turn end and the danger of a collapsing building. I'm a little torn, but decide to run the risk of a turn end and have them fire.


The next Dutch command roll is 6332 and I'm relieved to see there will be no turn end. The 7-Veld gun commander is wounded and so all he can do is order the crew to fire.


The Germans lose one man and suffer a point of shock.

A Bohler 47mm anti tank gun carrying two points of shock deploys successfully through the Stuka bombardment. It's positioned in the grounds of the town hall with a clear line of sight to the Bison.


The Germans have a very useful command roll of 63321. I consider trying to move the Bison to cover but instead decide to fire. There is an outside chance of destroying the anti-tank gun with a triple six and failing that there's a reasonable chance of breaking the crew.

In the end it does neither. Two of the crew are killed and they suffer a further two points of shock.

The Feldwebel continues moving to the roadblock.

He reaches the schützen squad and rallies a point of shock.

I consider moving the squad to a safer location but the Dutch leaders and the broken mitrailleursgroepen in the town centre present such an inviting target they cannot be ignored. The Feldwebel has the squad open fire.


The hail of bullets is deadly and all three men are hit. The loss of the last remaining man in the Lewis team see the mitrailleursgroepen wiped out. The Sergeant suffers a second wound and this time he's knocked out for the turn. The Luitenant, who is already carrying a light wound, receives a second one.

This most dispiriting sight deals a heavy blow to Dutch morale. For the loss of the mitrailleursgroepen morale drops two points to four. For the wounding of the sergeant it drops a further two points to two. Last but not least the wounding of the platoon Luitenant takes it down another two points to zero.


That total collapse in force morale brings about an involuntary withdrawal from the Dutch who melt away from the town leaving the river bridge in the hands of the Germans for a campaign victory.
Well, that was a swift and vicious victory, as welcome as it was unexpected. It certainly belies how hard fought the early parts of the campaign had been.
When we commenced, the prospects for the Dutch did not appear great - they were facing a German platoon with six MG34s against which they could muster three Lewis guns and a number of rifles. Yet, despite what appeared poor odds, they have put up a very good fight and had their engineers arrived earlier in the campaign they could quite easily have demolished the bridge before the Germans captured it. It has made for a very engaging campaign with a strong narrative. All credit to Dave for putting together a very tough defence from what appeared to be inadequate resources, this was certainly no pushover for the Germans.
Thanks to everyone who has followed the campaign and posted comments on the blog, in forums or in social media. It's always great to get your feedback and impressions, I hope you've enjoyed the journey as much as we have.
If you've enjoyed following along and would like to Buy Me a Coffee to help cover some of the costs of running the blog you can click through at the link or on the tab in the right hand column of this page.
You can find links to all the games in this campaign and several others on the Chain of Command Campaign AAR Page (link from here or at the top of this page).
That was a brilliant game, gotta admit I felt sorry for the Dutch.
ReplyDeleteThanks Ray. Yes it was brutal for the Dutch. Dave said afterwards that after the Stuka bombardment he just had a bad feeling that it wasn't going to be his day.
DeleteA cracking final game, the Dutch put up a splendid resistance throughout. I think the splendid performance if Herman's boys certainly cramped the Dutch defence this time further hindered by the Germans bold advance who threw caution to the wind to seal a victory. Well done both and thank you for providing such a detailed and thrilling write up
ReplyDeleteThanks Phil. Yes, those Stukas certainly performed well for the Germans and were instrumental in making the attack a lot easier than I was expecting.
DeleteWhat a finish! That seemed to go your way right from the start with the impressive results from the Stuka bombardment. The poor old Dutch were just outgunned by superior German firepower and the difficulty of deploying in the ace of enemy air superiority.
ReplyDeleteA great campaign - what's next?
That should be the face, and not the ace of enemy air superiority.
DeleteThanks for following along, glad you've enjoyed it. Not sure what's next. Dave has suggested another early war one this time with the BEF and I like the look of the Ruckzug campaign (German retreat from Normandy) that is in the recent Lard Magazine. We'll make a decision in the next few weeks (and it wouldn't surprise me at all if it's neither of these!).
DeleteGreat AARs and campaign. Love the action photos too.
ReplyDeleteThanks Peter, glad you've enjoyed it.
DeleteThose Stukas were dominant, can't help but feel for the Dutch who did nothing wrong, but were up against it from the start.
ReplyDeleteFantastic stuff, and your appreciative audience can only ask... what's next?
Thanks Doug. Yeah, agree, everything seemed to go right for the Germans and the Stukas certainly delivered in spades. The Dutch were almost reduced to spectators. Not sure what's next - possibly another early war with the BEF, although I like the look of the Ruckzug campaign in the recent Lard Magazine. We'll decide in the next few weeks.
DeleteWell, whatever it is, really appreciate all the work that goes into the reports, and provides us all with so much entertainment. I recently made up a list of the PSC I had from Lardie Mags/Specials, purchased or fan published. It was quite a number, so there should be plenty of choices. Thanks again.
DeleteA cracking campaign, gripping right up to the end.
ReplyDeleteThanks for following along, I'm really glad you've enjoyed it. It was a great campaign with plenty of twists and turns where the outcome was never certain until the end.
DeleteAppreciate all the work you put into these battle reports and campaigns. Aside from the amazing eye candy, the discussion of why you did things, and the dice utilization discussion is extremely useful.
ReplyDeleteEagerly awaiting the next one, be it early war, mid, or late!
In this one it seems a bit odd that a self propelled gun can not fire right away, but one moved by manpower can... fortunately it all turned out ok for the Germans in the end.
Oof, that was brutal for the Dutch. But a great campaign over all: I've really enjoyed your reports.
ReplyDeleteIt just got to be too much for the Dutch at the end -- they held out waiting for those engineers as long as they could! Stoking good story for this campaign. Thank you for letting us experience it with you! As always your AARs are amazing (and I still would love to see them in a book :) )
ReplyDelete