A new scale has called for new terrain. In several instances I've considered how I can use my existing terrain which was initially created with 20mm in mind. While a few elements might be usable in 12mm there are certain things, like buildings for example, that clearly will not work for a smaller scale.
For me buildings have to be practical for gaming. I like to be able to put my figures inside, which means the roofs have to come off and the building dimensions need to be such that the figures and their bases can fit. Having looked at what is commercially available for 10/12mm and not seen anything that will work for me I've decided to begin by scratch building what I need.
There are a few reasons for this. Firstly, I can build the terrain to fit the specifications and basing size I am using and secondly, I can ensure the building interiors are accessible. I like the way the O Group rules abstract the use of buildings so that a given area is classified as a Built Up Area (BUA) and as long as figures are anywhere within that area all that matters is the direction they are facing. It's assumed the men will take up the best available positions and it doesn't need you to micromanage the placement of figures to windows and doors. In many ways this is similar to the way Crossfire treats what it calls Building Sectors. After all, if you are supposed to be playing the battalion commander it should be safe to assume that an order to a platoon or company to 'hold the village' will see the commanders of those units do the job of assigning their units to the best defensive position for the job.
This allows for a bit of creativity in the way the BUAs are made. The way I've approached it is to consider the base size as representing the entire footprint of the BUA, so that as long as a unit is placed on that base it is considered 'in the building/s' or taking advantage of the cover they offer.
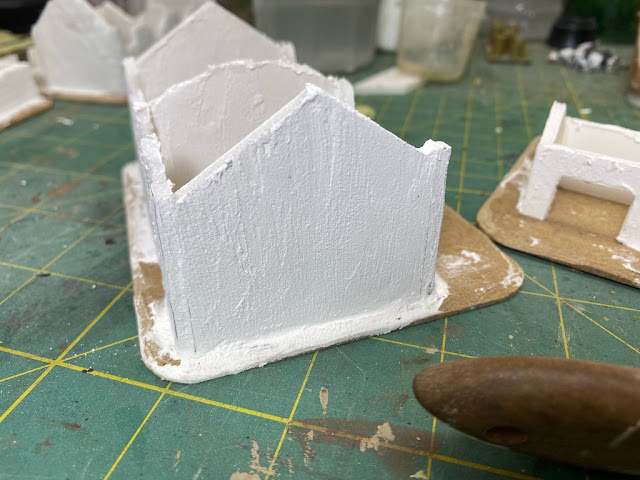
I thought 3mm foam core would work well for this job and constructed a quick test building as a proof of concept. Rather than make detachable roofs I've taken the lazy option and decided all my buildings will be ruins. The test building worked well and the base size was sufficient to house my figures on their 20mm square bases.
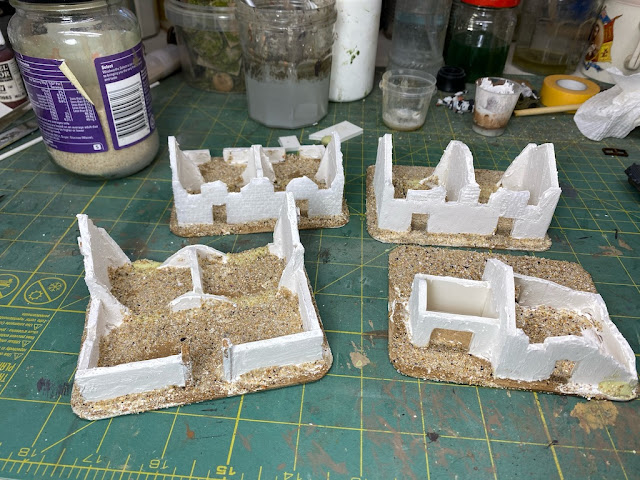
With that decided I set about making a selection of buildings to represent farms or sections of a village. For the bases I used pre-cut MDF coasters that are sold in craft shops and the first thing I do is take my Dremel and roughly chamfer the edges to give a more natural look.
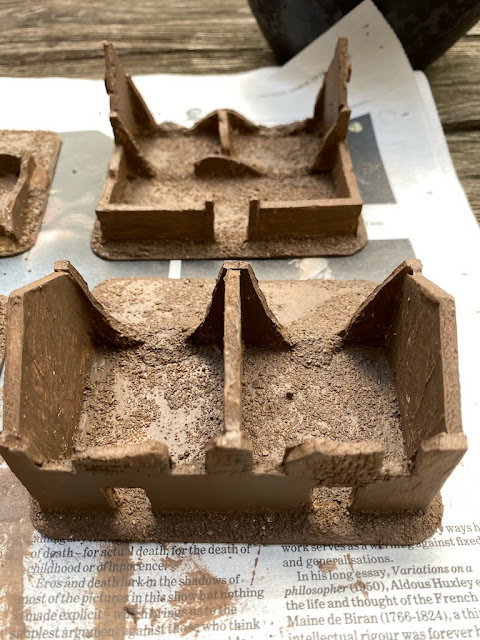
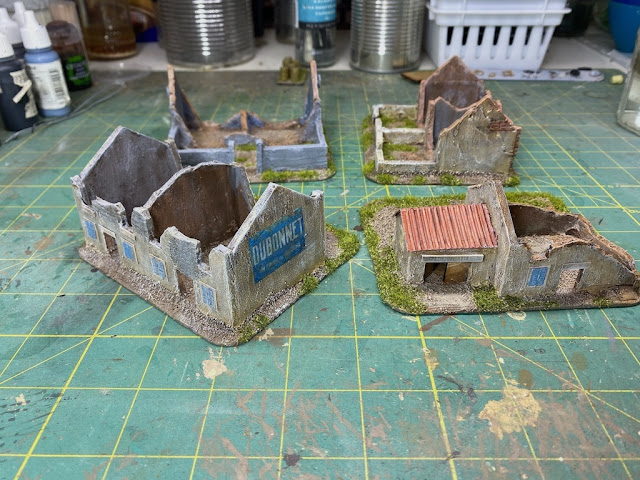
The next job is to paint the bases and buildings as you would normally. I put down base colours, give the buildings a wash and then dry brush to pick out the highlights.
At this point you can bring out the features like the carved bricks and the nice thing about using the broken plaster effect is that it doesn't matter if this looks roughly done, as that is part of the effect you are looking for anyway.
The shutter windows are cut from a thin piece of card and added after the walls had been painted.
The two other terrain types that need to be created are trees and hedgerows. I'm hoping I can do those in a way where they might also work as small items of 20mm terrain and so be as versatile as possible. With most of my miniatures now painted and based it's only a matter of finishing off the final terrain pieces before I can start to play. I'm getting there!


Nice scratch builds Mark
ReplyDeleteThanks John.
DeleteExceptional work. 😀
ReplyDeleteThanks!
DeleteNice work, Mark. I wonder if 3mm foamcore might look better than 5mm for this scale? :)
ReplyDeleteThanks. You know what, I went back and measured and they are 3mm. For some reason I had in my head that normal foamcore was 10mm and the thinner stuff was 5mm. I’ll go back and edit the post. That said it is still a bit over scale, but I suspect any thinner and it wouldn’t be sturdy enough (not sure if they make it any thinner either).
DeleteGreat Stuff as usual. How do you arrive at the building dimensions for the scale you choose?
ReplyDeleteThanks Dick. The key measurement was base size. Most units are on 20mm square and for O Group a built up area can accommodate one platoon (three stands) and a support weapon, so those were the key parameters. The height of the building was done by eye, I think I settled on roughly 3x the figure height so about 35mm.
DeleteThey look great!
ReplyDeleteExcellent tutorial!
ReplyDelete