
This is the third scenario in our Many Rivers to Cross campaign set in the Netherlands during 1940 using the Chain of Command rules.
A victory in the previous game has presented the Germans with an opportunity to blitzkrieg directly onto the next map in the same campaign turn. The advantage is that this could buy them extra time to reach the final map before Dutch engineers are able to demolish the bridge. However the disadvantage is that they must make this new attack without any additional support and only with the units that survived the earlier scenario. As time favours the Dutch I've decided the Germans should take the risk and push on ahead.

Having said all that, I'm not convinced this is a great idea. The reason being, the Germans are relying on infantry alone to make the attack. Until the river behind them is bridged they are without heavier weapons or armour. That means they lack both HE support and speed. Despite that, this is an opportunity to maintain momentum and keep ahead of schedule. It's a bit of gamble but I think it's worth a shot.
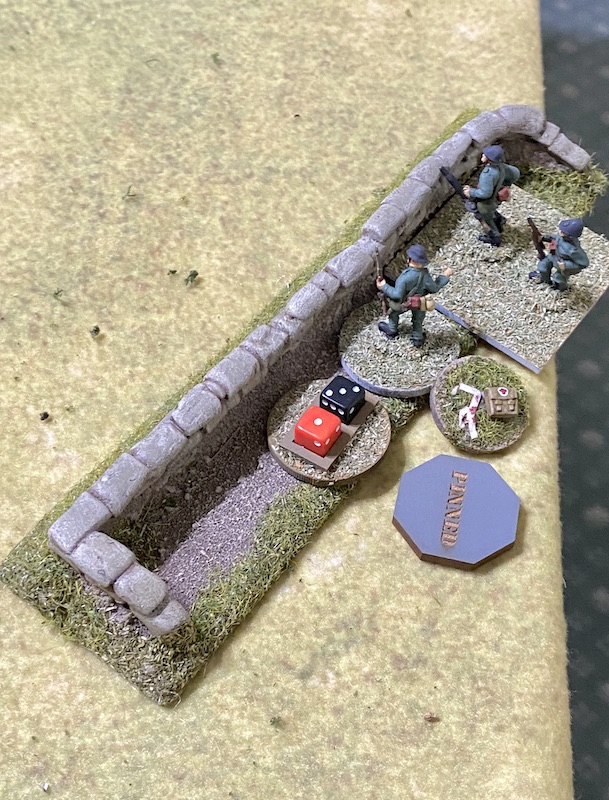
Naturally, the Dutch are desperate to stop or delay them and in this scenario they must attempt to demolish two culverts to halt the progress of German vehicles. This is a Going with a Bang scenario from the Blitzkrieg 1940 Handbook.
At the end of the previous game the German schützen platoon was close to full strength, missing only the second in command, the Feldwebel, who had been killed. The same cannot be said for the pioneer and schützen support squads who suffered more grevious casualties. Nonetheless with the help of a tripod mounted MG34 team and an Adjutant the Germans remain a potent force. Ideally they can get the job done, but if it looks like the cost will be too high or events start turning in favour of the Dutch I'll have no hesitation in withdrawing.
The map shows four possible locations for the culverts and we randomly determine two of these for the scenario. In our case it will be those at positions 1 and 2. The first, at position 1 will require a task roll target of 6 to set the charge and that at position 2 will require a target roll of 12.
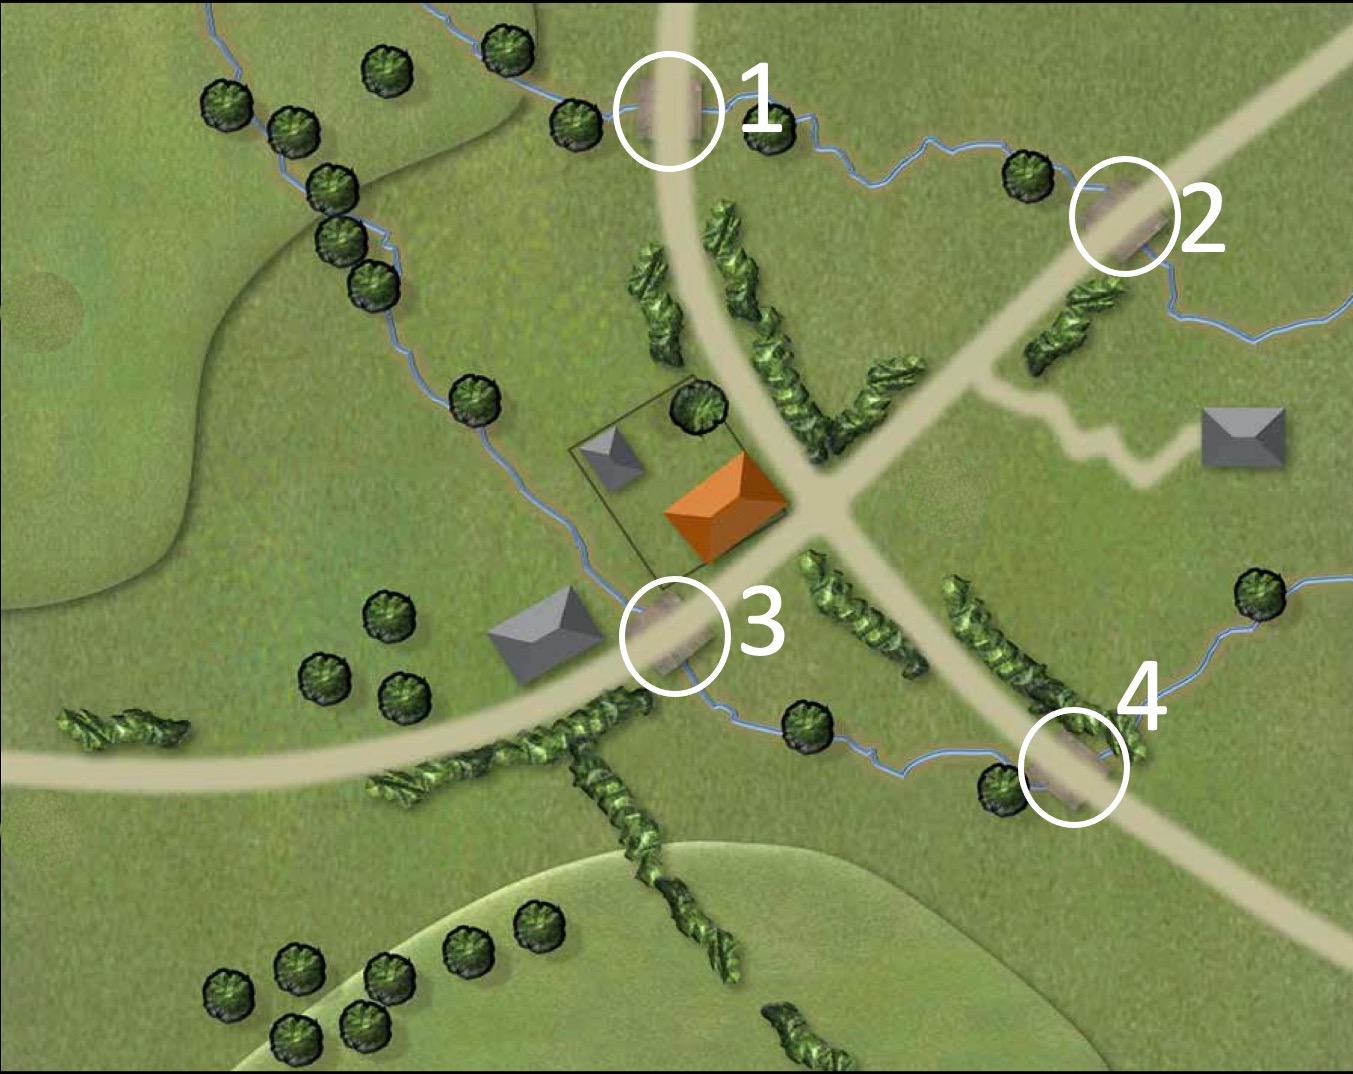
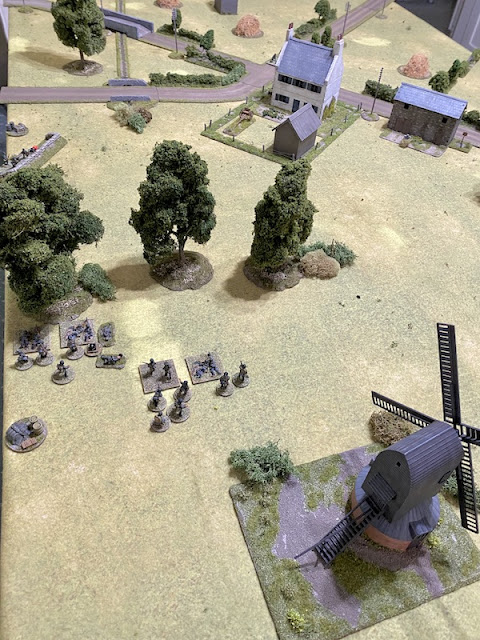
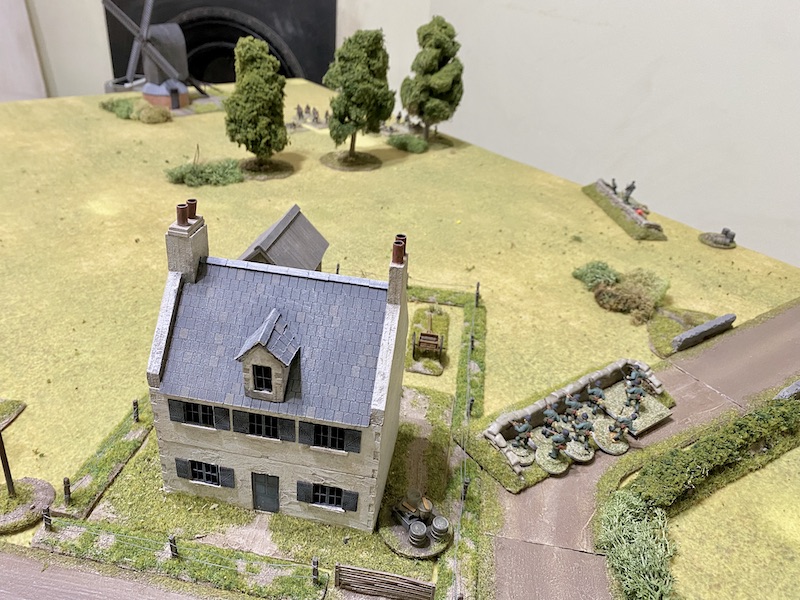
That gives the Germans a fair distance to go to prevent the Dutch engineers completing their task. In terms of terrain there is a small woods on the German right by the bend in the road. The trees on the left are too thinly spread to offer any cover and so that flank offers little in the way of protection.
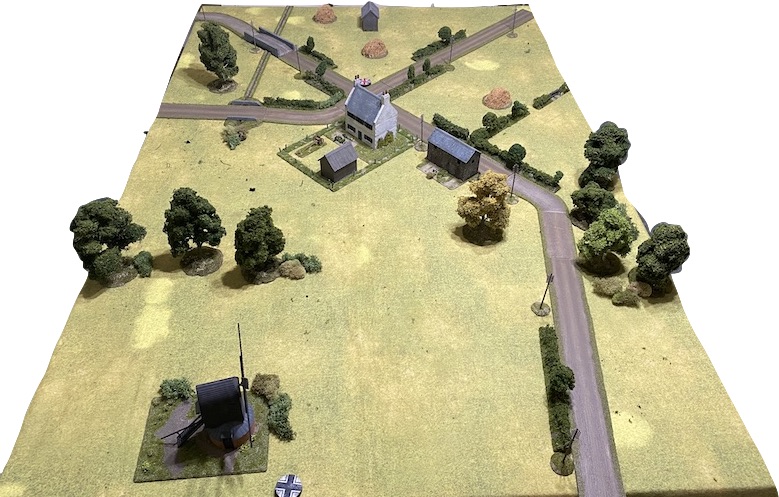
That means there is barely anywhere for the Germans to secure jump-off-points. The best they can manage is to locate two in forward positions on both the left and right table edge with a third at the rear. The Dutch are placed to defend the crossroads and the two culverts.

The Dutch will field their first platoon, last seen in action in the first scenario of the campaign. They have lost four men permanently and one of their NCOs, so a man will be promoted from the ranks to fill that position.

That greatly reduces the cover available to the Germans as they approach the cross roads.


At least from here they have some protection if fired upon from the direction of the farm.


That leaves most of the Germans in exposed positions, but between them they carry the threat of a considerable amount of return fire should the defenders decide to show themselves.


The pioneer squad edge forward cautiously taking up tactical positions on the edge of the woods.


I'm hoping the threat of so much firepower will give the Dutch second thoughts about deploying.


They manage to inflict only a single point of shock.


The machine gun team are exposed in open ground and suffer two casualties.


This time the fire is marginally more effective and the pioneers suffer a point of shock.


German fire is slowly taking its toll and the Dutch lose yet another casualty.

The single LMG team fires, but the Dutch survive unscathed.


So far the Germans are managing to threaten the Dutch on both flanks and divide their attention.

On the downside they are having to approach across open ground and have some way to go to find decent cover.
The situation is little different on the other flank. What I would do for a couple of tanks right now!


The Dutch open fire immediately at the schützen.


Just as it's beginning to look like the German attack might stall their command roll is 66632. The impending turn end will see the pioneer's smoke drift away but the double phase will be an opportunity for the Germans to continue pouring fire on the Dutch.


He then has both LMG teams put down covering fire on the entrenched Dutch in the centre.


In the Dutch phase the pinned mitrailleursgroep return what pitiful fire they can generate at the schützen.

They may only manage a brief burst with the Lewis gun but the Germans are in open ground and it's enough to kill one of the LMG crew.

The Dutch Luitenant in the farmhouse orders the mitrailleursgroep at the hedge to take advantage of the disappearance of the smoke to fire at the exposed pioneer squad.


The Luitenant then orders the 6 Veld infantry gun to also engage the pioneers.

The LMG team lose another man and the rifle team suffer more shock. The Pioneers are not too far off breaking.

The entrenched mitrailleursgroep in the road are ordered to open fire on the schützen squad opposite.

I have a CoC die and now seems as good a time as any to use it to interrupt. Both MG34 teams from the schützen squad on the left swing in to action.

The sudden burst of fire is enough to inflict a casualty and a point of shock. The Dutch will fire back less effectively than they might have done and they will do so with the added negative effect of the covering fire.

Nonetheless it is enough to inflict three points of shock on the schützen.

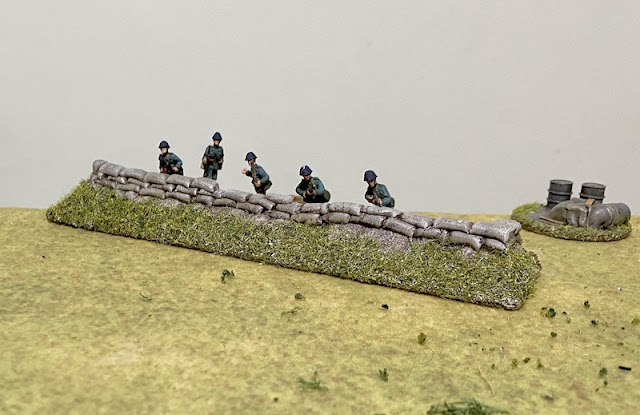
The platoon's final mitrailleursgroep deploy into the upper level of the farmhouse. They are weakened due to losses taken earlier and their sergeant is newly promoted from the ranks following the death of their original NCO. Nonetheless they are in hard cover and add to the weight of Dutch fire that can hit the squads in the open.

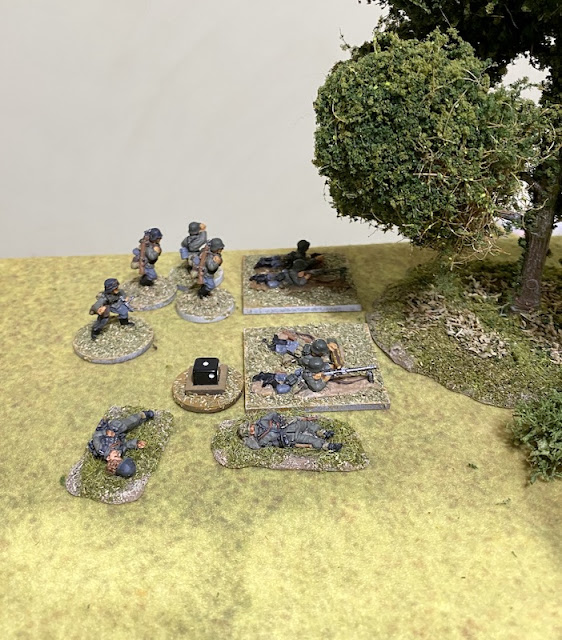
The German 2nd platoon will start as it finished the last game, without the Feldwebel but otherwise at full strength. They will be joined by what remains of the support units that attacked with them. The pioneer squad lost nine men but they will be joined by the pioneer engineer demolition team. The engineers are without their demo charges and so will join as riflemen. The support schützen squad is almost at half strength but can still field both MG34 teams (one with two crew and the other with three) under the command of their Obergefreiter. To some extent the loss of the Feldwebel will be alleviated by the presence of an Adjutant.
Before we start the Dutch place fortifications. There are no Kazemat, but the woods on the German right flank have two minefields and are effectively taken out of play.


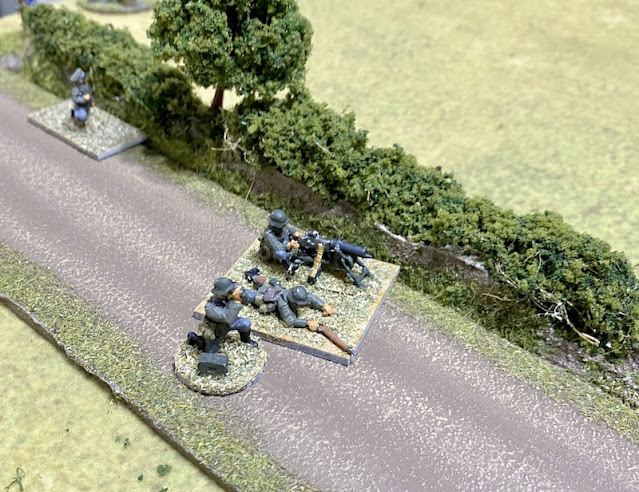
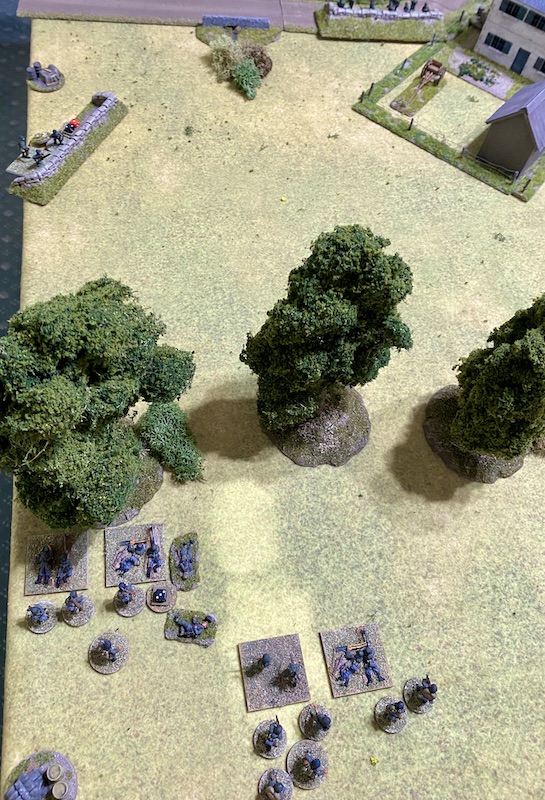
The opening German command roll is 42211 and I decide to use the support units to make the first move on the right flank. Given the lack of cover my plan is to deploy several units so that what I lack in cover I can make up for with firepower. The tripod mounted MG34 team are first to deploy and they take up position in the road alongside the cover of the hedge.


The weakened support schützen squad have little choice but to deploy in the open and are placed on overwatch. They are joined by the pioneers who take up tactical positions behind the woods.


In the Dutch phase Dave decides to bide his time and see how the attack develops.
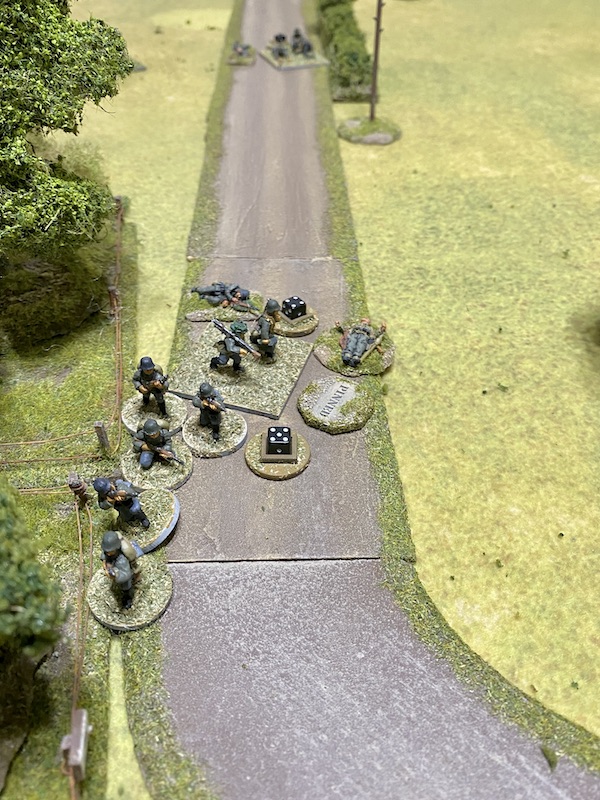
The Germans continue to press forward. The MMG team advance tactically up the road hugging the hedges.


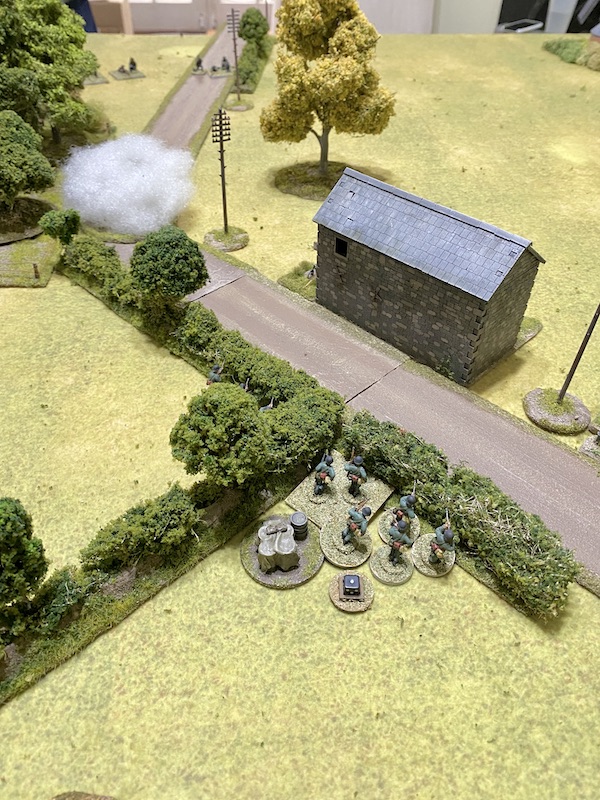
Once again the Dutch decide to sit and wait. In the German phase the pioneers press forward leading the attack. The squad's Obergefreiter hurls a smoke grenade out into road.

He then orders the squad to move up normally behind the plume of smoke.


As it turns out, they are not so easily intimidated. A mitrailleursgroep is dug-in on the opposite flank and they drop their concealment and open fire.

From this angle the pioneers are caught in the open, without the cover of their smoke.

The sudden burst of fire cuts down one of the pioneer rifle team and the squad suffers three points of shock. So much for being intimidated, that's first blood to the Dutch.

Both of the MG34 teams from the schützen squad are on overwatch and with a clear line of sight they return fire immediately.

Unlike the pioneer squad the mitrailleursgroep are in good cover and the initial burst of long range German fire leaves them unscathed.

A second mitrailleursgroep then appears behind the hedge near the bend in the road.
The smoke doesn't give them a clear line of sight, but that doesn't prevent them opening fire on the pioneers.


While there are no casualties the pioneers suffer a further four points of shock. The decision to mine the woods has paid dividends, forcing the Germans to advance across open ground and suffer the consequences.

The Dutch haven't finished with the pioneers just yet and an antiquated 6 Veld 57mm infantry gun deploys at the crossroads.


They also target the pioneers, but the small HE round explodes harmlessly.

In the German phase the pioneer Obergefreiter rallies a point of shock and has the squad move tactically. Despite the shock they manage to move 2" but perhaps more importantly they have now found better cover.
The platoon Leutnant deploys onto the road and orders the MMG team to target the Dutch at the hedge nearest to the pioneers.


The Leutnant then orders the schützen squad to continue firing at the entrenched position opposite.

This time the hard cover is not enough to prevent a casualty and the Dutch lose a man.
I decide the best thing to do now is to try and overwhelm the defenders with firepower before they can inflict too much damage. With that two squads from the core schützen platoon deploy from the left jump-off-point.

One LMG team has its line of sight blocked, but the remaining teams all fire on the entrenched Dutch.

This time the German fire proves even more deadly. The mitrailleursgroep suffer a point of shock, lose another two men and see the sergeant suffer a light wound. That proves a blow to Dutch morale which drops two points to eight.

The Dutch command roll of 55542 limits their response. First the entrenched mitrailleursgroep returns fire at one of the recently deployed schützen squads.

The Germans may have superior firepower but they are in the open.

The Dutch fire proves to be just as effective as the German fire and one of the MG34 teams loses two men and suffers a point of shock.

The Luitenant, the Dutch platoon commander, deploys into the farmhouse.

It's a good, central location from where he can command the units around him. The first thing he does is issue an order to the mitrailleursgroep behind the hedge to continue engaging the Germans.

They open fire on the MMG team in the road.


The Luitenant then orders the 6 Veld infantry gun to fire at the pioneers.


The Germans need to compensate for the lack of cover by asserting their superior firepower, so it's important it can all be brought to bear. In the German phase the Obergefreiter of the schützen squad on the left assigns a man from one LMG team to join the team that recently took casualties. I certainly cannot afford to carelessly lose one of the MG34 teams when they give me such an advantage. The squad then opens fire at the dug-in Dutch opposite.


I try to bring the full weight of fire of the other squad in to play and have them move and fire at half effect. Unfortunately they only manage to move 1", not enough for both teams to have a line of sight.


I'm determined to clear that Dutch position and the Leutnant commands the schützen squad on the opposite flank to engage them with long range fire.


This time around the hail of MG34 fire proves to be deadly accurate and the Dutch lose three men and suffer a further point of shock. That's the fourth man they've lost this phase and it leaves the wounded sergeant and lone Lewis gunner as the only survivors of the eleven man mitrailleursgroepen.

The Leutnant orders the MMG team to concentrate their fire on the mitrailleursgroep at the hedge.
The tripod mounted MG is not proving anywhere near as effective as the other German MGs and the Dutch are unharmed.
The Leutnant then moves towards the woods and the schützen squad.


In the Dutch phase a third mitrailleursgroep deploys in the road alongside one of the culverts. They are dug-in and so once again the schützen squads on that flank find themselves facing an entrenched enemy while they themselves are in open ground.

One of the LMG teams suffers two points of shock.

The few survivors of the mitrailleursgroep on the flank also fire, but to no avail.

From the farmhouse the Dutch Luitenant orders the mitrailleursgroep at the hedge to maintain their fire on the MMG team.

They suffer two points of shock and lose another casualty, reducing the team to two crew members.


The Luitenant then has the 6 Veld infantry gun fire once more at the pioneer squad.


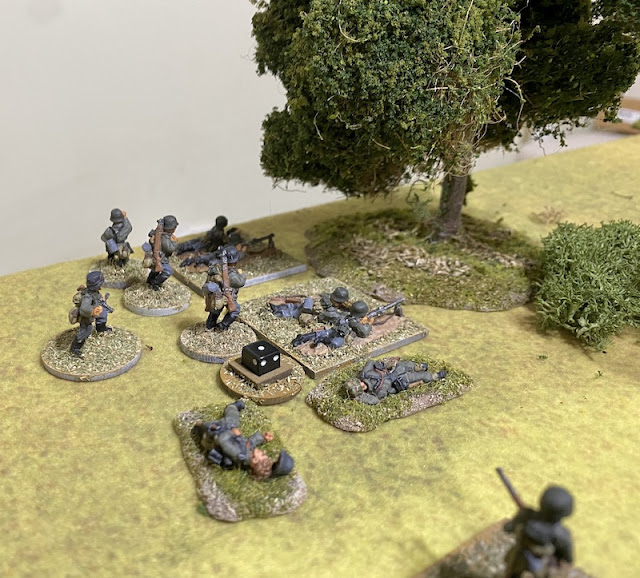
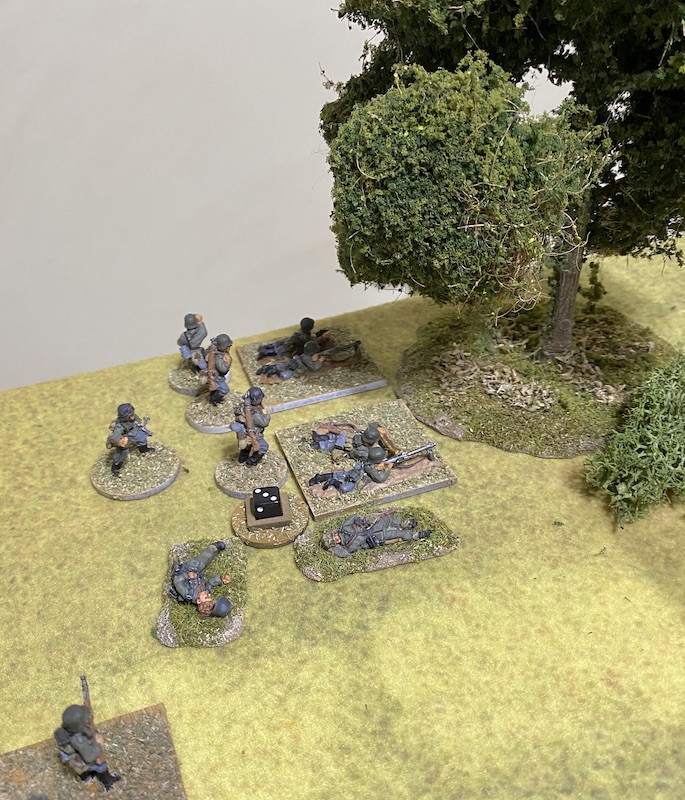
This time the gun has found its range and the blast from the HE round inflicts a point of shock and kills the Obergefreiter. That's a blow that leaves the pioneers leaderless and suffering eight points of shock. German force morale also takes a drop down to nine. It would be fair to say that pioneer squad is now combat ineffective.

With the Germans being kept at bay a Dutch engineer demolition team deploys by the crossroads.

That puts them a short distance from the smallest culvert which should be the quickest to demolish.

Just as it's beginning to look like the German attack might stall their command roll is 66632. The impending turn end will see the pioneer's smoke drift away but the double phase will be an opportunity for the Germans to continue pouring fire on the Dutch.
Despite the casualties they have inflicted I sense we are nearing the culmination point of this attack. Any further progress will come at the cost of more German casualties and there's no certainty that will deliver a scenario victory. It might be time to consider withdrawing - my force morale remains higher than the Dutch and they have suffered more losses.
For now there is a double phase and I'll await the outcome before making any decisions. On the left flank the Obergefreiter rallies a point of shock and the squad fires at what remains of the Dutch in the entrenchment, but it has no effect.
The other squad makes another attempts to move and fire but once again they only manage to move 1', however this time it's enough to give both MG34 teams a line of sight.

They inflict only one point of shock but that's enough to pin the remaining two men.
With that the phase ends and so does the turn. The pioneers' smoke is removed as is their tactical status, leaving them even more exposed than they were before.


In the subsequent phase the Obergefreiter on the left rallies another point of shock.


On the opposite flank the Leutnant has the MMG and the schützen squad fire on the same target.


Once again a torrent of German automatic fire proves deadly and the Dutch lose two men and suffer a point of shock.

The Leutnant then moves himself to the cover of the woods and relative safety. He's beyond command range of the MMG team but close enough to command the schützen squad. At this stage I'd rather have him in cover and out of line of sight, I can't afford to lose a second senior leader from this platoon.


They lose another man and suffer more shock, which is enough to see them pinned.


They target one of the schützen squads and the Obergefreiter is hit and lightly wounded. That takes German morale down to eight.
At that point I've seen enough to know I can make little progress beyond this point without suffering more casualties. The schützen can generate significant firepower but they are in the open and facing several Dutch mitrailleursgroepen, two of which are in hard cover. German casualties from the core platoon are light with only three men hit. On the other hand the Dutch have lost nine men from their core platoon and if the Germans withdraw now with force morale equal to the defenders then the Dutch won't have the advantage of recovering casualties from holding the table. That's enough to convince me to call it a day and I announce the Germans will withdraw.
Overall I'm not disappointed. The opportunity to blitzkrieg always carried a degree of risk and in the end the Dutch position proved very difficult to approach across so much open ground. With the defenders entrenched or in buildings it was always going to be a tall order for a platoon armed only with light infantry weapons.
The German engineers will have made progress constructing the bridge and for the next campaign turn a number of heavier weapons will become available. Alas it will still be some time before the division's tanks will make it across. So in the next game we will return to this map for a second German attempt to clear the Dutch defenders. You can find out what happens next in this post.
You can find links to all the games in this campaign and several others on the Chain of Command Campaign AAR Page (link from here or at the top of this page).
Great AAR, as usual. Seems a tough nut for the attacker to crack but worth the risk to try.
ReplyDeleteThanks, as long as I didn't take too many casualties and inflicted more on the Dutch it was definitely worth it.
DeleteAnother engrossing game report!
ReplyDeleteThanks!
DeleteAnother super game - I think you were right both to give it a go and to call it quits when you did. I know you may have explained it elsewhere but why is the tripod 'MG34' a Maxim?
ReplyDeleteThey early war Germans are from Dave's collection and I think he's based it on a 4th or 5th wave division platoon from Army Group B or C most of whom had older kit, like the MG08. While we are part of Army Group B I've chosen to play units from 9th Panzer Divisions and they were equipped with the better equipment, so the lists give me the tripod mounted MG34 team but the model Dave has is the MG08.
DeleteA nice little battle report...great terrain too.
ReplyDeleteThank you.
DeleteCracking game as always.
ReplyDeleteCheers, glad you enjoyed it.
DeleteSplendid read as usual. A bold decision that could have paid dividends.
ReplyDeleteThanks, it was always worth a shot, but probably wise to get out while I was ahead.
DeleteAs always, a great read. In this game the adage "Fortune favors the bold" didn't apply.
ReplyDeleteSplendid game report, another good looking game
ReplyDeletecheers
Matt
Thank you for putting the time in to giving such an excellent account - enjoyed
ReplyDeletecommenting so you know how much the reports are appreciated and enjoyed.
ReplyDeleteI really thought you were going to pull it off! Nevertheless, a good result for the Germans. Well played by both parties -- that was a great defence by Dave.
ReplyDeleteHi Mark. A bit after the fact but how did you calculate the defenders Blitzkrieg support amount. We are at the same stage in the campaign and I am blitzkrieging map 4. Thanks John
ReplyDeleteIf I recall correctly, the Germans don’t have any support, except what survives from the game you just played. The defender’s support is based on the campaign turn, as normal.
Delete