
The Germans made their first attack of Campaign Turn 6 on Map 2 in the previous game. Here they tasted victory for the first time in the campaign. As a result they had the option to 'blitzkrieg' and advance immediately onto the next map. That attack must be made with whatever force is available at the end of the scenario, without replacement by a fresh platoon and without any additional support.

This is a tempting opportunity to squeeze one more game into a campaign turn, but in the end Dave resists that temptation. He had a Volksgrenadier Rifle platoon that was at full strength backed up by a PzIV, but his other support, a leIG18 infantry gun, had lost three of its crews as casualties. He knows from bitter experience that Map 3 Holzthum Village is held by a full American platoon backed up with two 30cal MMG teams. His men have also seen a Sherman make its way along Skyline Drive into the village. That would make it a tough nut to crack. With the rifle platoon the weaker of the available Volksgrenadier platoons and the infantry gun on the verge of losing its crew, he has decided he lacks sufficient force for the task.
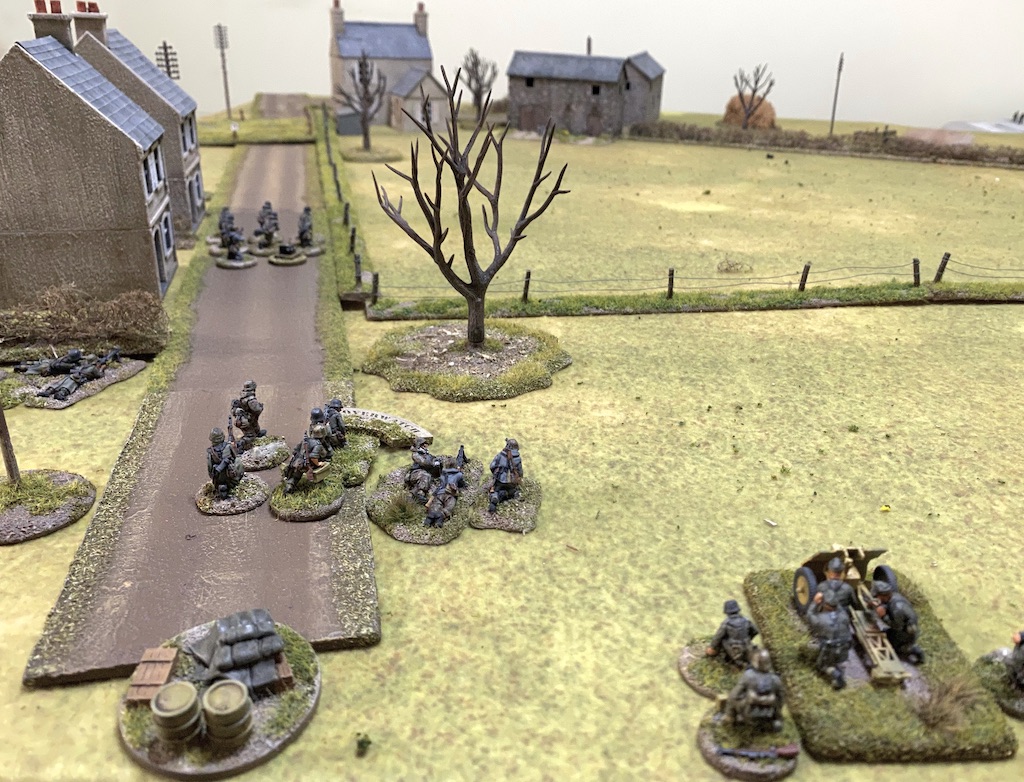
That means we now move to Map 4 The Outskirts of Consthum for the second attack of the campaign turn. This will be carried out by a Volksgrenadier Sturm platoon coming from Assembly Point D. The men have already been in action and were roughly handled during a failed attempt to take Holzthum Village in Campaign Turn 3. Since then the platoon has infiltrated to a new assembly point from where they can launch this first assault on Consthum. However, the platoon is below strength, short of four men they lost during the abortive attempt to take Holzthum. This has meant the rifle grenadier team has been disbanded in order for the men to make up the numbers in the squads.

Like so much of the agricultural landscape in the area this attack must be made across open fields, making for yet another tough assignment for the Volksgrenadier platoon. The Americans will be holding the small cluster of buildings at the road junction and the Germans will come from the opposite side of the table. They have opted to fight this as an Attack & Defend scenario and so must force the defenders from the table to win.

The Americans start with three free moves at the start of the patrol phase and are able to quickly pen the Germans into one corner of the table. As a result their jump-off-points are grouped close together.

This will be the first combat for the defending American platoon, who are at full strength. Among their supports are two minefields. These have been placed to deny the Germans access to the nearest buildings and to channel them into the open ground.

The Americans will start with their force morale at nine, while the Germans will be at eight. The minefields are then placed and the Germans announce that a pre-game barrage is in effect.

Dave shares his thoughts on how he plans to make this attack:
As the attacker the Germans have the first phase and they open with something that takes me by surprise. From one of the roads appears a captured jeep packed with men (in our case this is represented by a Kubelwagen). It comes barrelling down the road going flat out, racing towards the road junction and the American jump-off-points.


The squad's LMG team deploys near the other road, where it is joined by an Unterfeldwebel, who has been brought in as a second senior leader to assist the platoon.

Well, that's an interesting opening. The captured jeep means that the Americans will not necessarily be able to determine if it is a friend or foe. There's a 50% chance that, when they first try to target it, they are unable to decide and hold their fire. And that's assuming the Americans are able to deploy through the barrage in the first place.
Dave is clearly trying a coup de main here. The speed of the jeep; the uncertainty of it as a target, and, the delays caused by the barrage, all present an opportunity to enable a rapid closing down or capture of the American jump-off-points. I could find myself punished for having all my jump-off-points grouped so close together.
In the American phase I'm fortunate that one of my squads can deploy through the barrage. They take up position in the barns either side of the road and form a welcoming party for the jeep's occupants. There are only a few windows and so the squad leader has the BAR team placed at one and a rifleman and the extra BAR gunner from the rifle team at another.


Unfortunately, the fire has no effect, but at least the Americans have men in place to try to prevent the Germans from capturing their jump-off-points.

That may be easier said than done - the next German command roll is 66552. While the threat of a double phase presents quite a problem, at least the jeep won't be moving in this phase. Nonetheless, one of the Volksgrenadier Sturm squads deploys in the road with the clear intention of making a dash towards the American positions.


German good fortune continues with their next command roll of 66541. They are about to enjoy a run of phases that could see the American position unhinged.
The Unterfeldwebel moves with the LMG team along the hedge towards the road.

Once there, he orders the squad to move at the double down the road.


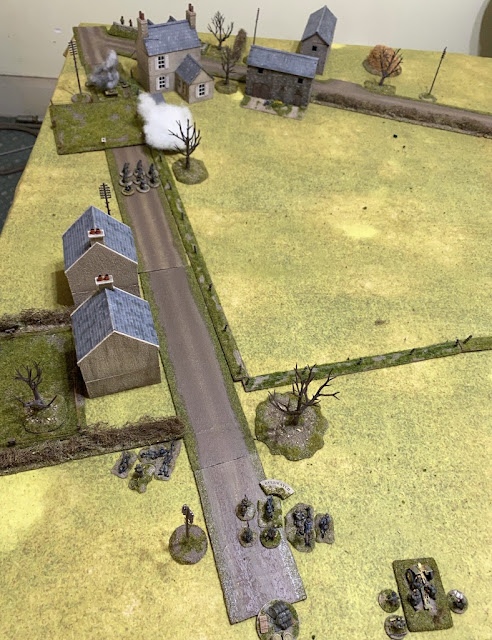
Over on the other road, the driver of the jeep keeps the accelerator pedal pressed to the floor, travelling flat out and covering 22" in the phase. They may yet pull off their coup de main.


The next command roll is 63331, which may mean an end to the run of phases, but it will see the Germans able to activate a number of units. The platoon's LMG squad deploys across the road and both teams are placed on overwatch.

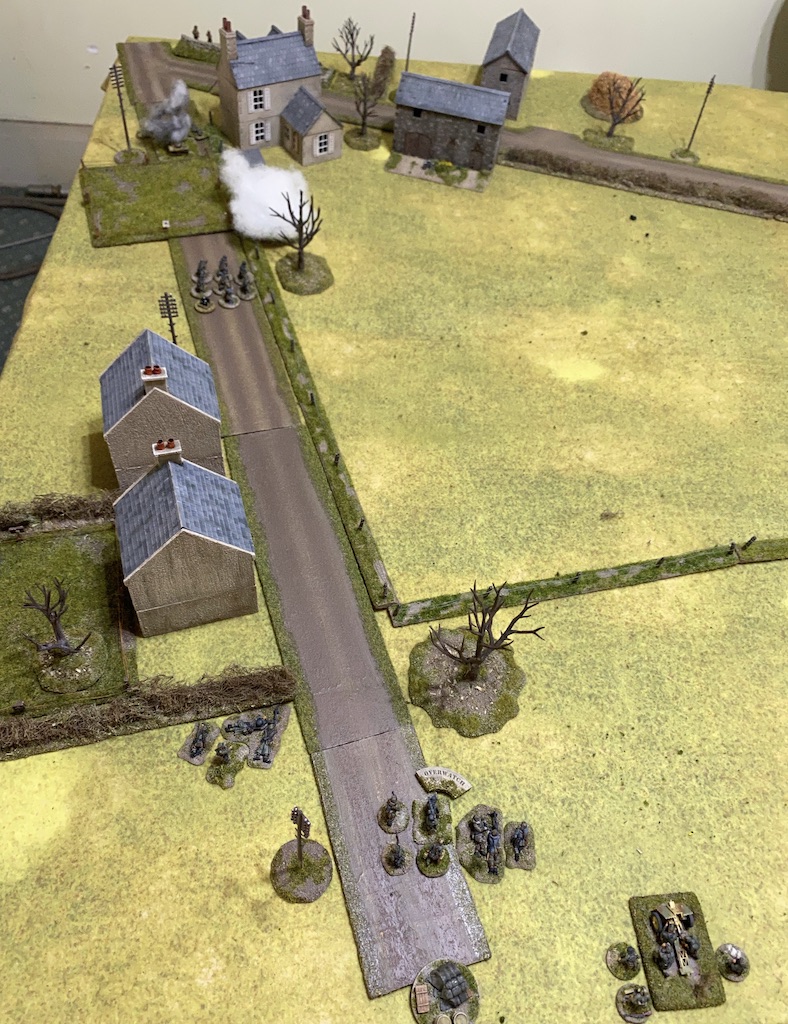
Even more menacing, a leIG18 infantry gun deploys alongside them and fires off a round of HE at the barn. Unlike the LMG teams the gun crew don't need to see the American infantry at the windows, it's enough for them to know that enemy fire has been seen coming from the building.


Once again the squad in the road moves at the double bringing it close to the minefield and the road junction.


The squad's Obergefreiter hurls a smoke grenade forward to provide the men with some cover.

The jeep driver seizes the opportunity to continue driving flat out and he races past the men in the barn before they can react.


However, the fortunes of war swing both ways and the next American command roll is 66541 which might be just the opportunity they need to restore the situation. The pre-game barrage is still in effect and any decisions on deployment will require a delicate balancing act to ensure the opportunity to deal with the jeep and its passengers does not slip away. Nothing makes that more apparent than when the platoon sergeant fails to make his way through the barrage.
That means I must activate the rifle team in the barn, it will be the only chance this phase to be sure I can target the jeep. As it requires the whole team to turn and face the opposite direction, this will call for a move and fire at half effect.

It doesn't generate a lot of firepower and the jeep occupants suffer a single point of shock, but at least the rifle team are now facing in their direction and ready for the next phase.

American luck continues with a command roll of 66531. I'm hoping this is my chance to eliminate the threat posed by the jeep. The squad leader is close enough to use his SMG and he joins the rifle team in letting loose a volley of gunfire at the impudent Germans.

The fire inflicts a further two points of shock on the passengers, which is a little disappointing, however there are three 6s in the hit roll, which means this hail of bullets has had an impact on the vehicle itself.

While it doesn't damage the jeep, it causes the driver to panic and speed off immediately, going flat out. The movement roll is 18" and as it reaches the road junction there are two directions in which the jeep could travel. We resolve the driver's panicked decision with the roll of a D6, he will either turn right and disappear off the table or turn left in the direction of the German jump-off-points. He chooses to turn left and speeds past the jump-off-point and around the corner.

With the threat of the leIG18 infantry gun still present the BAR team in the other barn take cover in tactical positions.

I have one more squad left and I'm hoping desperately I can bring them into action. Fortunately, they are successful and deploy entrenched covering the road junction.


With that threat eliminated, I now want to be in a position to deal with the sturm squad that's closing in from the road. The squad leader in the barn orders his men to follow him across the road to the cover of the other barn.


The Americans need to prevent the German squad in the road from climbing over the wire fence and making it into one of the buildings.
However, that's not something they will need to concern themselves with for the moment. With the failure of the attempted coup de main it's clear this under strength Volksgrenadier platoon is going to find it very tough forcing the numerically superior Americans from their position. Dave decides there is nothing to be gained from a probable defeat and the ensuing casualties. The Germans decide to withdraw.


This puts them in a good position to cover the flank, yet keeps them out of the line of fire of the German LMG squad and the infantry gun. From there, most of the squad can also target the jeep and so once again it becomes the subject of a barrage of small arms fire.

There is only so much fire a jeep can take. This time it's unable to weather the storm. The Americans have rolled four 6s in the fire dice and the end result is catastrophic. The fuel tank ignites and the jeep explodes in a ball of flame, killing all the passengers. The Germans lose a rifle team and their junior leader. That's enough to bring German morale down three points to five.

So, the German attempt at a coup de main comes to a grisly end, after a very entertaining sequence of play. That was a wild ride and one that delivered more than its fair share of cinematic moments.


That was a short, but highly entertaining game. On another day the Germans may well have succeeded with their coup de main. All the elements were in place - a pre-game barrage, a captured enemy jeep that may have deceived the Americans when they first tried to target it, and not least, a vehicle capable of moving very fast along the roads. Like all these things it also needed a little bit of luck, the one element you cannot plan on. Alas, for the Germans it was not to be.
Dave reflects on how things unfolded:
'Well, the jeep got close, but the Americans defied the odds to walk through the barrage, deploy, recognise the jeep immediately, and then use a triple phase to chase it off and then destroy it. With the failure of that move, victory once again becomes impossible and so I chose to fall back. I have learned that sticking around trying to deplete the defenders for the next game doesn’t really work, as the force morale difference at game end means that they get their casualties back, so I call it a day rather than write down another platoon.'
All the German casualties came from the support squad and so despite the drama both the American and German core platoons come away from this encounter without losing any of their men. The German victory in the first game of the campaign turn and their light casualties in this one has gone some way to improve the men's opinion which climbs from -6 to -4. The Division commander's outlook does not improve though and he goes from Aggressive to Bitter.
The American men's opinion suffered as a result of the defeat on Map 2 but was buoyed by this victory and so it stands at +3.
We now move to Campaign Turn 7 which is the first turn of the second day of the campaign. This will see the level of German support increase for their second attempts to take any of the maps and so the Americans can expect to face increased pressure in the turns ahead. You can find out what happens next in this report.
You find reports for all the games in this campaign and many other campaigns on the Chain of Command Campaign AAR page here.
The captured American jeep provided a lot of suspends, nice AAR
ReplyDeletecheers John
Thanks John, it could have gone either way, so it make it very enjoyable.
DeleteAnother great report and the jeep provided a lot of drama.
ReplyDeleteThanks. Yep, no doubt the jeep added a fantastic narrative.
DeleteThat must have been huge fun to play. It was fun to read, too.
ReplyDeleteThanks Carole. I think at one point Dave even said, 'don't let anyone tell you that CoC isn't a lot of fun' and he was absolutely right.
DeleteGreat read, that was an audacious plan by Dave, one those where if it paid off goes down in game legend.
ReplyDeleteThanks Phil. I think that's so true, it made for a great story no matter what the outcome, but it certainly would have been legendary if those cheeky Germans had captured all the jump-off-points.
DeleteSo close yet so far. A terrific read.
ReplyDeleteYes indeed, it could so easily have gone the other way.
DeleteVery entertaining with the "Jeep" nearly making it!
ReplyDeleteIn this sort of campaign game, where casualties are carried forward from game to game, would it not be a tactic to use the various heavier guns to shoot from extreme range to wear down the other side while your own men stick to heavy cover, thus making it easier for the next game turn?
In this particular game, the 75mm gun could blast away for a few more turns before the Germans withdraw. Even a few additional American casualties could be useful, particularly if they are officers/NCOs etc.
Yes that's a valid tactic and it was one reason I made sure my deployment was out of sight of the gun and the LMG squad. In previous games I've held off deployment for as long as possible to avoid just those sort of casualties. In the game before this one the deployment on my flank forced me to respond and I did so in the sight of German guns and paid the price. This time I was determined not to allow that to happen.
DeleteAnother great AAR! The Germans had a daring plan, it could have paid off, but as you say, you have to keep luck in mind.
ReplyDeleteOnce again another excellent report, thanks for the entertainment!
ReplyDelete