

I scratchbuilt a simple Norman church many years ago and have always intended to upgrade that to something more elaborate.

The incentive was the start of the 29, Let's Go! campaign for Chain of Command and the requirement for a church as a central terrain feature in the third scenario Flanking St Germain-du-Pert.
The Sarissa church is a substantial sized building and should make a great feature on any table. Given every village in Europe features one or more churches I expect it will get much use.

The base kit goes together very quickly and everything fits well. It boasts a couple of clever design features that make it particularly gamer friendly. Firstly, the bell tower attaches to all four sections of the roof and becomes a 'handle' whereby you can lift off the entire roof in one piece. Without that feature accessing the interior in the course of game would be a laborious and messy business. The second is the ability to remove the top section of the bell tower in order to place a miniature in there. Removing the roof would make access tricky and would require long and delicate fingers. A simple but clever solution that makes it very functional for gaming.

While a lick of paint would make the model perfectly serviceable in its current form it does have some of those distinctive features so common to MDF laser kit buildings. I like to see a building in this form as the base model to which I can add features that make it look a little less like one made from MDF.
There were three areas in particular I wanted to focus on. Firstly the roof tiles. These are easy to embellish and Sarissa make sets of pre-cut tiles. As it happened I still had a number of pre-cut tile sheets from Charlie Foxtrot Models and so I planned to use those in this instance.
Secondly, the walls lacked texture and character and so I planned to use household filler to create this.
Finally, I wanted to do something about the windows. These are large and add much character to the church, however they also reveal the interior of the building. These are normally stained glass windows, however stained glass only works when you are in the lower light source, in other words within the relative darkness of the church when the exterior sunlight illuminates the windows. It doesn't happen in reverse, in fact it's often very hard to tell what a church's stained glass windows look like from the exterior. Somehow I wanted to suggest stained glass windows but without the artificial look of having them as bright as they appear from the inside. I printed out images of stained glass windows from the web and then painted over them with a dark wash to tone down the colour. I experimented with a few colours and techniques.
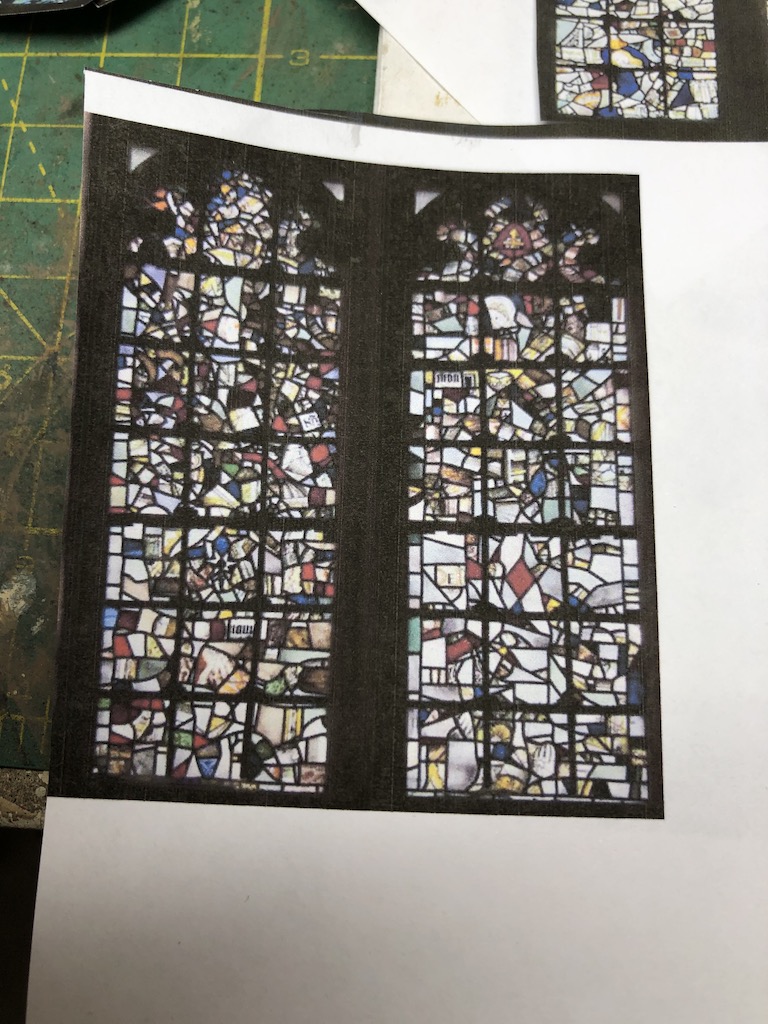

I then propped these inside the windows to see what worked best. My initial preference was for the darker grey one in the middle, but decided to wait until the exterior was painted before making a final decision.


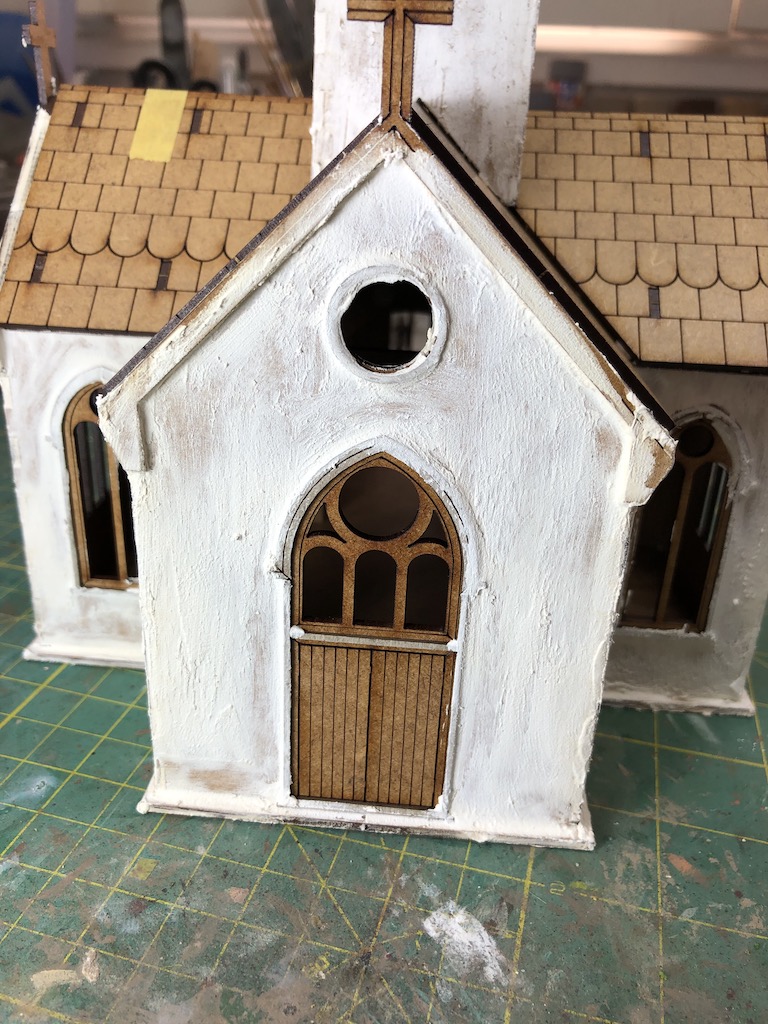
As planned the exterior was coated in a thin layer of general purpose filler. In hindsight I should have done this before I attached the grey board features around the windows as I needed to do a fair bit of cleaning up around the windows once it had dried.

Here you can see the filler applied, but before cleaning off the excess around the windows and other features.


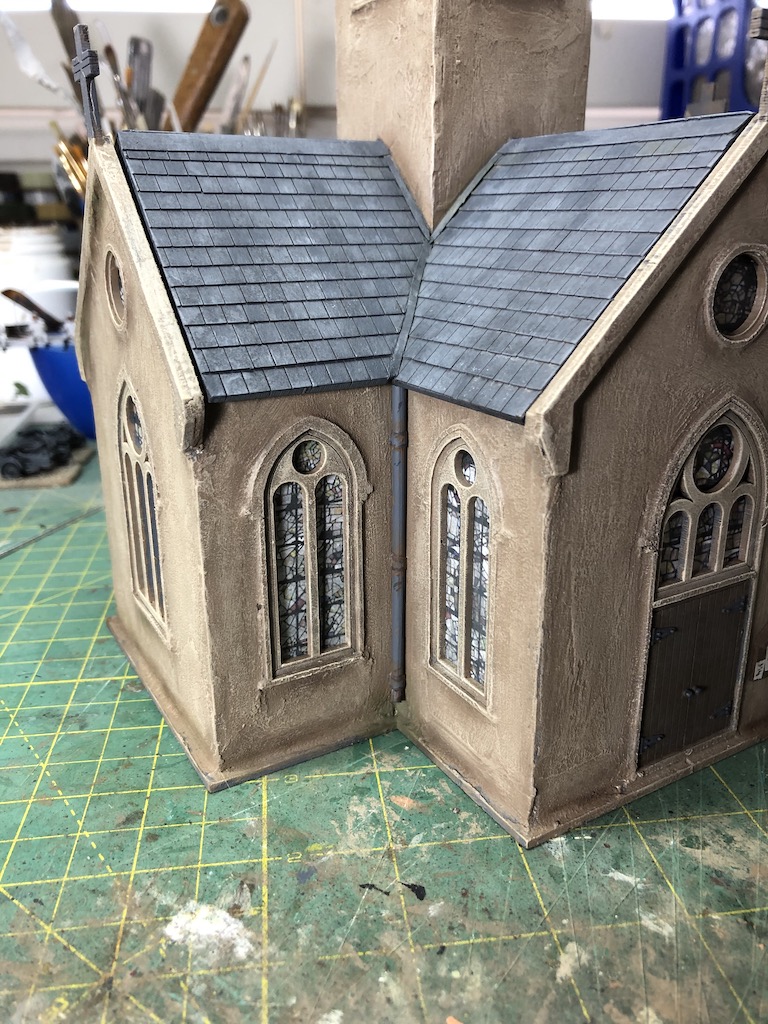
While that was drying the roof tiles were applied. There's quite a lot of roof, so this was a major job.


I added flashing to the areas where the roofs joined each other and where they joined the bell tower. I used off cuts from the sheets of pre-cut roof tiles to make the flashing.


Once the roof was completed I went back and cleaned up the filler around the door and windows and then gave it a light sanding where the texture was too pronounced. It was at that point I wanted to begin adding additional detailing to the doors.

I used plastic card and rod to scratch build some large, cast iron hinges. I cut the plastic card into triangles and then sanded the point into a rounded shape. The large bolts were made by cutting small pieces of plastic rod and gluing these in place. For jobs like this I find my Cutter from North West Short Line invaluable.


An additional length of rod was added to represent the actual hinge itself and then these were glued in place on the door.

Lastly a piece of discarded plastic sprue was rounded off with some sandpaper to make up two door knobs.


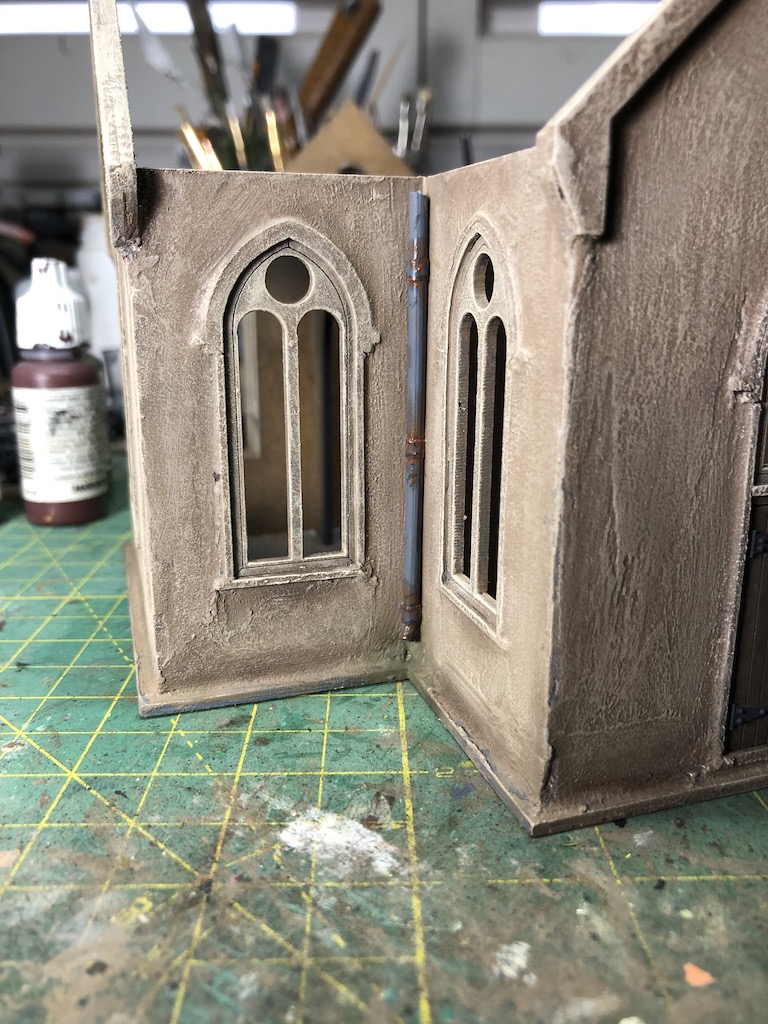
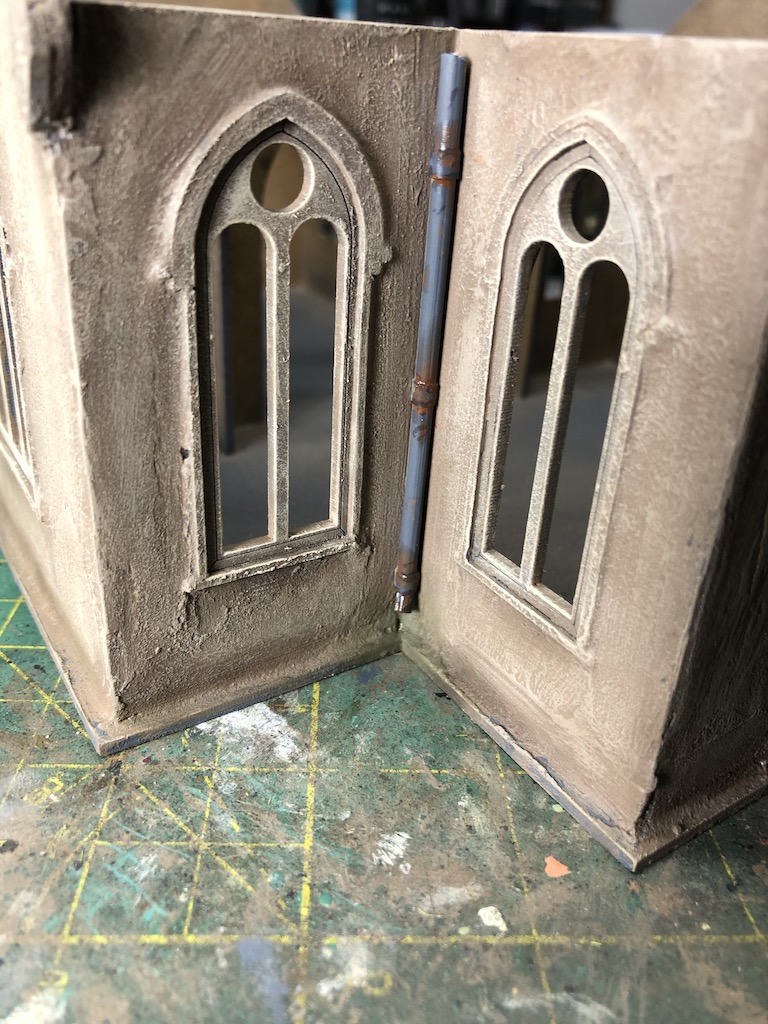
One other missing feature was guttering and drain pipes. The guttering wasn't going to be practical, but four downpipes would be easy enough to make. For these I used bamboo skewers (great for BBQs but also a very handy terrain making material). The Cutter enables cuts to be made at various angles and so I made small pieces to represent the parts of the pipe that direct the water away from the walls. I often find it's these smalls bits of detail that can make such a difference to the appearance of a model.


The next thing was to make up the attachment points and for this I simply wet strips of paper in diluted PVA glue and wrapped them around the skewers.


These were then glued in place in the four corners of the church.


As the bell tower can be opened up to place a miniature and the windows won't feature any stained glass I thought it worth adding interior detail. Strips of balsa wood were used to create a wooden floor and simple interior detailing around the windows.


As you can see from the picture below, with four large windows and such a small space plenty of light gets in to reveal the interior.


With the assembly work completed it was time to move to the painting stage. First up the whole building was primed using a spray can of RustX all surface grey primer. I find this works very well for a multi-medium project like this.

The walls were then painted with Dulux emulsion Deep Bamboo as the base colour.

This was followed by a dry brush with Arava.


The roof tiles were painted with various shades of grey to break up the uniformity of a single colour or shade.

This was then tied together with a very dilute dark grey wash.


Finally a very light dry brush with a pale shade of grey.


As I mentioned earlier, the interior of the tower has been designed to be open and easily accessible - no doubt anticipating the placement of snipers, forward observers or LMG crews. It's easy to see inside, even with the roof on and so I wanted to add further detail to the interior beyond the wooden floor. For this I used embossed wallpaper printed with brickwork (I bought several A4 sheets off eBay a few years ago). This is easy to use and very effective. Simply cut to the desired shape, wet with diluted PVA glue and put in place. If you allow the glue to soak in for a minute or two the paper becomes soft and is very easy to press into corners and recesses.


The drain pipes were painted and then aged with a bit of rust (a wash of diluted rust coloured oil paint).
The door and door furniture were also painted.

The images were printed out and given the wash. Then they were glued onto some card before cutting to shape.

They were then glued to the church interior using PVA glue.


They still look quite bright, however the pictures above were taken under the bright light I have at the workbench. When I take pictures with more subdued and natural lighting they look less vibrant, as you can see below. I also like the way the softer colours blend in with the building .


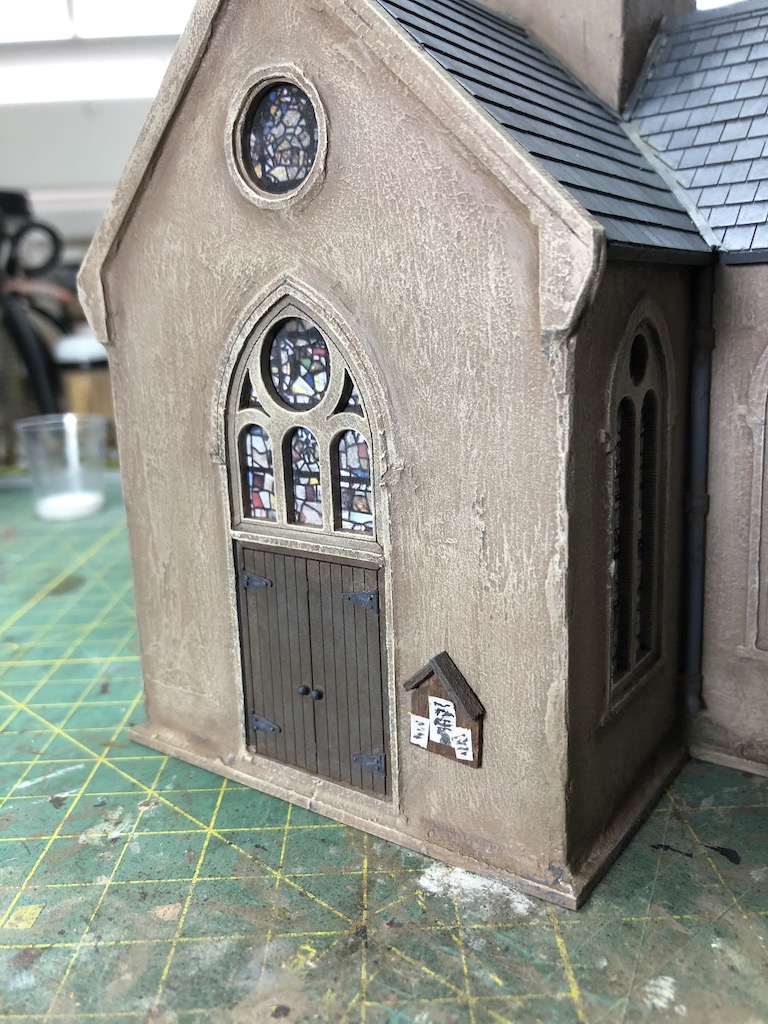
One other small feature I wanted to add was a noticeboard outside the main entrance. I made this up from balsa wood and then glued on some hand painted notes. It's funny how the small details can make such a difference.

The only real problem I've had so far has been a small amount of warping on two of the outer walls of the church. I suspect the MDF hasn't liked the coat of filler and paint and with nothing to hold it in place it has warped outwards slightly. The best anchor point to correct that would be to glue it to the roof, but that would mean the roof couldn't be removed, which somewhat defeats the object. I suspect it's something I'll just have to live with.


The stained glass has blocked off all the windows and it made me think about what I might do with the interior. Now I was not about to start scratchbuilding an entire and elaborate church interior, but it's inevitable that the church willd be occupied at certain stages of games and so I wanted to give it at least the semblance of an interior. I decided to print out another set of stained glass windows, but this time I would leave them without a wash, in other words as bright as they should appear from the interior. I glued these on the interiors of each window.

I've kept this very simple, but it does give the interior more character.

The first use of the church was for our 29, Let's Go! campaign which called for the church to be surrounded by a low wall. I wanted to create a suitable base but not one that was permanently attached to the model. I didn't want to limit its flexibility for use in other setting plus it would make it a real headache to store. So I made a separate base specifically to match the campaign map but one that could be adapted easily in future for other uses.


With that I was calling it complete and ready for use in the campaign. Here it is in a game setting:


The grey tombstone/memorial in the churchyard came about when accidentally I broke off one of the crosses on the church. Instead of repairing it I decided to re-purpose it. Using some off cuts of the cork wall tiles that I used to make the wall around the church I made the simple memorial and mounted the cross on top.


Simple beautiful work! Love all the special details and even the stained glass effect. I bought the blown-up version of this model in 28mm. Modified the steeple to match the one in Saving Private Ryan. Again great effects.
ReplyDeleteThanks Greg, I like the sound of what you’ve done with yours, truly cinematic in every sense.
DeleteReally wonderful work. I also enjoy "improving" the Sarissa kits although I don't quite go to level that you have done here. On the warping, I quite often prime the inside of the building too. I also base a lot on MDF and I find that if I prime both sides it often doesn't warp as much if at all.
ReplyDeleteThanks. I primed before painting but after I applied the texture, I think that was the problem. Lesson learnt!
DeleteYou have done a great job on this kit. Your extra miles put in really paid off.
ReplyDeleteThanks Jonathon.
DeleteYour attention to detail really brings this to life. It is a wonderful piece of scenery.
ReplyDeleteThanks Carole, glad you like it.
DeleteLovely work, the downpipes and windows add so much to make it believable.
ReplyDeleteThanks Doug, I’m a firm believer that it’s often the small details that can do so much to lift a model.
DeleteDamm, you must be retired and/or single to do this kind of work! Looks amazing but I gotta ask, how long did this take to do? I’m envious of the dedication to detail and patience you must have. Great work, inspiring...
ReplyDeleteHaha, just read this to my wife who had a good chuckle and says to tell you she begs to differ on both counts. I do have more time than most, as I no longer work full time, but I didn’t find this particularly time consuming. I’ve been modelling for many years and I’d say the combination of experience, the right tools and working reasonably fast means this is not as time consuming as you might think.
DeleteThe Sarrissa kit is a purse, no sow's ear but you have made it into a Gucci, magnificent.
ReplyDeleteVery flattering and very eloquent, you have a wonderful way with words. My wife only wishes I could do the Gucci work on something she’d like to be seen with!
DeleteGreat stuff as usual. I Love Sarissa except that they have a lot more in 28 that I would love to see them design as a 20 mm kit also. E-mail after e-mail has elicited no response! I just wan the RR station kit in 20 mm! Is that too much to ask? Apparently it is.
ReplyDeleteThanks Dick. They seem to do the 20mm work in fits and starts and for as long as we 20mm folk are treated as the poor cousins of the miniatures hobby I guess we may always find our wishes at the back of the queue.
DeleteA superb piece of scenery there! Great article too, thanks for the tips.
ReplyDeleteCheers
Matt
Thanks Matt.
Deleteexcellent !! -mdf models are so much improved by a little work on them.
ReplyDeleteThanks. I agree and I’ve been inspired by so many others who have transformed MDF models.
DeleteGreat work on this church, the little details like the down pipes and the notice board really help make it seem more real. I also like how the base and walls work together, even in war time the church grounds would be comparatively well kept.
ReplyDeleteThanks, I think it’s often the small details that can lift a model and give it more character. Agree about the church grounds too. I think war leaves destruction in its wake and many European villages were unscathed until they were in a combat zone. In our case the war had not come directly to the village until June 1944.
DeleteSmashing! It's beautiful, and as I'm embarking on my own wargaming board journey, this kind of in-depth walkthrough is pure gold...👍 Keep up the excellent work - This blog is now on my list!
ReplyDeleteCheers,
Gustav
Thanks Gustav, I’m a great admirer of your modelling, you post some beautiful stuff, very inspiring.
DeleteHi! i used stained glass windows from sites I found by googling "Stained glass windows" scaled them and printed them on regular paper. They came out well - wish I could post a photo here.
ReplyDeleteYes, that’s exactly what I did, there’s plenty out there!
DeleteWow. Great job on this church. You’ve really shown how going the extra mile to make subtle enhancements really goes a long way to making the bare mdf model really unique and stunning. 😀
ReplyDeleteThanks Stew. The base model isn’t too bad but like most MDF it benefits from extra detail. It also makes the model more unique and adds more character to the table, I think it’s well worth the effort.
DeleteA beautiful piece of work.
ReplyDeleteReally nice work. What did you use to apply the layer of filler to the exterior walls? I have tried an 1" brush but that leaves too mant brush strokes.
ReplyDeleteThanks. I used a small artists spatula and spread it lightly (like butter on toast).
DeleteA really informative, useful and inspiring post. Like many here, I think the small details do so much to lift the model into something quite exceptional - I particularly like the noticeboard - such a little detail but one that makes such a big difference! With the windows I wondered whether you had tried printing with increased transparency to subdue the images?
ReplyDeleteBravo!
Hi! Really great work you have done. I'm currently working on my church and I like the idea about the stained glass. Do you happen to have the reference where I could print these?
ReplyDeleteI’m afraid I can’t recall it was a few years ago but to be honest a quick Google search will throw up lots of images and you should be able to find something suitable.
Delete