On reflection I've wondered whether that's a flawed approach to this map. Perhaps the Germans are better off making this primarily an infantry assault and providing them with the brute force they might need to bludgeon a way through the Dutch? It could either create a breach or inflict enough losses to compel them to withdraw.
That led me to think that this time I should consider selecting support options heavy on firepower or disruption - like a PzIV with a 75mm gun; a pioneer squad with a flamethrower team; a leIG18 infantry gun, or a pregame barrage. The mission would be to focus on a section of the enemy's line and blast a way through. The idea was very tempting. However a couple of factors work against it. First, the Dutch can build a solid defence utilising Kazemat pillboxes and entrenchments which would entail a frontal assault and a fight that would be attritional. Second, time is at a premium, the longer the attack takes the greater the chance the Dutch acquire the two CoC dice they need for victory.
One thing is clear, the Germans cannot afford another costly defeat. The fresh platoon that fought the last game was badly mauled. To repeat the experience with another platoon and yet fail to capture this map could put the success of the whole campaign in jeopardy. To make matters worse, a Dutch victory here would buy them the valuable time they need for their engineers to arrive at the bridge on the final map. If they can begin setting their demolition charges before the Germans have reached it, the greater is their chance of destroying the key objective of the campaign.
All this is a long winded way of saying that I've decided to make another attempt at punching through with vehicles. That said, I will take a slightly different approach this time. The first task will be to locate and destroy any AT guns. That would be a job for the infantry supported by a PzIV. Once that major threat is removed then the Germans would seek to push a fast exploitation force of armoured cars across the table. If anything has been learned from the last game it is that such a plan is not viable for as long as the Dutch have a potent anti-tank weapon in operation. The initial task is to find it and put it out of action.
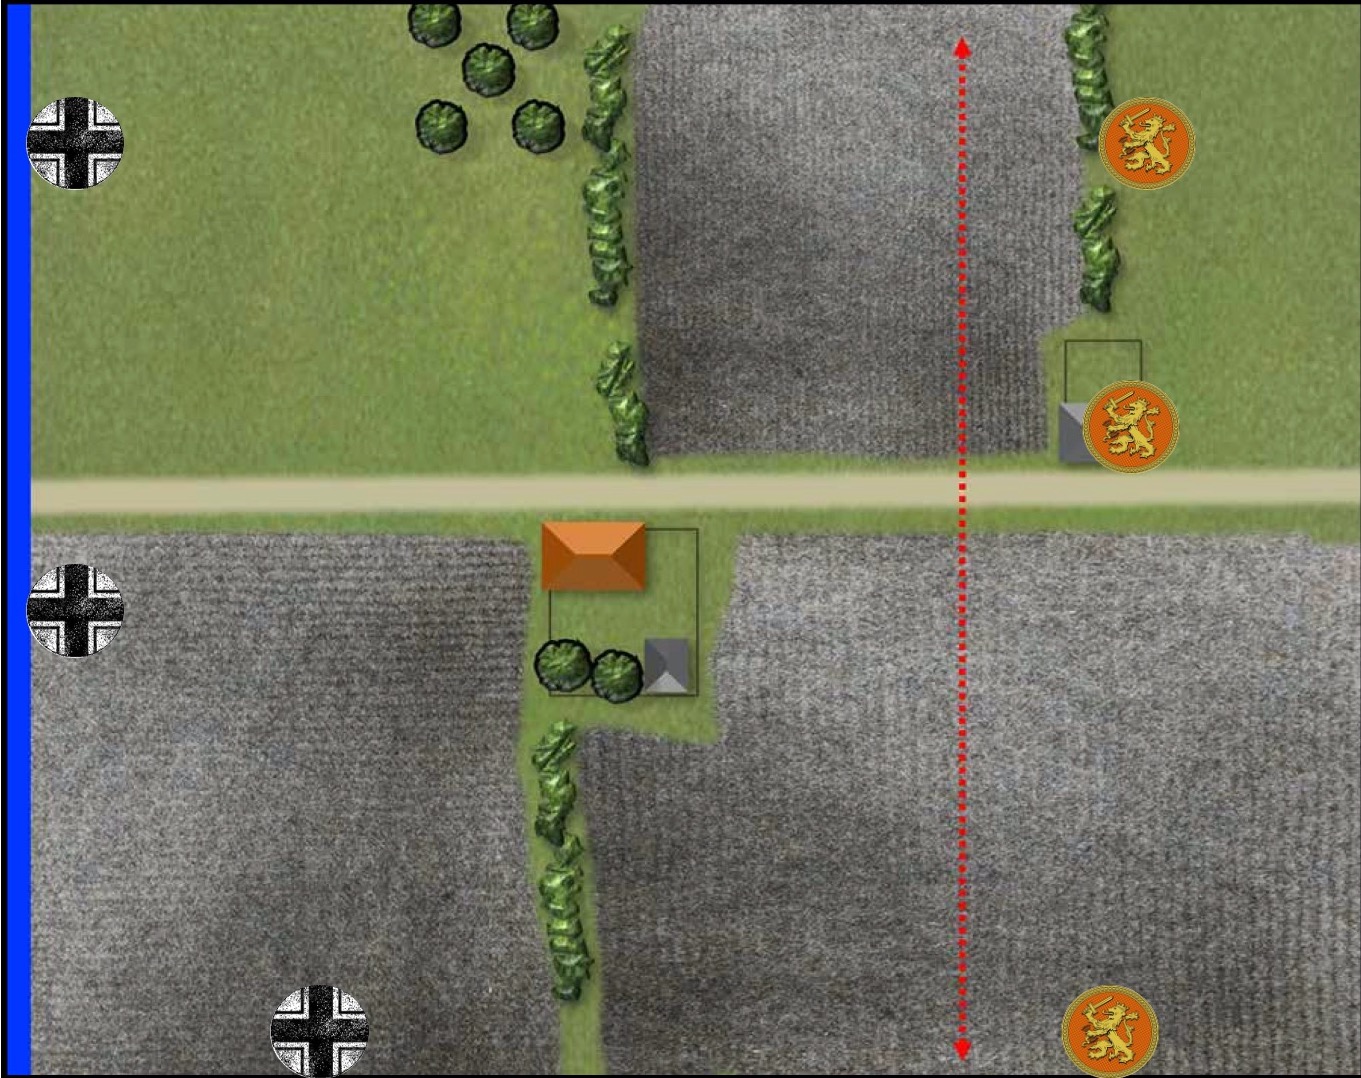
We will begin with German force morale at nine and Dutch at eight. The Germans start with two free moves in the patrol phase and this slight advantage allows a jump-off-point to be placed along the right table edge. It means a little less open ground for the German infantry to cross before finding cover at the hedges.
The Germans receive 3D6+2 supports. We each make our support rolls secretly and I roll eleven, so have thirteen points available. This gives me enough to focus on the key supports I want - a PzIV and two Sdkfz221 armoured cars. With the remaining two points I opt to improve my command options by adding a red command dice for extra tactical flexibility (note: when relevant I will include the number rolled on the red dice in brackets).
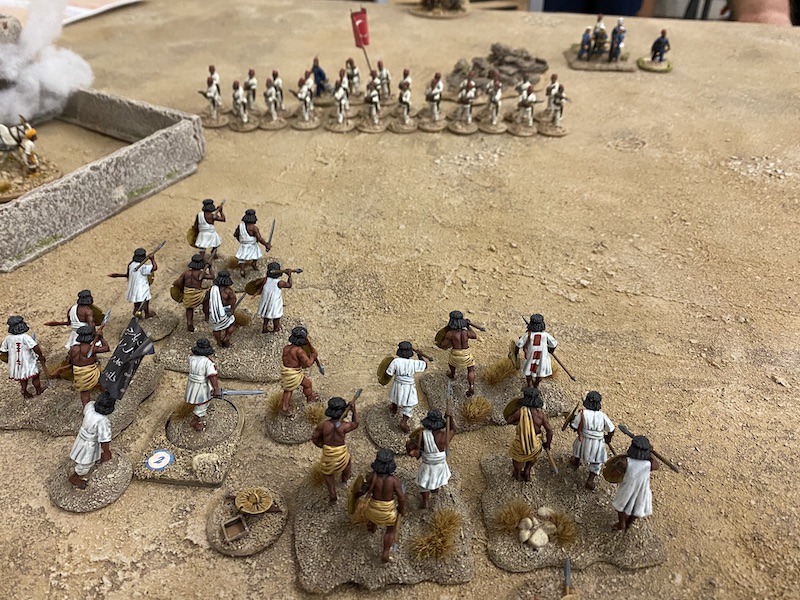
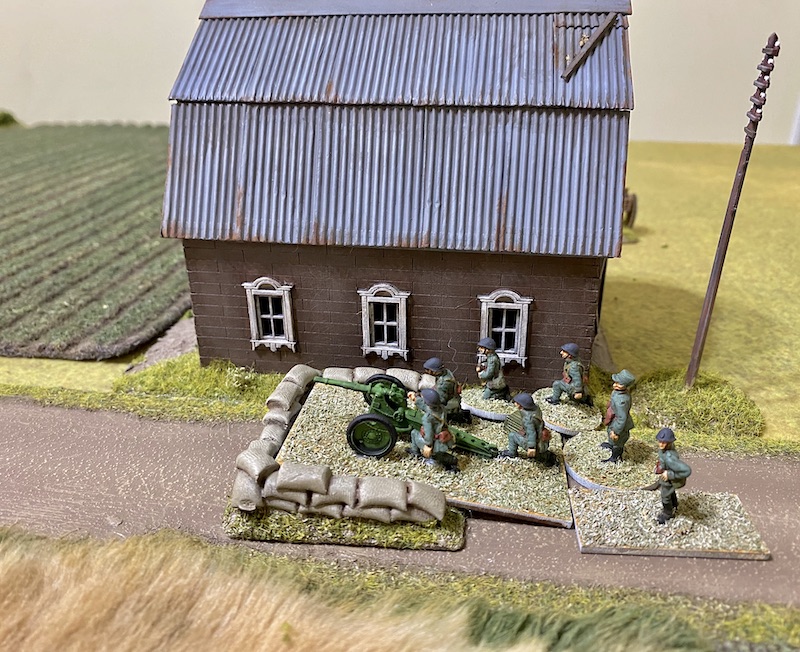
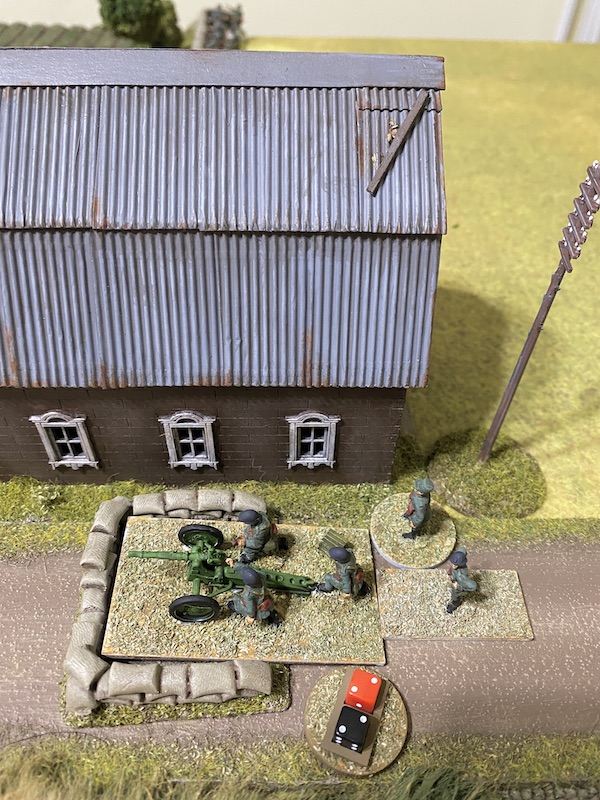
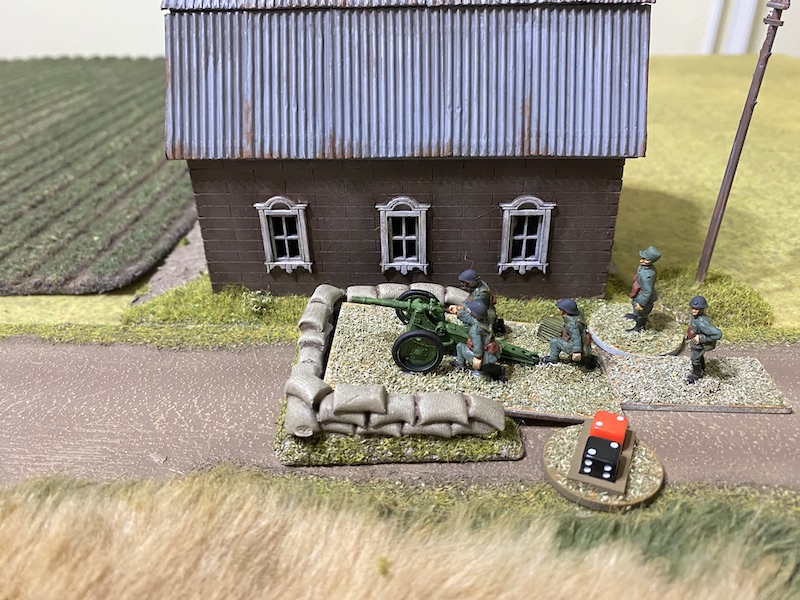
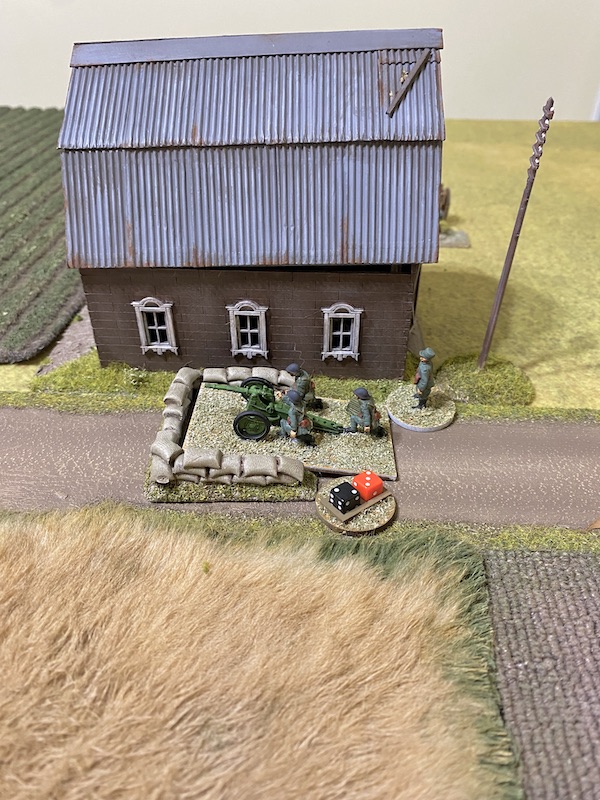
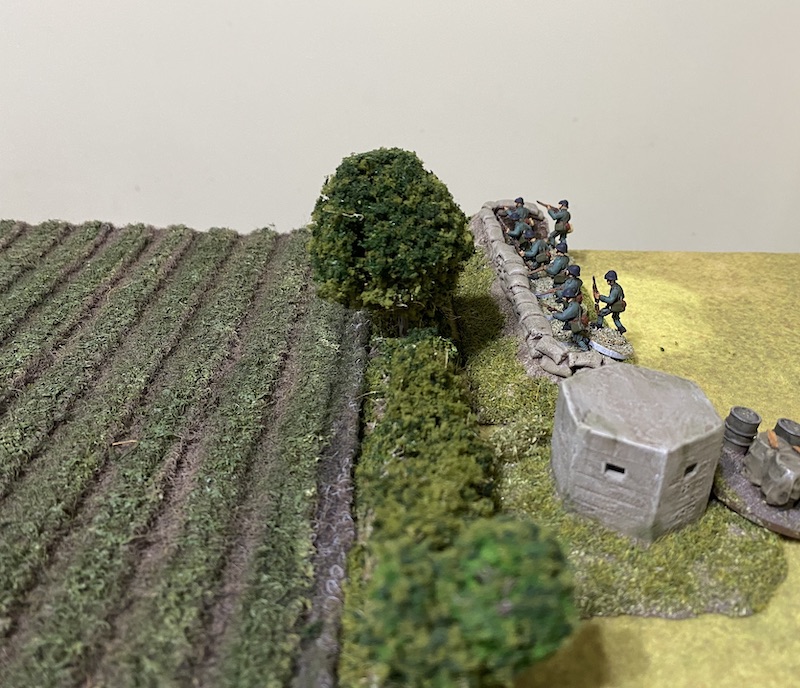
The Dutch receive 2D6+1 and Dave rolls eight. That gives them nine plus the seven for the difference in force ratings for a total of sixteen. He selects AA guns; an Adjutant; a support mitrailleursgroepen, and, a Bohler 47mm AT gun. He receives two bonus entrenchments for holding the map and adds to this a Kazemat and another two entrenchments.
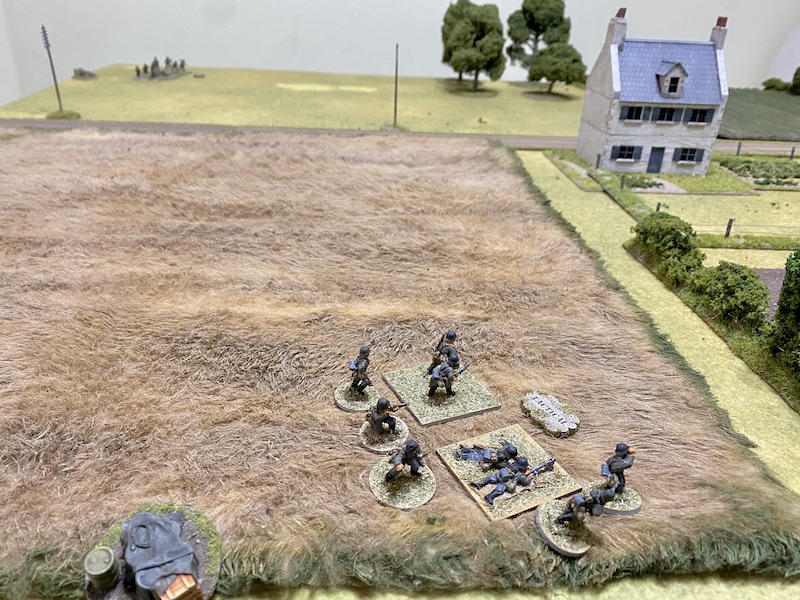
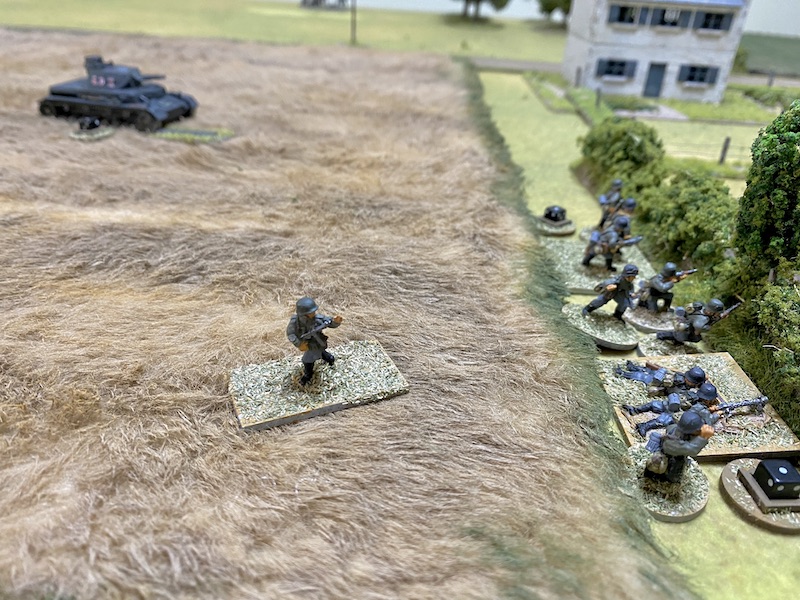
The Germans hold the initiative and two squads deploy tactically. One on the right using the forward jump-off-point.
The other, on the left, from the rear table edge.
The first round is right on target and inflicts three AP strikes. The tank's armour is four but manages to make only a single save. While that's not enough to knock it out, it does inflict two points of shock on the crew and, perhaps worst of all, does sufficient damage to the running gear to immobilise the tank for the rest of the game. This is not a good start.
The following Dutch command roll is 65442. Clearly the gun commander has not grasped the urgency of the situation, but fortunately for the Dutch the platoon Luitenant is alert to the opportunity. Eager not to let it pass he comes forward and orders the crew to fire again.
Once again their aim is good. The hit inflicts two AP strikes but this time the German armour deflects the round without any further damage. Well, the tank has survived, but only just and for how much longer?
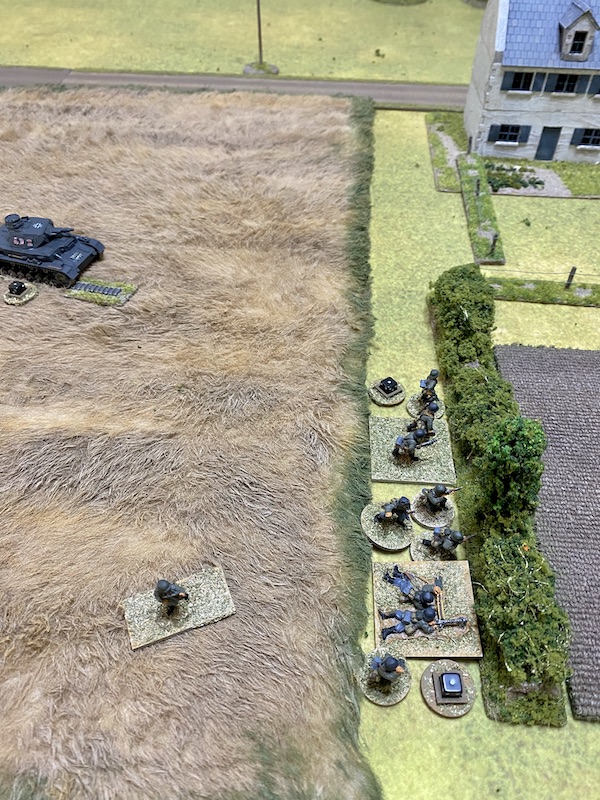
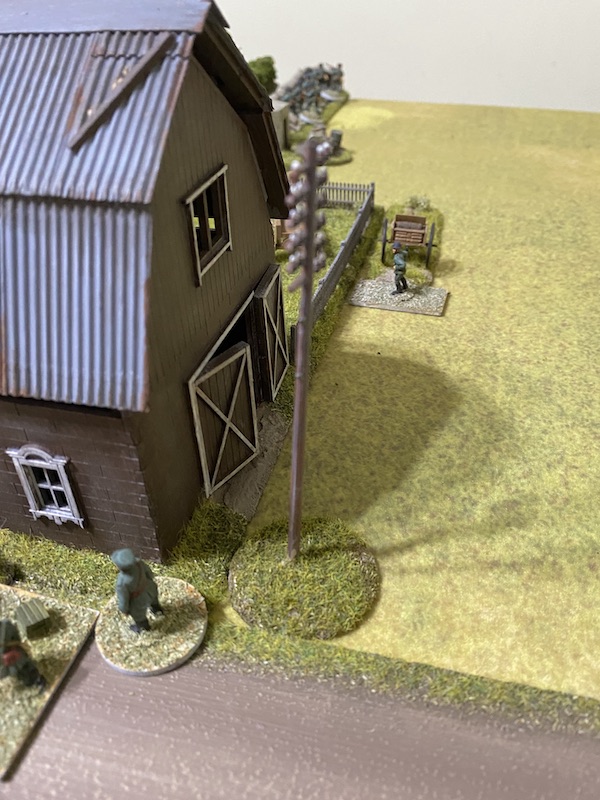
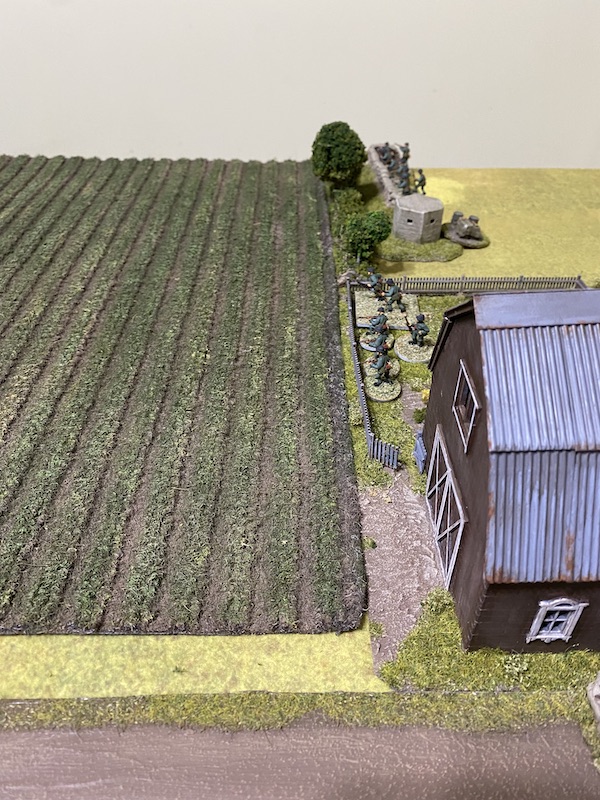
A second mitrailleursgroepen deploys into the back yard of the barn.
The men open fire at the schützen squad behind the hedge.
The unexpected burst of fire inflicts a point of shock on each team.
In the German phase the PzIV commander rallies some of the shock from his crew before ordering the gunner to fire HE at the anti-tank gun.
The shell explodes to deadly effect and the crew lose two men. This sets up a crucial duel that could have a major impact on the outcome of the game.
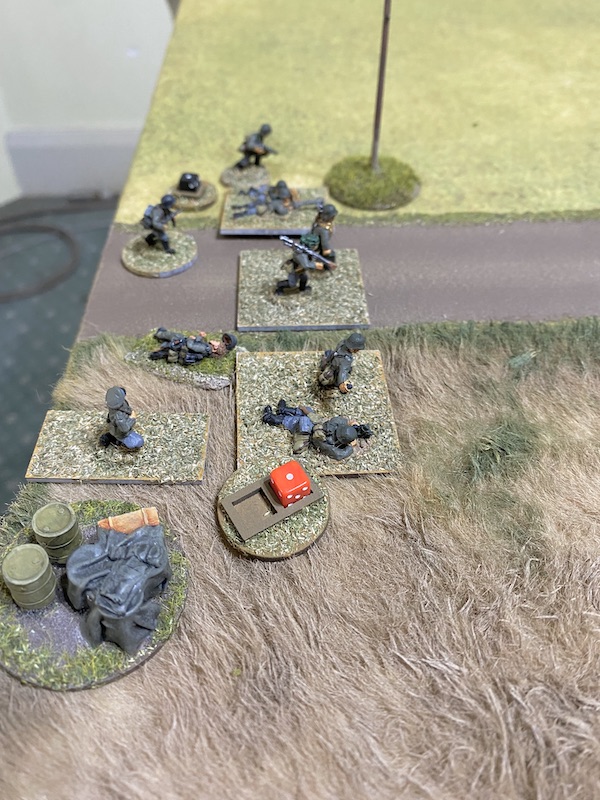
The schützen’s Feldwebel deploys near the hedge.
He's close enough to rally the shock off the squad and have them return fire at the mitrailleursgroepen (unfortunately they can't target the AT gun because their line of sight is blocked by the small barn behind the farmhouse).
Their fire is well aimed. The Dutch lose three men and suffer two points of shock.
On the left the schützen squad continue to move forward toward the woods.
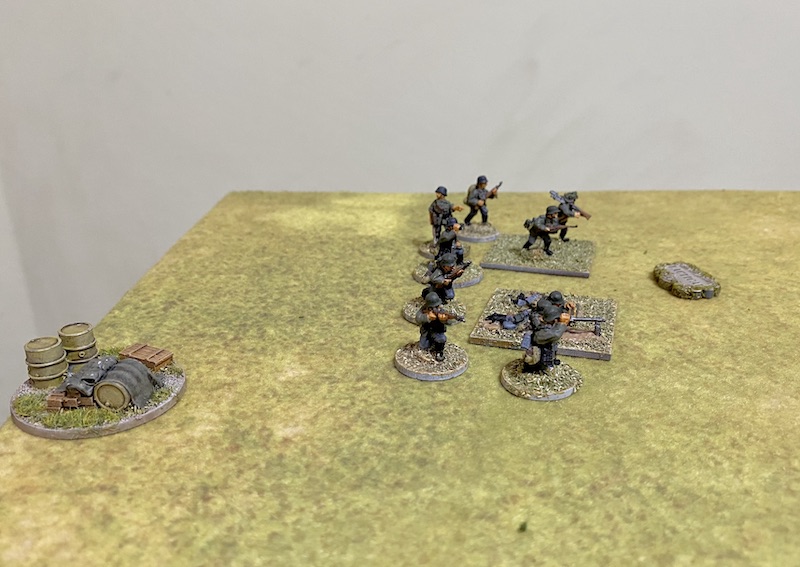
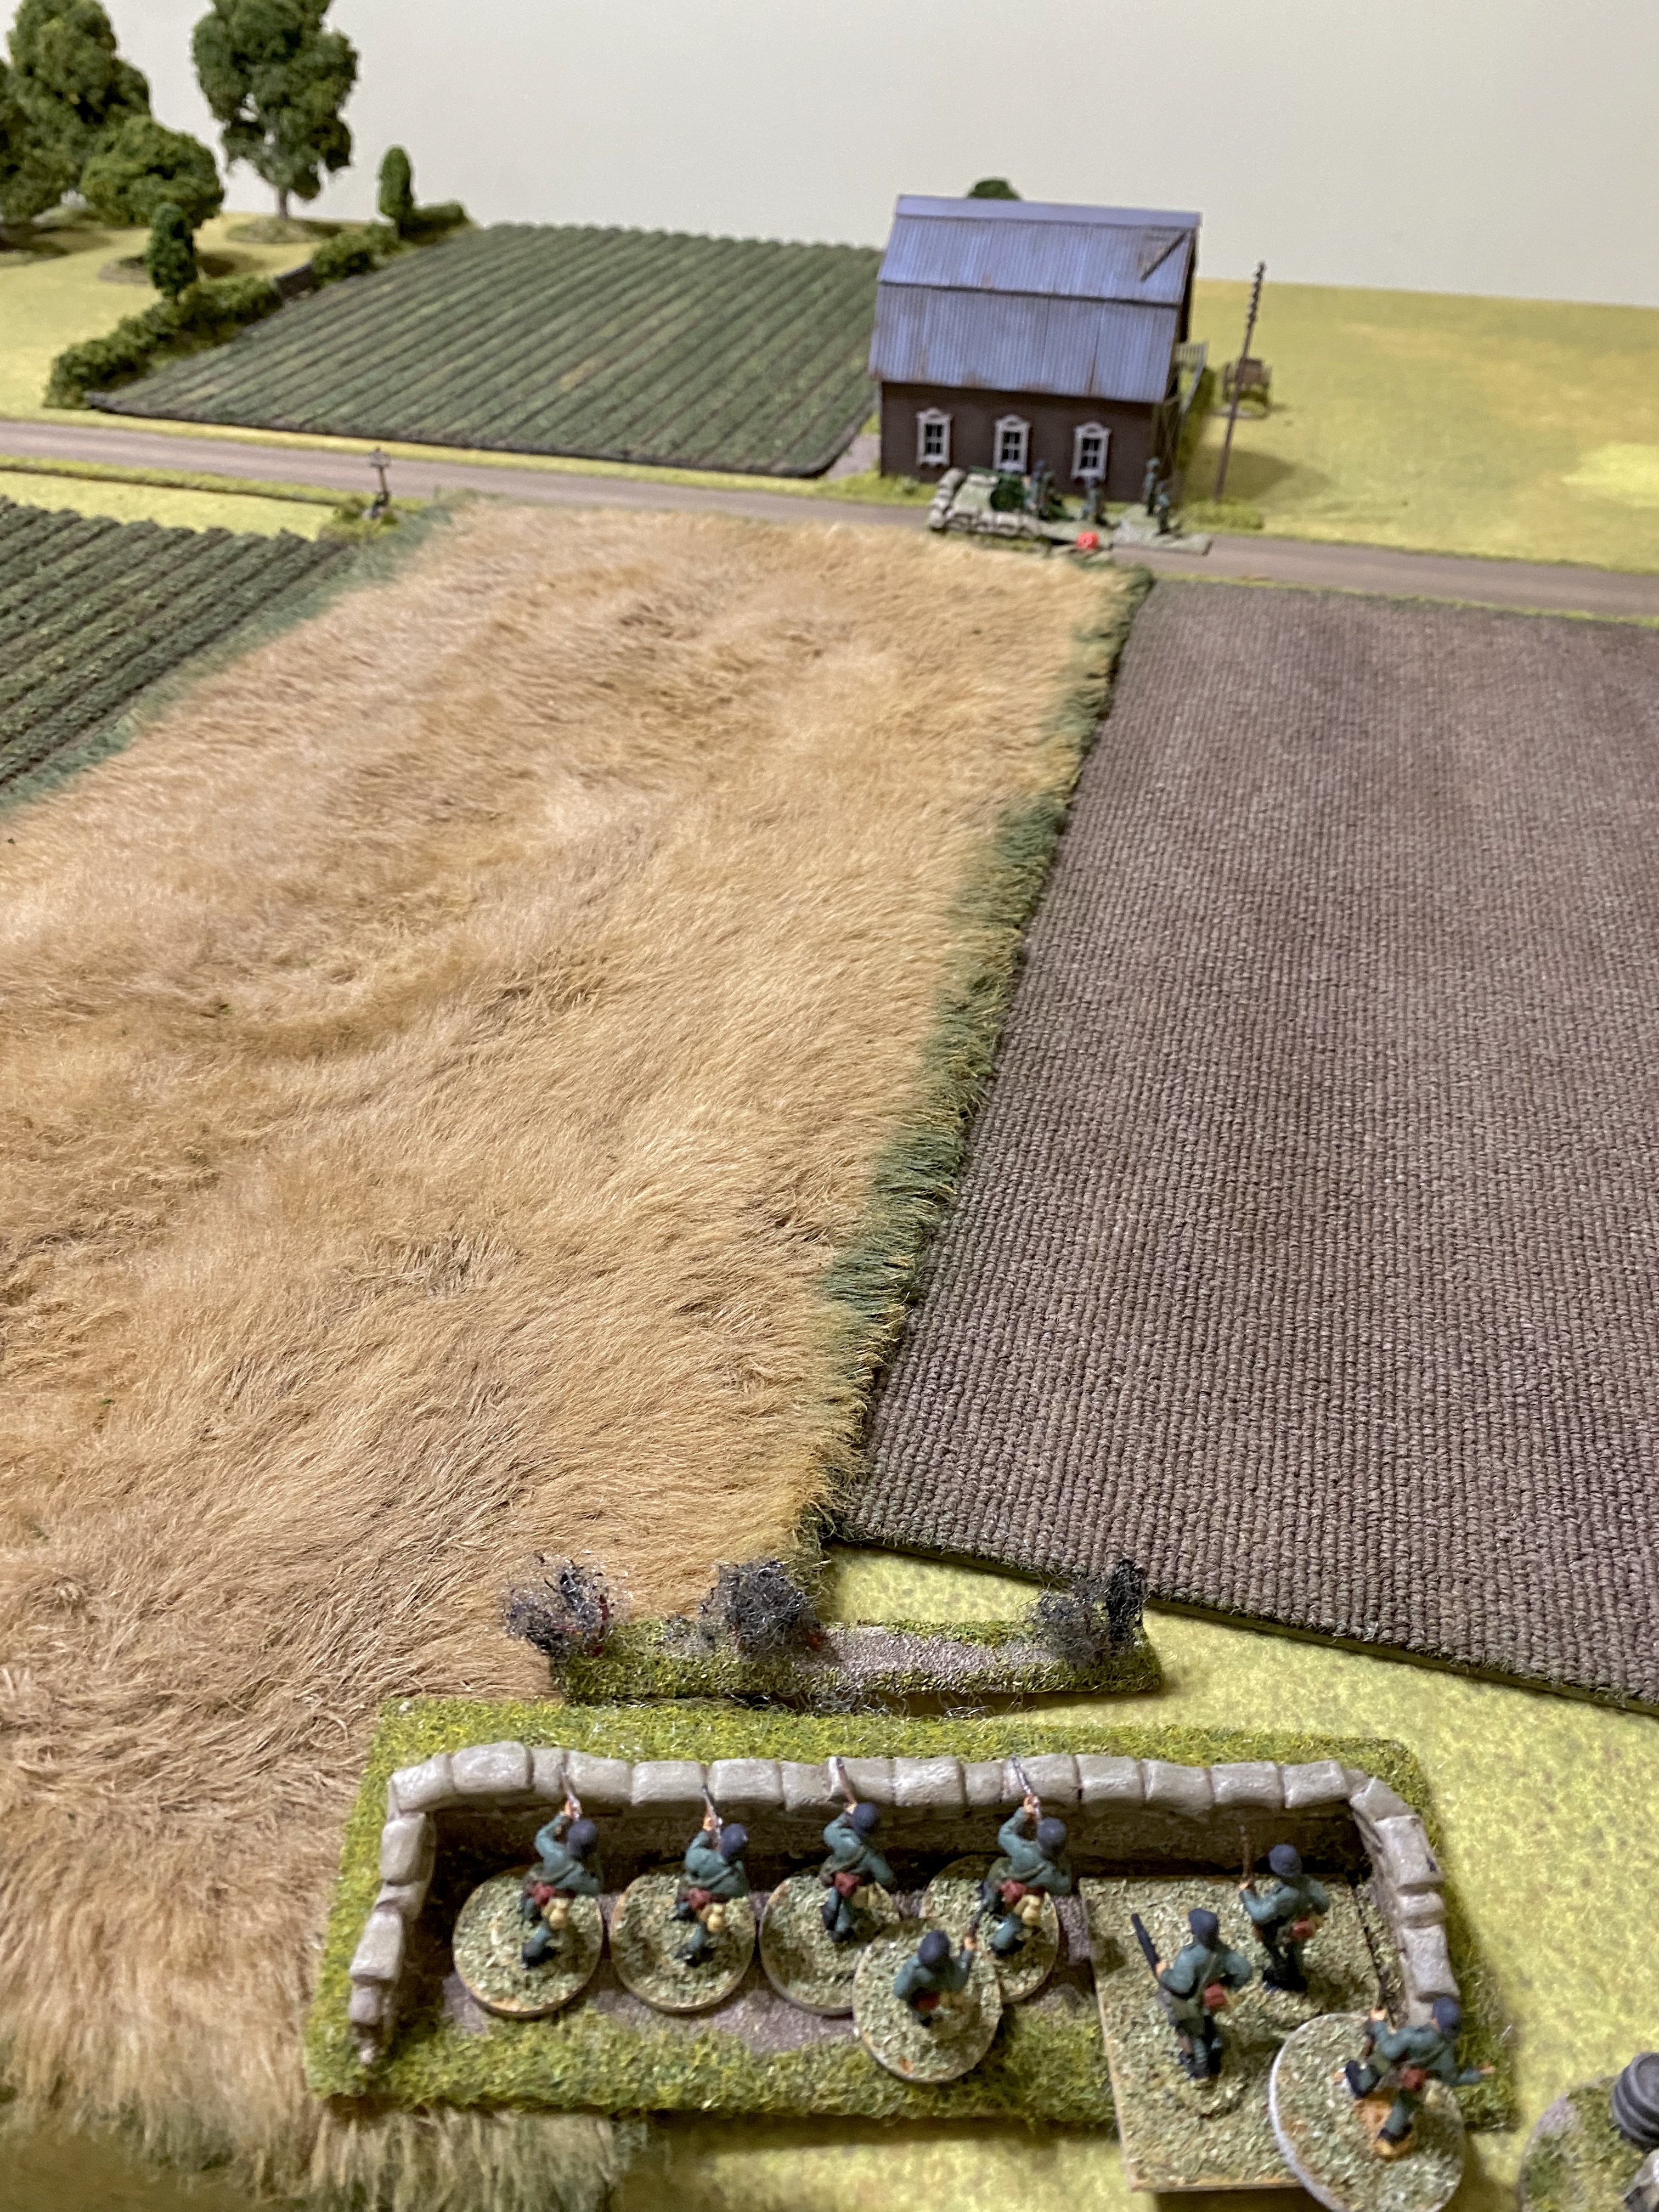
With the anti-gun located I now want to do all I can to eliminate it and so the platoon's third schützen squad deploys on the road.
While it seems like an exposed position the Dutch mitrailleursgroepen to their left cannot see beyond the hedges. It's still not an ideal location, but taking out the AT gun is critical, so I’m prepared to run the risk.
They open fire. Despite the long range and hard cover they manage to inflict another casualty on the crew.
In the Dutch phase the sergeant at the barn rallies two points of shock from his men.
Meanwhile the Luitenant orders the gun to continue targeting the PzIV.
Another 47mm round strikes the tank but fails to inflict any further damage. This is turning into a frantic exchange of fire with much hanging on the outcome.
The Luitenant then has the mitrailleursgroepen behind the barn join with the group at the Kazemat to target the schützen behind the hedge.
The bloody exchange of fire between these two opposing infantrymen continues unabated. The Germans lose three men and suffer a point of shock. Fortunately neither of their NCOs are hit.
A third mitrailleursgroepen deploys entrenched on the Dutch left flank.
From there they can target the schützen squad in the road. It's at effective range but the Germans are exposed in open ground.
One of the LMG teams loses a man.
In the German phase the PzIV commander rallies off the remaining point of shock and has the gunner target the AT gun once more.
This time the fire is much less effective, inflicting only a single point of shock.
The elimination of the AT gun is vital and so the platoon's Leutnant brings on the 50mm mortar team and has them target the gun.
The crew suffer another point of shock.
The Leutnant then orders the schützen to fire at the same target.
Despite ten hits the crew are protected by hard cover and survive unscathed. That was a disappointing round of German fire and it will need to be much more effective if the gun crew are to be eliminated.
On the right flank the Feldwebel moves up to the hedge. He rallies off shock and has the schützen squad put covering fire on the entrenched Dutch mitrailleursgroepen opposite them.
In the Dutch phase the 47mm gun continues pumping AP rounds at the PzIV.
Not only does it hit again but this time Dave rolls 6,6 - a critical hit. It results in only three AP strikes but that's enough to penetrate the armour and the tank is knocked out. Fortunately it doesn't explode and the crew are able to bail out. Nonetheless, that's a real blow and German force morale drops to seven. Has my plan gone awry already?
The Luitenant rallies the shock off the gun crew.
He then orders the mitrailleursgroepen behind the barn to fire.
They are joined by the other two mitrailleursgroepen, each of whom have their sergeant use the Dutch characteristic
Concentrated Fire to ensure the Lewis guns fire more effectively.
They all target the schützen squad at the hedge. It's another deadly rain of bullets and each of the LMG teams suffers a casualty and two shock.
That reduces the squad to four men and suddenly things are starting to look very bleak for the Germans on this flank!
Lastly, the entrenched mitrailleursgroepen on the Dutch left continue to direct their fire at the squad on the road.
German misfortune continues. Despite the long range and the impact of the covering fire three of the schützen are taken casualty. Things are not going well at the moment and I'm beginning to wonder if this table will prove the Germans' undoing in the campaign.
In the German phase the Feldwebel rallies two points of shock
He then orders the squad to continue putting down their covering fire.
On the road the Obergefreiter assigns a man from one LMG crew to the other so that both can fire at full effect.
The Leutnant then orders the mortar team to fire at the gun. Despite two hits the gun crew survive unharmed.
He then orders the squad to fire at the same target. This time their fire proves much more effective. The crew lose another man and suffer two points of shock. That not only leaves the gun manned by a single gunner and the commander but it also puts the Dutch Luitenant at risk of becoming a casualty. German losses are running high but things might yet swing their way if the gun can be put out of action.
On the left the squad moves through the woods but makes very slow progress.
In the Dutch phase the two mitrailleursgroepen near the Kazemat fire again at the schützen squad at the hedge.
They suffer two points of shock and are finding themselves in an increasingly difficult position. They've lost the support of the PzIV and yet if they choose to pull back from the hedge that would only leave them in open ground and still subject to Dutch fire. As it stands they don't really have anywhere else to go.
The Dutch Luitenant stays with the surviving crew members of the AT gun and rallies a point of shock.
He orders them to target the schützen squad and mortar team in the road with HE, but it has no effect.
A fourth mitrailleursgroepen deploys into the barn, giving the Dutch even more firepower to direct at the German infantry.
They waste no time and open fire on the Germans in the road.
The 50mm mortar team loses a man and one of the LMG team suffers a point of shock. It was always a risk deploying here but if they can survive the incoming fire and finish off the AT gun crew they will have done all that was required of them.
The Luitenant comes to the conclusion that remaining at the AT gun position is fraught with danger and he wisely moves around the back of barn towards the two mitrailleursgroepen on the other side.
The next German command roll is (6)66421. From my perspective that double phase is very welcome. I sense the attack could be in danger of stalling and so this could be an opportunity to claw back the initiative. The Leutnant rallies shock from the schützen squad.
He then instructs the mortar team to target the AT gun.
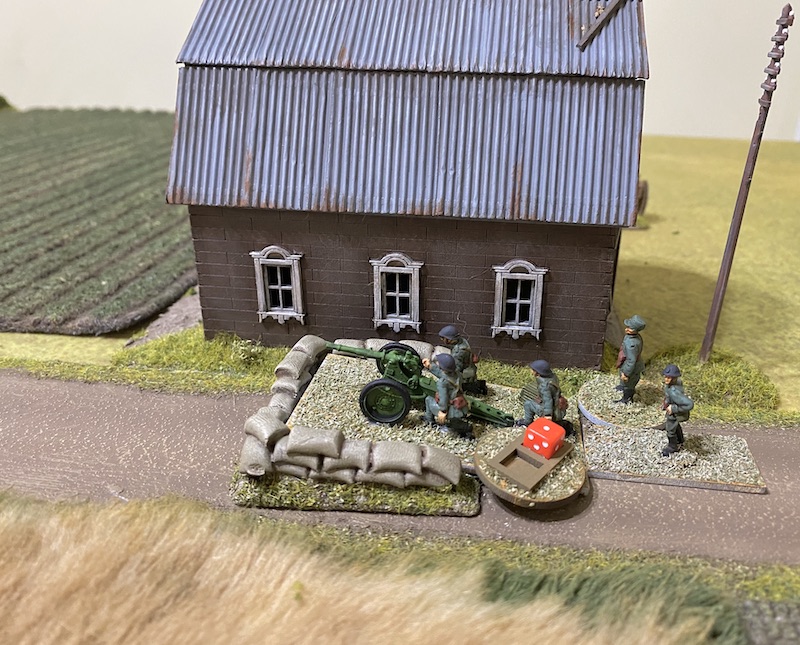
The small 50mm mortar round falls with unerring accuracy into the gun position and kills the last remaining member of the crew. That leaves the gun commander as the sole survivor.
The Leutnant then orders the squad to fire at the gun. The hail of MG34 fire certainly does the job, hitting the gun commander and killing him. It's taken a lot of effort and casualties to eliminate that gun, but it's accomplished finally. The loss of a support and the death of the leader also deals a grievous blow to Dutch morale which drops four points to four.
That was a duel I wasn't sure I was going to win, yet in one swift round of fire it has put a different complexion on the game - the gun is out of action and the Dutch are reduced to four command dice.
The Obergefreiter rallies shock from the schützen squad in the woods, but when he orders them forward they can only manage a very cautious move of 2”.
The Dutch have barely accumulated any CoC points at this stage, a stark contrast to the previous game. This makes the next German command roll of (6)55542 very welcome, those CoC points will prove useful preventing the Dutch from ending the scenario prematurely.
With the destruction of the Dutch AT gun the mortar team and the squad no longer need to remain in the road. It's a dangerous spot and the Leutnant orders them to move tactically to the left and escape the enemy's line of sight.
The drop in force morale has reduced the Dutch to four command dice but a command roll of 6654 still presents them with a number of opportunities, not least of which is a double phase. The Germans have much to do and the Dutch can still put up a fight. The platoon Luitenant is well positioned to command the mitrailleursgroepen in the barn and also those in the barn yard and at the Kazemat. He has all three fire at the remaining Germans behind the hedge.
There is a significant volume of Dutch fire, so it is just as well the schützen squad are tactical. Nonetheless they lose one man and suffer two points of shock.
That's enough to see them pinned down and each LMG team reduced to a single man.
A command roll of 6433 in the following Dutch phase allows them to continue pouring fire at those hapless Germans. The Luitenant has the mitrailleursgroepen in the barn fire first.
They can only target one of the LMG teams but it's enough to inflict a single point of shock. Only four men remain at the hedge - one from each of the LMG teams, the Obergefreiter and the Feldwebel. It won't take much to break them.
The remaining mitrailleursgroepen all open fire. It's an attack with 36 fire dice so it's no surprise to see one of the LMG teams wiped out. Somehow both leaders have managed to survive this torrent of Dutch fire without so much as a scratch. If there is an upside to the loss of the LMG team it's that the wiped out team take their shock with them, which spares the squad from breaking. German force morale also holds steady
With the Dutch AT gun out of action and German casualties fast mounting the time has arrived to try and push through with the armoured cars. In the next German phase the first Sdkfz221 arrives on the road and gives the Dutch in the barn a burst with their machine gun, but it has no effect.
The Feldwebel spends the phase rallying all three points of shock from the few surviving men in the schützen squad. For as long as they are pinned those men are trapped, placing two of the platoon's NCO's in a very vulnerable position. Their loss could have a huge impact on German force morale and scupper all my plans.
On the left flank the squad in the woods moves forward cautiously to the hedge making the best use of the available cover. If nothing else that is something the Dutch infantry can't ignore.
They need to be careful, there's a lot of Dutch fire that can come their way from across the field, but if they can draw it away from the Feldwebel and what is left of the schützen squad then they will have played a useful role.
The Leutnant leads the third squad forward tactically. The open ground proved costly to cross in the previous game and at this late stage I don't want to take any unnecessary losses.
The Dutch may be reduced to four command dice but the Luitenant remains in an excellent position to direct most of the platoon. A command roll of 4412 makes it possible for all the Dutch units to activate.
First, the sergeant with the entrenched mitrailleursgroepen on the left uses the Concentrated Fire characteristic to direct the Lewis gun and he has all the men target the few remaining Germans at the hedge.
Fortunately, it has no effect.
The potential to drive down German force morale by wiping out what remains of that squad and the accompanying NCOs continues to draw Dave's attention. Once again they become the target of Dutch firepower and the Luitenant has the mitrailleursgroepen in the barn shoot at them.
The one advantage the Germans have is that they are at effective range and in hard cover, nonetheless they suffer a point of shock.
The Dutch are determined to finish off the squad or even better, kill or wound the NCOs. So the Luitenant orders the mitrailleursgroepen in the barn yard to engage them. They inflict two more points of shock.
Dave is not prepared to give up and the Luitenant has the mitrailleursgroepen at the Kazemat do exactly the same thing.
There is only one man remaining in the schützen squad and he is hit. That sees the squad's second LMG team wiped out and with that German force morale drops to six.
With men falling all around them both the Feldwebel and Obergefreiter have somehow avoided injury, yet I'm not sure for how much longer they can lead such a charmed existence in the face of so much fire.
The Dutch have one more surprise up their sleeve and they call down the mortar barrage that is part of the Kazemat fire plan.
The aiming point is in the woods opposite and while the mortars are slightly off target it's enough to ensure the short but violent barrage will hit the German squad.
The mortars crash down into the woods and the schützen lose one man and suffer two points of shock.
The Dutch are putting up a very stiff fight. German casualties are starting to mount and with it the danger of force morale dropping to a point where it will be hard to sustain the attack. There is now a real sense of urgency to push ahead. If there's any consolation it's that the Germans have a full CoC die available, while the Dutch have been slow accumulating CoC points, and that should be enough for me to prevent them bringing the scenario to a premature end.
The next German command roll is (5)66421 and it couldn't come at a better time. The Leutnant tells the squad with him to move at the double and he rallies off their shock when they do so.
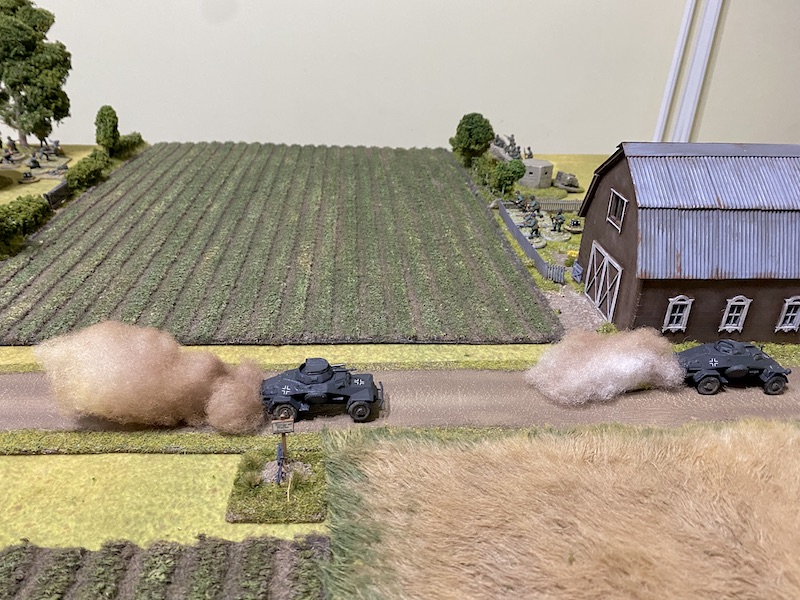
More importantly the Sdkfz221 races flat out along the road, covering 26” in a single move.
The following command roll is (6)53321 which means I can bring on the second Sdkfz221. This one wastes no time at all and arrives moving flat out.
This is the moment the infantry and PzIV had been working towards. The armoured cars can now dash to exploit the breach in the Dutch defences, but will they make it through?
The first armoured car waits for the second to catch up. At this stage they are beyond close range of the Lewis guns and I'd prefer to have both cars run the final gauntlet through the Dutch defence together and not risk being picked off one at a time. The lead Sdkfz221 sends a burst of MG fire at the barn.
That's enough to cause a Dutch casualty and inflict a point of shock on the mitrailleursgroepen.
While everything now hangs on the success of the armoured cars the German infantry still have a role to play. Should the Dutch succeed in delaying the armoured cars with Lewis gun fire I may well need the support of the schützen's MG34s to suppress them. The Leutnant throws a smoke grenade to cover their advance and the squad with him moves forward tactically.
In the Dutch phase the Luitenant is able to activate once again and he has all three mitrailleursgroepen open fire at the squad across the field.
One of the LMG teams loses a man and each team suffers a point of shock.
The entrenched mitrailleursgroepen on the left fire at the two German NCO's pinned at the hedge.
The fire has no effect but the two NCOs are living dangerously.
The German command roll is (1)53321 which will allow both of the armoured cars to move ahead together. The second one overtakes the first. Driving flat out it covers 30" along the road. This is exactly why I opted for armoured cars, they can take full advantage of the road to drive at great speed.
The other doesn't travel quite as fast, covering 16”.
Nonetheless it puts both of the armoured cars very close to breaking through the Dutch lines. With the Germans this close to victory the game is becoming incredibly tense.
The Leutnant has the schützen squad run to the hedge. We may not need their fire support but I don't want to leave anything to chance.
The squad in the woods fires at the Dutch in the barn yard.
They lose another man and suffer two points of shock.
In the Dutch phase a command roll of 6211 once again allows the Luitenant to issue a flurry of commands. The first is to order the Lewis gun in the barn to fire at the only Sdkfz221 it can see.
I've been saving my CoC die to reduce Dutch CoC points, but they are still a little way from the second CoC die that they need and now that they are limited to four command dice there's a chance it will take them even longer. With victory so close I decide it's worth the risk and use the German CoC die to interrupt so that the armoured car can continue driving flat out.
It accelerates down the road, overtaking the lead armoured car and escaping the line of sight of the Lewis gun.
The other two mitrailleursgroepen open fire at the Germans in the woods.
There are a lot of hits and the result is deadly. The Germans lose three men and the Obergefreiter is wounded and out of action for the turn. That brings German morale down to five and there is enough shock to see the remaining men pinned. It would be a disaster if my force morale was to collapse with the armoured cars so far advanced.
The following German phase is the opportunity for the armoured cars to make the breakthrough. Despite force morale down to five the Germans can still benefit from the red dice and so there's a very good chance this can happen, except......I roll (4)64411. This is agonising, both armoured cars are so close to exiting!
Yet this is where Chain of Command can develop such a rich narrative. The armoured cars aren't looking to reach the edge of some imaginary games' table, they are thrusting into enemy territory and the unknown. They know it's not going to be plain sailing. They've witnessed a PzIV knocked out and just driven past the Dutch anti-tank gun responsible - surrounded by the bodies of the brave crew who served it to the bitter end. Who knows what's around the next corner? That would surely call for a degree of caution.
There is nothing left to do but move the infantry forward. The Leutnant rallies shock and has the schützen move tactically to the hedge row.
The squad in the woods are not in great shape. They target the Dutch in the yard of the barn with what they can muster.
Their rather desultory fire has no effect.
In the Dutch phase the mitrailleursgroepen in the barn turn their Lewis gun to the windows facing the road. Will this allow them a last ditch attempt to stop the armoured cars?
The mitrailleursgroepen at the Kazemat target the Germans in the woods.
This time their fire has no effect.
The next German command roll is (6)64321, I see the two sixes and for a moment in my excitement I think I have a double phase. Dave has to bring me down to earth and remind me that the 6 on the red dice doesn't apply. Nonetheless this time I
can activate both of the Sdkfz221. Is this my opportunity to drive off the table and break the Dutch defence?
When the first armoured car starts to move Dave uses his one full CoC die to interrupt and have the Lewis gun in the barn try to bring the car to a halt. It's a very tense moment. I roll for armour saves and with armour of only two..... I fail. Having come so close am I about to have victory snatched from me?
Not so, the MG fire fails to stop the armoured car or have any effect at all and with an urgent press of the accelerator the Sdkfz221 leaves the table in a cloud of dust.
All that remains is to see if the second one can also make an exit this phase.
Motoring flat out, it joins the other armoured car in breaching the Dutch lines, earning the Germans a hard fought victory at the second attempt.
The platoon has punctured a hole in the Dutch defence and the armoured cars move ahead to exploit. The way is now clear for the remainder of the division to follow.
Well, that was quite a game and the last few phases were incredibly tense. That takes us to the final map and the all important river crossing. Having completed Campaign Turn 6 Dave rolls to see if the engineers are at the bridge, but unfortunately they haven't arrived yet. That means to have any hope of winning the campaign the Dutch must repulse the German attack in the next game.
It was quite a relief to see the German plan succeed, yet it was a very close run thing with victory coming at quite a price. The platoon suffered seventeen casualties and while none of those were NCOs, it leaves the unit severely weakened. Yet the consequences of a defeat would have been greater and could well have jeopardised the whole campaign. Those losses do have repercussions. The men's opinion dropped -3 as a result of this game, taking it down to -7 for the campaign. The CO on the other hand is pleased with progress and his opinion rises to +1. The platoon commander's outlook remains relaxed.
The Dutch suffered ten casualties - five from the gun crew and five from the core platoon. As a result the men's opinion rises and is now at -1. Despite the defeat the CO's opinion also rises and is now at +2. The platoon commander's outlook becomes sociable.
So we now move to Map 6 and the defence of the vital river bridge, you can find out what happens next in
this post.