
Rail lines may not feature much in the fighting on the Pacific islands but in places like Burma, Malaya and China these key means of transport were often focal points of fighting.

I've had lengths of rail track that I've used for terrain for some time and it's seen use in several games of Chain of Command.
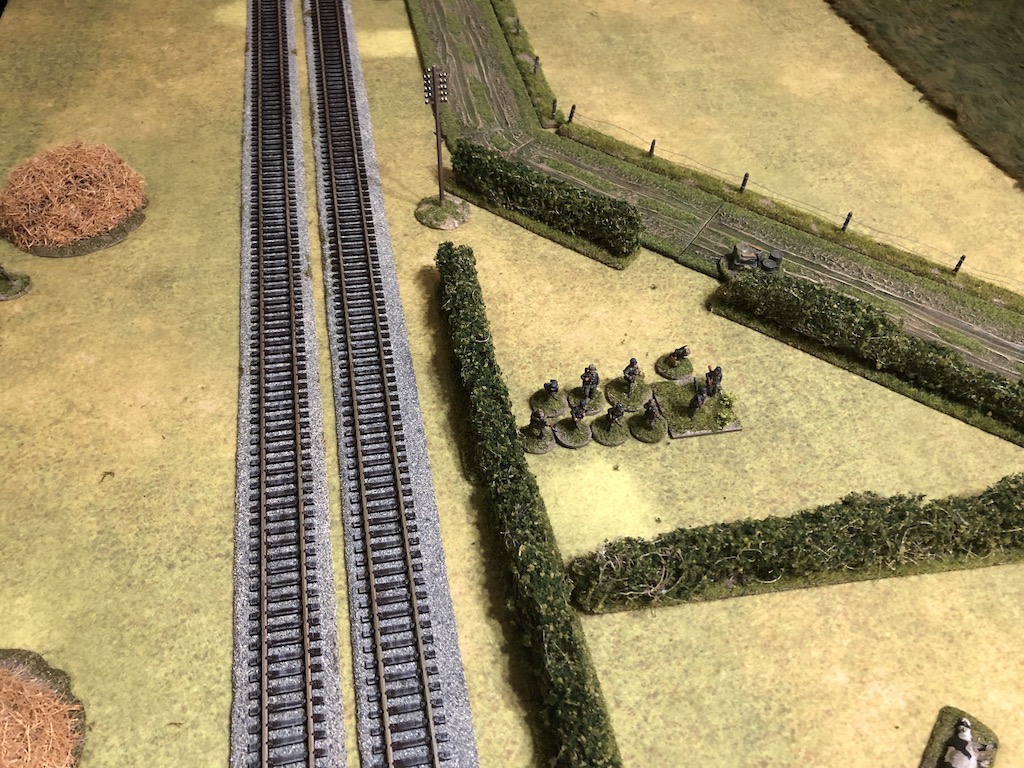
For our Westwind Konigsberg campaign set in East Prussia the scenario Signal Box at Seerappen unsurprisingly featured fighting around a signal box and so I made up one of the plastic kits from Mini-Art and scratch built a set of signals. You can see more about that build in this post.

The acquisition of railway terrain continued when I managed to pick up a set of six railway carriages quite cheaply on eBay. That in turn led to a search for an inexpensive locomotive. I was looking for a 'non-runner', electric locomotives that no longer work and come up for sale from time to time, but was having no luck. In the end I decided to make one using the inexpensive plastic kits from Dapol. These kits date back to the 1950s and were once part of the Airfix range, but they hold up surprisingly well and will certainly do the job. Despite being more work than I was looking for it was a refreshing change from building model tanks.

So it made sense that I also add a station to the collection, but whereas the signal box would work in Eastern Europe this time I wanted something for the Far East. The sort of building I had in mind was this modest station in the picture below from 1930s Malaya. Sarissa Precision make a similar looking station in MDF. It's based on the station at El Alamein but I thought with a bit of modification it could be made to be suitable for a range of places from the Middle East to Malaya.

The MDF kit is a good start but it's a very basic structure. Two things would make an immediate difference - texturing the walls and finding a replacement roof. Texturing the walls was a simple matter of applying a small amount of filler and then with a wet finger spreading it across the surface of the walls.
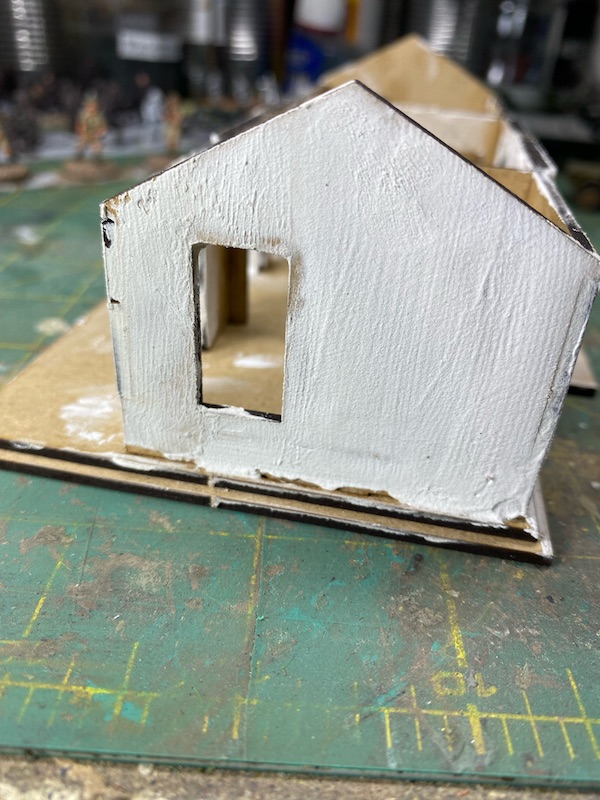

I thought a pantile roof would make a big difference and so used a sheet of vac formed plastic from a railway modelling supplier and cut it to size.


MDF models are always instantly recognisable by their neat laser cut lines and flat surfaces so anything that can be done to alter those shapes often makes a big difference. With that done it was then a matter of painting and adding final details like window shutters.


I made use of the tap that is part of a water fountain and a drain grill to make up a watering point.


Very nice job on the station - I have also been tempted by Dapol kits but most of my gaming is 28mm and OO HO is a bit small unfortunately...plus, several of the people I game with already have trains, so I don't really NEED my own.....
ReplyDeleteThe Dapol stuff is very good when you consider its age and price point. I made their windmill for our Dutch 1940 campaign and was happy with that too. Instructions can be a bit hard to follow but I got there in the end.
DeleteNice work Mark
ReplyDeleteThanks John.
DeleteA rather fine addition to the railway collection.
ReplyDeleteThanks Phil, hopefully get this on the table in 2023!
DeleteI really like the look of the roof tiles. How did you paint them?
ReplyDeleteThanks. The base colour was a Terracotta craft paint. It was washed with Agrax Earthshade and then given a light dry brush with a lightened shade of Terracotta.
DeleteThat's really rather good!
ReplyDeleteThank you!
DeleteNicely done!
ReplyDeleteNicely done, great how to steps shown. Should be in some great games.
ReplyDeleteAbsolutely splendid!
ReplyDeleteGreat job, a few simple steps and a few spare bits is all it takes to make mdf buildings look good.
ReplyDeleteVer noice.
ReplyDeletePredictably superb work on the extra detailing.
Very nice work as usual. Not sure where you store it all.
ReplyDelete