

There is much open ground to be crossed on this map and aside from a few scattered hedges the only cover is a drainage ditch running alongside the road. I'm not sure how best to tackle this one. Do I try to punch through with armour, or will the clear fields of fire make the British tanks easy targets?

I know the Germans have a PzIV and it could be entrenched, making it very difficult to hit. To compound the problem it would most likely have the first shot, giving it a distinct advantage. It feels like I'd be pinning all my hopes on a couple of vulnerable tanks if I went down that path.
Instead I've decided to make this an infantry assault, backed up with a 3" mortar barrage to help shoot them onto their objective. I have thirteen support points and opt for an additional infantry section and a forward observer (and a reminder, once again, that we are using a set of playtest modifications to the existing rules for mortar barrages that you can find at the end of this post). I'll also call on an extra 2” mortar team to provide smoke and a second PIAT team to help deal with any German armour.
Given the limited positions for British jump-off-points the patrol phase has a fairly predictable outcome. It comes as no surprise that I will have to make the assault along the full length of the table.


They take up tactical positions and make the most of what cover is available.

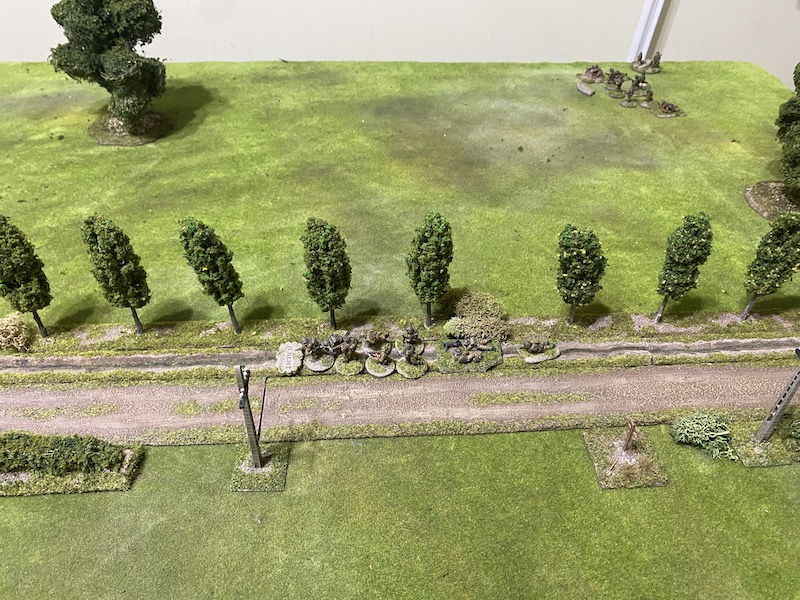
The British start with their force morale at ten whilst the Germans are at eight. That's promising, as is the first British command roll which provides a double phase. There is no good reason to delay deployment and so the support section makes an appearance in the drainage ditch by the road.


In the following phase the section moves forward cautiously.

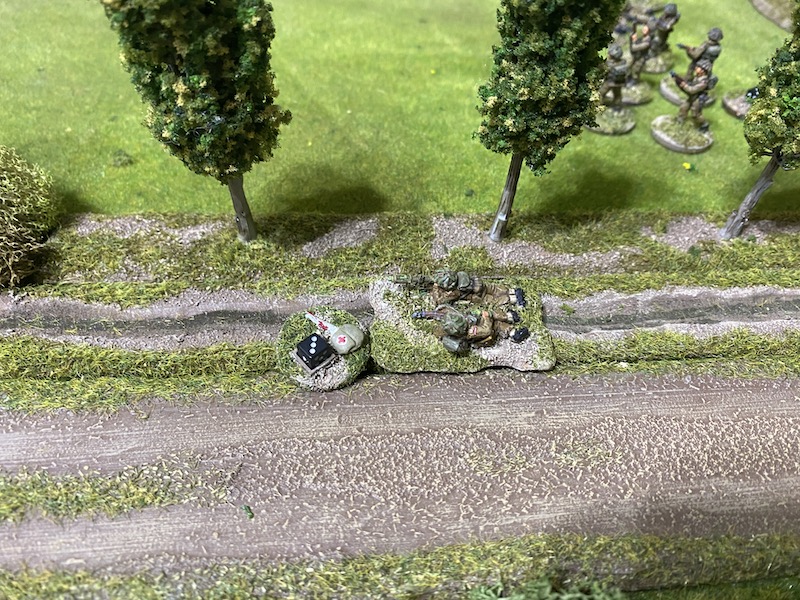
They are joined by the forward observer who also takes cover in the drainage ditch. He makes contact with the mortar battery.

One of the 2” mortar teams deploy into the road.


The Germans opt to do nothing other than watch and wait and so the British continue to deploy. The forward observer is joined by the platoon sergeant.

He keeps the attack moving and orders the section to continue its cautious advance.


The sergeant instructs the 2” mortar team to aim another smoke round at the crossroads.


With smoke blocking some of the lines of sight from the hedgerows a second section deploys to the right of the road and the corporal places both teams on overwatch. There’s no cover on that flank for the Germans to deploy into, but I want to be able to respond quickly if they chose to do so.


As it happens a German squad doesn't deploy there, but a sniper does. He's hidden in the field and aims a shot at the recently deployed section hoping to hit the nearby platoon sergeant or forward observer.

The shot rings out but it has no effect. The British are on overwatch and scan the fields for the source of the fire, but can’t locate it.

The Germans choose to do no more. In the British phase the sergeant orders the section in the ditch to keep moving forward cautiously.


Meanwhile the sergeant has the 2” mortar team provide more cover.


The sergeant then takes up a tactical position in the ditch.

The mortar smoke is doing an effective job of restricting opportunities for the Germans to engage the British infantry. A third British section deploys from the jump-off-point on the right and the corporal puts both teams on overwatch.

That establishes a firm base for the British on their right flank. There is little option but to deploy into open ground, but I'm hoping with the support of the forward observer they can lay down as much covering fire as possible to allow the section in the ditch to make an advance.

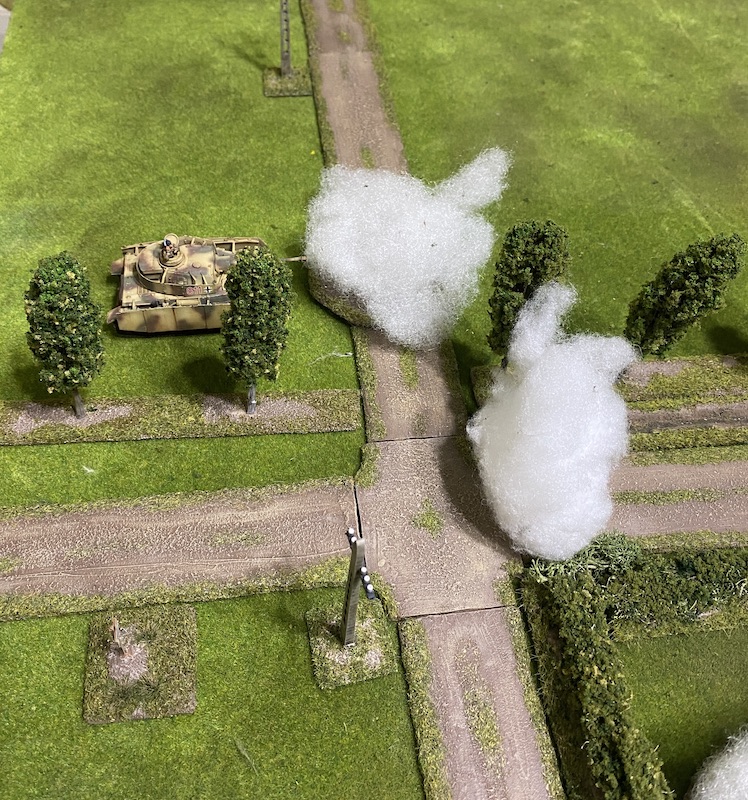
At this point Dave has made a quick mental calculation and worked out I don't have any armour in support. Unwisely, I've revealed my hand too soon and not made the most of the fog of war. It gives Dave the confidence to deploy the platoon's PzIV in the following German phase.

I feel rather foolish. It's all very well equipping the British with two PIAT teams, but they are not much use when enemy armour sits well beyond their range. I don't think I've thought this through sufficiently and may pay a heavy price.
The tank commander wastes no time and orders the gunner to fire a round of HE at the section nearest the road. They lose a man from the Bren team and suffer a couple of points of shock.

The tank's bow machine gun proves equally deadly, killing another one of the Bren gun crew and inflicting more shock.

I've found myself in a nasty predicament and urgently need to limit the damage the PzIV can do to my infantry. In the British phase the second 2” mortar team joins the section on the right flank.

The sergeant orders the 2” mortar team nearest to him to also fire off a smoke round.


With the tank's line of sight blocked by smoke the section corporal rallies a point of shock and assigns one of the rifle team to join the lone gunner in the Bren team and act as his No2.

The only German response is for the PzIV to pivot on the spot and turn its turret.

In the British phase I ponder how best to extricate myself from this messy situation. Much of which, I regret to say, is of my own creation. Fortunately, the forward observer is able to activate.


The platoon sergeant continues directing the platoon.

He orders the section in the ditch to keep on moving forward.


The sergeant has the 2” mortar team fire more smoke to cover the move.


The sergeant then moves back along the ditch. He has work to do here and so must leave the advancing section to work its way forward without him.

In the German phase the PzIV reverses slowly.

It just manages to reach a point where it can see through some of the mortar smoke and the commander has no hesitation ordering the gunner to target the British section with a round of HE.

They are lucky. There are no casualties and they suffer only a small amount of shock.

The Germans haven't finished with them just yet and the sniper targets them once again. His aim is off and his shot misses.

The section are still on overwatch and this time they spot where the fire is coming from and return it, but they too fail to hit their target.

In the following British phase a PIAT team joins the platoon sergeant in the ditch. With the barrage about to come down and the cover provided by the mortar smoke there might soon be an opportunity to rush forward.

The section by the road continue to target the sniper.

This time they find their mark and the hail of small arms fire eliminates him. That's a blow to German force morale which drops two points to six.

The forward observer then calls down the mortar barrage.


The mortar rounds prove particularly effective, inflicting one net hit and an additional point of shock. The end result sees the tank crew suffer a total of three points of shock and the tank reverse 2D6". We interpret the 'reverse' literally and it moves 9" directly backwards in its current facing. Had it not pivoted earlier it would have reversed off the table, but regrettably for the British, that's not to be.
While the tank may have escaped the barrage the crew have been rattled by the experience and are very close to bailing out. Yet I don't think I can drive them from the tank as the British don't have any weapons that can strike it again at that range. I've really made a meal of this.

The tank commander rallies some of the shock in the German phase.


From there it can target the section on the British right.

An HE round comes crashing down. It inflicts two points of shock on the rifle team and a light wound on the corporal, but British morale holds steady.

Come the British phase the first thing the sergeant does is try to close down the tank's line of sight.


I sense fortune seems to be favouring the Germans at the moment and a roll 66321 for their next command roll seems only to confirm it. The tank commander rallies off another point of shock.

He then orders the driver to reverse so that the gunner can find a better line of sight.


Dave is fully intent on capitalising on the double phase and a squad deploys behind the hedgerow.


They have a line of sight to the PIAT team and open fire.


The subsequent German command roll is 66652, a sure sign things are not going well for the British. The panzer grenadier squad can't see the section in the ditch, but they can see the section across the road. They open fire.

The corporal is wounded and out of action for the remainder of the turn. The section suffers shock and British morale takes another drop to eight.

With that the phase ends, as does the turn. It's a small consolation, but the recently wounded leader dusts himself off and gets back on his feet.


The squad at the hedgerow continues firing at the British section.


When it comes to the British phase I think I've seen enough and I know when I'm beaten. It's time to withdraw, I can't see any way to turn this one around. That was a rather brutal lesson and best I leave now before casualties climb any higher.
The British suffered eight casualties, four of which are permanent and two men will miss the next game wounded. The men's opinion takes a drop to -2 and while the CO's opinion also drops it remains high at +4.
The Germans lost only the sniper team and their men's opinion rises to +4 as their casualties to date have remained light. The CO has been less impressed with their performance but after this encounter his opinion rises to -1.
Dave will now capitalise on this victory by mounting a local counterattack. It's a smart move, as I expect him to mount a limited spoiling attack. He won't be looking to inflict many casualties, by simply delaying the British for a further campaign turn he will have achieved his primary objective and with it deprived me of any chance of a major campaign victory. A bad day for the British all round.
A humbling defeat that will see us return to St Nicholas Farm for the next instalment in the campaign and you can follow what happens there in this post.
If you've enjoyed following along and would like to Buy Me a Coffee to help cover some of the costs of running the blog you can click through at the link or on the tab in the right hand column of this page.
You can find all the game reports for this campaign and for many others on the Chain of Command AAR page.