Rebasing a whole collection? Really? Yes, really. Up until now, I'd resisted the temptation, if only because of the effort involved. Now that the task is completed, I'm very pleased. But why did I do it?
It all started with a bit of false logic. I'd based my Second World War 20mm figures on 20mm round bases. When I started the AWI project, my first project using 28mm figures, I intended using them to play Sharp Practice. That seemed to suit single figure basing. For reasons that made sense at the time, I assumed a bigger base would be required for larger scale figures. As a result, I went with 25mm rounds. I continued that with other periods like the colonial Sudan project.

That was my first mistake. One that was compounded when it came to using sabot bases. Obviously, they needed 25mm slots, which in turn meant a larger sabot base. I ended up with four figures on a 60mmx60mm sabot base.
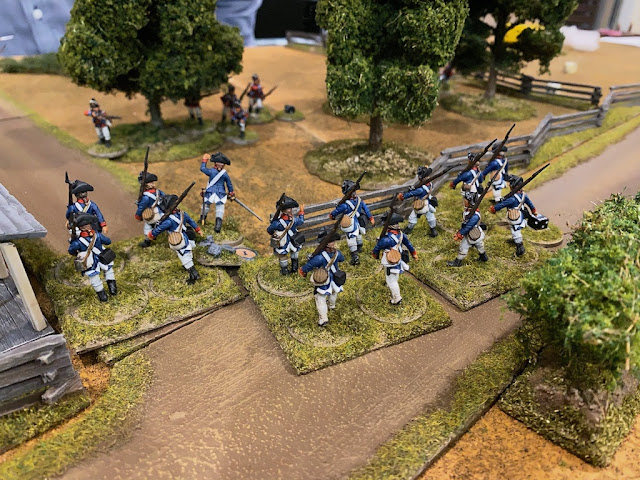

Even at the time they looked too big and the figures appeared too spaced apart. The large footprint was problematic enough, but what bothered me just as much was the spacing between the figures. It just didn't look right for any of the periods. Particularly when you consider some of the classic images of the Victorian age (which may or may not be truly representative of the reality, but they remain iconic images in the popular imagination).
Every time I played a game or posted a picture something jarred.

The individual basing and sabots worked well in game terms. Moving a unit was quicker and it allowed for casualty removal. Yet that created another issue, what to do with the unsightly empty sabot slots once a figure is removed? I'd never liked that. To fill them I made up bases that held shock markers, or casualty figures, or just empty terrain.

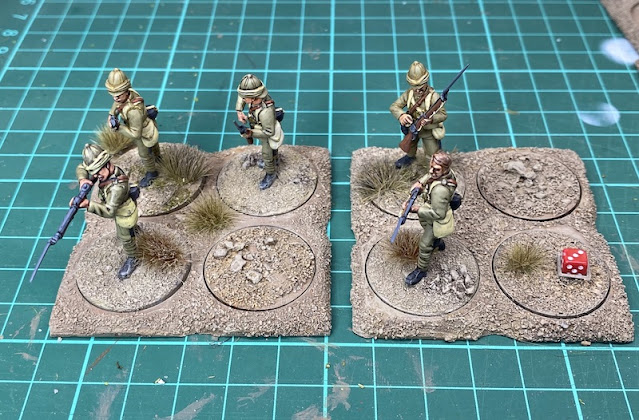

Sometimes there were never enough of them.

Of course, one option would be to ditch the idea of using sabot bases altogether and simply use the figures on individual bases. Aside from the laborious process of moving units one figure at a time, I couldn't escape the distance between individual figures, even when the bases were sitting right next to each other.

I wrote a lengthy blog post on all I was doing to try to reduce the visual impact of those sabot bases, indicative of the fact that I wasn't completely happy with the approach even then.
When I started my Romans for Infamy, Infamy I decided to use multi basing. A decision I was very happy with, so it wasn't much of a step further to consider doing it for the AWI and Sudan collection.

For the Romans I used 50mmx50mm for four figures, but for both the AWI and Sudan I settled on 40mmx40mm. I know for many that's a very standard size for rules like Black Powder, so I wasn't exactly breaking any new ground here. However, from my perspective this was going to make a huge difference. I would go from four figures on 3600 sq mm to four figures on 1600 sq mm. That was going to change things more significantly than I realised.
It goes without saying, the difference in footprint is amplified the more bases you have in place. Below you see the frontage and footprint comparison for two Sharp Practice groups of eight figures in line formation.
A line formation made of three groups for Sharp Practice would be six bases of four figures each. On my old sabots that was a frontage of 360mm (approximately 14.5"). With smaller 40x40 bases, the same formation would have a frontage of 240mm (approximately 9.5"). In effect, the new formation of three units would have the same frontage as two of the sabot based units. They would also have less depth, making them easier to place within terrain.
Perhaps most surprising was that having the figures closer together actually gave the impression of a greater number. Not quite sure why that is, but it certainly is the case. Once I started the rebasing that all became clear very quickly
Initially, a fairly laborious task beckoned, but now I could see the reward for the effort. A good result in my book. This was just as well, given this was a major distraction from all the other things in progress or planned.
It is, of course, a problem of my own making. I've no doubt a few of you are rolling your eyes and wondering why it took me so long to see the benefits of multi basing over sabots. Perhaps, if I had based the figures on 20mm rounds to start off with, I may never have been motivated to do this? Regardless, I'm happy where things have ended up.
I pondered how best to deal with the larger militia groups of ten figures. In the end I settled on two bases, one 40x40 with four figures and one 60x40 with six figures. That allowed flexibility for other rule sets that might require units in multiples of four, six or ten figures.
One other decision was how to treat skirmishers. For those, I settled on the same approach I've taken with the
Mahdists and
Germanic tribes. I would use a mix of 3,2,1 basing that would allow figures to be spaced in more open order, with the added convenience of easier movement and casualty removal.
The only other key question was how to handle casualties for the multi-based line units? If one of the motivations for the rebasing was an improved aesthetic, I needed to have something that blended in reasonably well with the table, yet also served its purpose as a game marker.
Once I no longer needed casualty figures to fill empty sabot slots, I decide to convert them to casualty markers. My immediate thought was to use mini-dice to track the numbers lost, but then it occurred to me that I need to track a maximum of three casualties in most cases, as a fourth would simply mean the removal of a four figure base and the marker.
While this idea might not survive actual contact with a game, I've come up with a base with a casualty figure and two empty dice frames.
The casualty figure will represent the first casualty. I just need a suitable item or marker to fill the two empty frames as further casualties occur. For now I'm going to try small rocks (in this case, painted aquarium pebbles).
If this proves impractical for any reason, then there's always the option to revert to mini dice if needed.
If I do go down that route, then perhaps the same frame can also work to record shock with a different coloured dice.....
Time will tell, but I also have a Plan B. I've put a small dice frame on these adjustable markers from Warbases. My thinking being the marker itself will be used to record shock, while the small dice frame holds a mini dice for casualties. This does have its merits, as it consolidates two markers into one for a smaller footprint.
That said, I do like the way the casualty figure adds to the game narrative, so I'm inclined to carry on down that road, or at least give it a good try, but it does mean a second marker on the table to record shock. Too much clutter? Perhaps.
On the other hand, my newly based units have a smaller footprint, so perhaps there is more room on the table after all?


