Showing posts with label HYW. Show all posts

Friday, 9 May 2025

Wargame Butterfly? Me? Hmmm....

While the blog has been quiet for a few weeks, I have been anything but quiet when it comes to the hobby. However, I have to confess, I've been massively distracted and wandered off down a few different paths. That said, in my defence, it's not been a matter of new projects, it's been more a matter of taking several projects to the next stage.  

Having said that, one of those probably qualifies as a new project. Why? Because I bought the figures to start something new, even though they don't qualify as a recent acquisition. In time honoured fashion, they were bought on a whim and by the time they arrived my ardour had begun to cool. No longer, I'm pleased to say.

So, what happened? Well, my regular opponent Dave was eager we should give Infamy, Infamy a try. Fine with me, but I have to confess that my knowledge of the broad scope of time that falls under the banner 'ancient period' is not a slice of history I know much about. Naturally, it follows that I don't have any figures for the period in my collection. However, the idea of asymmetric warfare on the borders of the Roman Empire had some appeal. It also coincided with a sale at Victrix. 

That was convenient, because one bag of their Germanic Warriors includes 60 figures, probably just enough for a force for Infamy, Infamy. Order was duly placed; figures arrived; I made up about six of them; became distracted by another project; put them aside, and, there they remained for almost a year.

Jump forward to recently and Dave and I played a game, finally. Dave had Romans, but no Germans, so we proxied some of his Saxons. We both enjoyed the game and needless to say it was the impetus I needed to get moving with those Victrix Germans. In the end it has been a remarkably quick project that is almost complete. It's the 'almost' that's held me up blogging about it, but I thought I'd not wait any longer.

I gave some thought to how I wanted the figures based. The most versatile option would be to base them individually and use sabot bases to move them around in groups during a game. My only issue is that I find sabots have a habit of making the units look too regimented (and yes, I know, you can get sabot bases with the slots in irregular patterns, but there's something about the fact the whole sabot base is square or rectangular that still creates the illusion of a uniform shape. Call me fussy). 

I decided to go down the same path I did for my Mahdists for the Sudan. I would base the figures in 3s, 2s and individually. That way I can remove casualties; keep an irregular shape to the groups, but also have the convenience of multi-based figures to aid movement. It has worked well for the Mahdists.

It wasn't until I'd painted most of the figures that I realised I had run out of suitable MDF bases for the multi-figure basing. Order has been placed and I'm now waiting on delivery to base those figures. In the meantime at least the individually based figures are finished.


The Victrix set gave me enough figures for five groups of ten and a number of leaders, which pretty much gives one of the forces recommended in the army lists in the Infamy, Infamy rule book. Of course, the key phrase here is 'pretty much'. I think we all know what that means.

I needed a few small additions. Groups of skirmishing/missile figures are useful and these can include slingers, archers and javelins. I thought I could solve the slingers quite simply and without purchasing more figures. 

I had a box of Gripping Beast Dark Age Warriors and the set includes lots of hands with slings. The easiest solution seemed to be to use the bodies and sling hands from Gripping Beast. To help them blend in and match the other warriors in the force, the heads would come from those left over from the Victrix set. It seemed like a good idea, but it didn't work quite as well as I hoped.

Two things bugged me. Firstly, the Victrix heads appear too big for the Gripping Beast bodies and, secondly, the Gripping Beast poses lacked the dynamism that is so apparent in the Victrix figures. Looking at the Victrix set I could see how several of their bodies would lend themselves well to representing slingers. The solution was to buy a spare sprue online and just make use of the Gripping Beast sling hands. As it happened I thought a few of those GB heads would work okay on the Victrix bodies, which they do. It was the simplest of conversions. By turning the heads on the bodies so the figures were facing side on, it was easy to create an entirely new configuration that gave me the dynamism I was after.


Once painted I was much happier. These looked the part.


I also thinks this speaks to the versatility of plastic figures. I understand completely why some people dislike them, but as someone who has made plastic models all his life, I don't have any issues. In fact, quite the opposite. 

The two figures below are based on the same Victrix torso/body. Aside from the option of using a different head, the only real difference is how the heads are angled. As I've done with nearly all the slinger conversions, the heads are adjusted to face sideways rather than forwards. The end result, a very different looking figure, without the need for complex surgery.


In terms of basing, aside from the 3,2,1 scheme for the main body of warriors, the leaders are on slightly larger bases that will line up with the larger bases I'll use for three figures. To these I've added rocks, these are to help identify which figure corresponds to which leader card while playing the game.


So, that's where I'm at with the Germans. Hopefully I have the remaining figures based soon and ready for a game.

At the same time I've been diverted to painting up a few more figures for my Hundred Years War collection. These are all based on Perry Miniatures plastic sets. I put these together a few years ago to play simple skirmish games like Lion Rampant. To be honest, they don't see much action these days. Lion Rampant works well enough as an introductory game or a quick game on a club night, but it feels too much like a squad based action than something from the medieval period. 


More recently, I've joined in several big games set during the Trojan Wars using Midgard which I've enjoyed. By good fortune I stumbled across army lists for the HYW that the rule's author James Morris had put together. 

I don't have enough painted figures for a game, but I do have quite a few unassembled plastic frames of various Perry sets in my stash. They've been sitting there for far too long and this was a good reason to pull them out and get painting while my mojo was raging. I probably needed to paint up about 30-40 figures to give me what I need in extra figures for various types like archers and men-at-arms.

First to be completed were three bases to represent English leaders/heroes and another dozen men-at-arms. To distinguish the commanders I've based these in twos on a round base and made use of a set of flags I have for the period from Battle Flag.


Having used some of the Gripping Beast Dark Age Warriors in my attempt to create slingers for my Germanic warriors I've also been inspired to try and do a speed paint job on a couple of dozen of those to give me a rather generic force that could be used to represent anything from peasant levy to tribal warriors to armed serfs. So, in short, a very busy workbench at the moment, but too many works in progress and not enough completed projects to warrant a blog post. More to come!


Friday, 2 August 2019

Painting, doing lots of painting

A busy month clearing out a back log of uncompleted projects. For some reason I'm finding I can paint faster than I used to, I think this has more to do with having settled on a style of painting and somehow this has made me more productive. I don't know what it is, but I do know it's a good thing.

So I've been working in 28mm for a Medieval project and in 20mm for my WWII Chain of Command units, mainly focussing on finishing off my Americans.


I bought some Perry plastic Agincourt sets with the idea of dabbling with Lion Rampant and trying to see if that would spark any interest from my younger son. That, like all my attempts to interest in him in miniature gaming proved fruitless and so the project stalled. However I revived it and have put together an English retinue for Lion Rampant and the start of a French retinue.

These are all Perry plastics with most from the Agincourt English Army box with additional Serjeants from the Agincourt French Infantry box. So two dozen archers, twelve serjeants and six men-at-arms.


The spearmen can be used for either French or English and so I've completed the rest of the figures to make up numbers with an eye to having two opposing retinues. While doing that I threw in a few more men-at-arms including one with a banner from Battle Flags.


The first of the French were crossbow men and they were painted up with the remaining English archers.


These joined the English retinue in a game of Lion Rampant (you can read the AAR in this post).


Having painted up most of a 20mm US platoon for Chain of Command I had become distracted and as a result there remained several support units that required finishing (even starting in some cases). With the 29 Let's Go campaign in mind I finished off two 3" AT guns and a 57mm gun. The first of the tanks were also finished - an M4, an M4A3(76) and an M5A1.


I have a number of American vehicles that need crews but I had only bought the crew figures for hatches and so I needed to order more of the full figure crews. The first project finished is the M10 which is based on the Amourfast Achilles kit and all I've done is to replace the barrel and add a 50 cal MG. The Armourfast kits are quite basic but with a little attention can make a perfectly acceptable gaming model.


I've also completed a M4A1 (76mm), this is one from PSC with a crew figure from AB.


I'm not very happy with the bow machine guns in the PSC models. While they are robust for gaming purposes they are way over scale and so I've bought some metal 30 cal barrels from Sgts Mess and I will replace all the bow guns in the PSC kits over the next weeks.


As I had an order in for the AB crew figures I thought I would pick up a few extra bits and pieces. No harm having an extra bazooka crew.


The AB German casualties were a nicely sculpted set and I intend using casualty figures to illustrate the images in the AARs on this blog. As I've said before, I've often taken a picture of the space where a unit or leader used to be if they were wiped out or killed, now at least I can fill that space with casualty figures that should help with the narrative and make for a more meaningful picture. As with the Germans I've painted these avoiding any gore as I don't think it really adds anything and the figures as they are get the point across without the need to over dramatise.


I continued to paint up the AB figures I've collected to replace the plastic PSC figures in my British platoon and this last section now means the core platoon are all AB.


Part of the project has also been replacing the PSC gun crews and so this PSC 6 pounder is now crewed with the AB 6 pounder set. At the same time I've rebased the gun on a smaller base so that I can fit it into terrain in a more practical way as I have done recently with my Russian guns.


I ordered the British command set because I wanted a figure with a radio and an officer to represent a forward observation team. However the set includes some rather nice figures that will work as platoon and section leaders and these were the first to be painted.


These join two other recent AB leaders from the core platoon that come with the platoon section sets.


I have a Bofors gun to make up and while that is yet to be started I've used this painting spell to get the crew ready plus put some paint on a few remaining tank crew figures that have been awaiting paint for far too long.


The Germans haven't been neglected and with an eye on the 29 Let's Go campaign I've needed to add a Marder to the German arsenal. Once again AB provide the crew for this PSC Marder III. The pictures make the muzzle brake look even bigger than it actually is and while it is no doubt over-scale it doesn't look quite this ridiculously large to the naked eye.


Looking at historical photographs it appears the Russian Maxim MG was often fired with the gunner prone yet for some reason many figures created for these guns have the gunner seated. From what I can see that is not the usual position and unless the gunner is prone the gun shield offers very little protection.


I've never liked the seated gunner that comes with the PSC gun and so I was pleased when AB released this Russian set which will now become the default MMG for the Russian platoon.


A busy few weeks, but pleasingly productive. Long may it continue.


Wednesday, 10 July 2019

Lion Rampant first game and thoughts

Having tried Saga (Age of Crusades) we thought it would be good to run through a few games of 
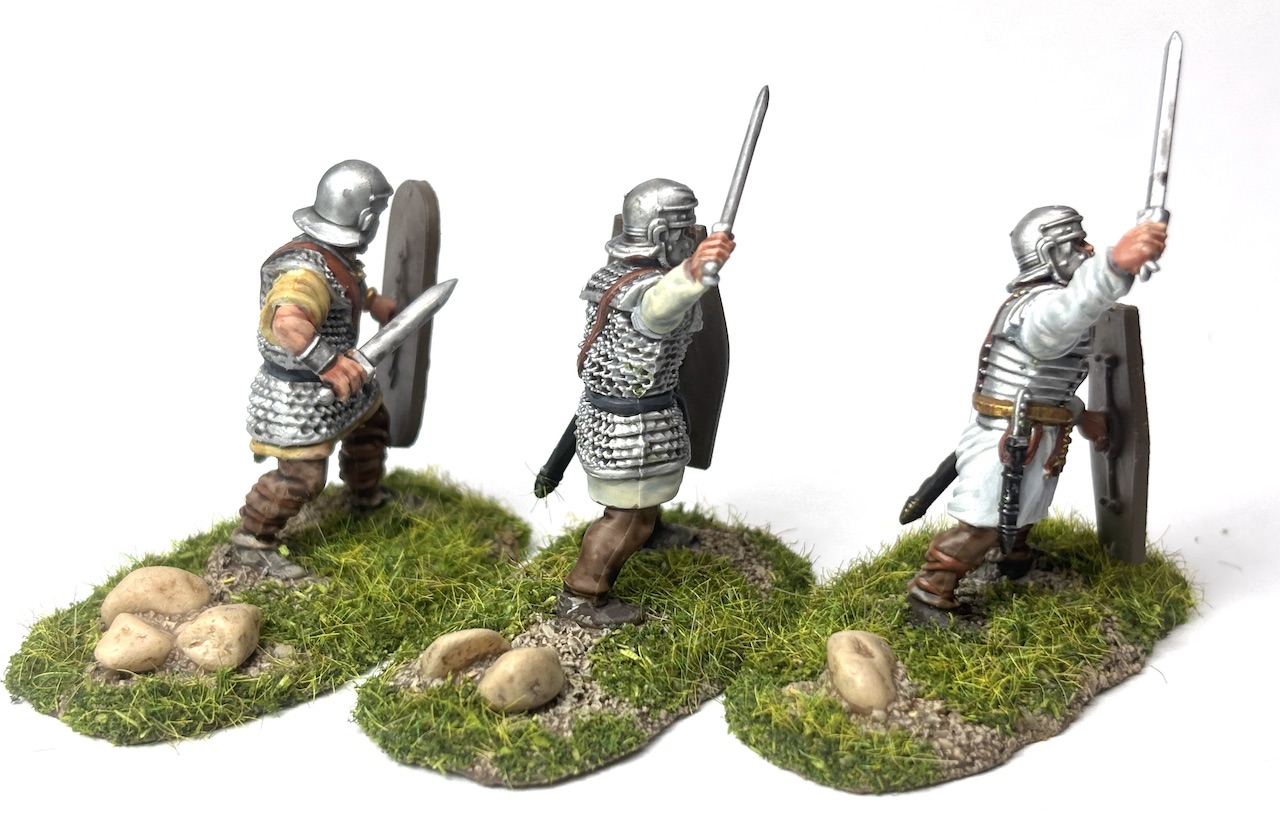
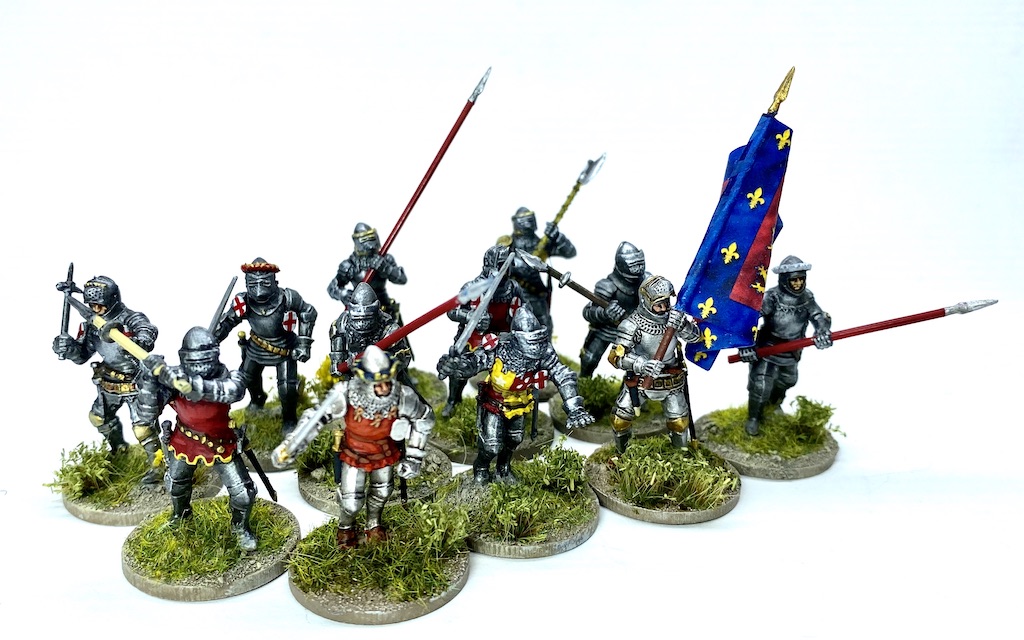
Lion Rampant, Osprey's popular medieval skirmish rules written by Daniel Mersey. I have been slowly putting together an English retinue based around the Hundred Years War and, even more slowly, a French retinue to oppose them. Unit sizes in Lion Rampant are larger than Saga but we realised that by nudging some of Dave's Crusaders forward a few centuries we could make up enough numbers for a Lion Rampant size French retinue.

My English foot men-at-arms (Perry figures)

My English archers (Perry figures once again)

The key difference between Saga and Lion Rampant is the way that units are activated. In Saga activation is driven by use of Saga dice on a battleboard, where each player can assign dice to unit types to perform specific tasks. These battleboards give Saga much of its flavour and drive the narrative of the game. Lion Rampant uses a simpler system that requires units to roll sufficiently high enough to pass an activation test in order to act. That introduces some attractive features, as a unit will often require a different number to activate depending on the action you want them to take. So for example it will be a lot easier to have archers shoot their arrows than it will be to have those same archers charge into close combat. I like this mechanic, as it allows different types of units to have nuanced characteristics to better reflect their various strengths and weaknesses.


Critics of Lion Rampant are normally most vocal in their dislike of the activation system, not least because it leaves too much to luck. While there is an element of truth to that, it's also a common criticism of most rule sets that introduce elements of friction and take away some of the player's total control. Managing friction is part of game play that I enjoy and any reader of this blog will know this is not an issue that would normally bother me. Nonetheless it's important that the player be allowed to exert some influence in the process, success should come from managing luck, not riding it. I still expect any system that makes use of such a mechanic to create a game that produces something close to historically plausible outcomes.

The Lion Rampant rules provide a number of scenarios that are strong on flavour and these can be furthered spiced up by factoring in pre-game Boasts (basically trying to predict successes that might occur in the course of the game along the lines of 'I will slay their leader', success at which earns you additional victory points and failure will cause the loss of those points).

We decided to start off with a scenario called Sausages with Mustard where the attacking force must attempt to set fire to four objectives in the centre of the table. In our case we made this two haystacks and two barns. The defender can assign one unit to defend the objectives while the remainder of his force must enter from one end of the table. The attacker's entire force enters from the opposite side of the table, so it becomes a race for the barns and haystacks while the defender's meagre defensive force must do what they can to hold on until relief arrives.

We each secretly selected a few Boasts to add uncertainty to the victory conditions. It's a simple but effective feature that introduces a little more fun and unpredictability. Probably more Hollywood than history, but a simple enough mechanism.

I was defending with my English retinue while Dave was attacking with the French.

The English retinue consisted of:

1 Foot Men-at-Arms
2 Expert Archers
1 Expert Foot Serjeants

The French retinue consisted of:

2 Mounted Men-at-Arms
1 Mounted Serjeants
1 Foot Serjeants
1 Crossbowmen

Both sides main forces moved on to the table while a solitary group of English bowmen defended the barn.


Play moved quickly with both sides suffering shortened turns from failed activations but nothing to throw the game off balance. Dave's Crusades figures are easy enough to spot as they are the ones based for the drier terrain of the middle east.


The archers put up a mixed performance, failing more activations than average, despite the target rich environment.

Crossbowmen and mounted men at arms advance

The French force looks quite daunting

As the French close in my bowmen seem paralysed with fear and quite rightly so!


Once the range closes the archers are spurred into action and target the crossbowmen.


The English foot serjeants have made good progress and look like they might arrive in the nick of time to help the archers.


However they haven't arrived fast enough to stop the French serjeants who cross the stream and attack the archers across the wall. The bowmen are thrown back having taken a few casualties but their courage holds good. Can my serjeants drive the French off before they do any more harm?


Meanwhile on the flank French mounted sergeants have made their way quickly around the orchard to threaten the other archers and the men-at-arms who are struggling to move fast enough.


Back at the barn the English bowmen find themselves in a spot of trouble. Having staggered back from the French serjeants they are assailed by crossbow bolts that leaves them battered.


Things lurch from bad to worse when the French mounted men-at-arms finally shake themselves into action and come barrelling down the road towards them.


Having seen off the English archers the French Serjeants break out their fire starting tools and move close to the first haystack ready to set it ablaze.


The English could really do with some reinforcements but their men-at-arms are moving painfully slowly through the rough terrain of the orchard.


More worrying, the other unit of archers are about to face a mounted charge before they can reach the cover of the orchard.


My serjeants try to save the the haystack from burning and attack the French, only to suffer casualties and be rebuffed.


To our surprise my archers not only survive the charge from the mounted serjeants they manage to repel their attack and then finish them off with a hail of arrows. However that is the only ray of sunshine in an otherwise bleak picture as the French mounted men-at-arms rout the archers near the barn before charging into the battered foot serjeants.


At this point it looks highly unlikely the English can save the day. The French have already fulfilled two of their boasts and I can't see how I can stop them setting fire to all the objectives, so I call it a day.

That was an enjoyable game that took about two hours to play. While failing to activate is frustrating we didn't see it as a problem, in fact we quite liked the challenge it presents. It calls for a player to try to prioritise what is most important. As one of my managers said to me many years ago - 'don't do what's urgent, do what's important'. As the chances of not activating impact both sides it is a dynamic that needs to be factored into your thinking. It's not perfect and having my archers fail to shoot when the field opposite is full of advancing enemy can feel odd, but no more than those same enemy units failing to move when faced with archers.

As we had time for another game we decided to keep it simple and play the 'Bloodbath' scenario, a straightforward fight to destroy the opposing force.

I kept the same English retinue while the French opted to dismount one of their mounted men-at-arms and have them fight on foot. The English took up a classic Agincourt deployment with the archers on either flank and the serjeants and men-at-arms in the centre. The French had their mounted on their left flank and the crossbowmen, serjeants and foot men-at-arms facing a walled field in the right centre of the battlefield.

The English arrayed for battle

English serjeants in the centre

English men at arms

I didn't take quite as many pictures of this encounter, although I covered the main action. On the English right the archers made their way into the woods from where they had protection from mounted charges and could target the French horsemen. This resulted in very little happening on that flank because the French mounted chose to wait and see how things unfolded before committing themselves.

As a result the main action took place in and around the walled field. The combination of English archers and serjeants proved an unstoppable force. The archers took advantage of the protection offered by the stone wall from where they were able to weaken any French units before the serjeants set upon them with their spears.

A group of French serjeants suffered at the hands of the archers and so the French foot men-at-arms tried to come to their assistance, however they couldn't come fast enough before another volley of arrows and a charge from the English spearmen saw them routed from the table.

The French men-at-arms were to suffer a similar fate. Accurate fire from the archers saw them reduced to three men, which put them in no position to withstand the very aggressive English serjeants.


French crossbowmen had been ineffective from behind the wall and so had moved to try and reduce the range but they were put into a tight predicament once their accompanying serjeants and then men-at-arms were beaten.


At this point the French mounted started advancing towards the centre to try to see what they could do to throw the English off balance (you can just see them in the top left of the picture below).


There was nothing the mounted could do to help the foot men-at-arms, who lost another man and retreated, battered in the face of the serjeants. That left both French units exposed to the wrath of the English archers and spearmen who felt they now had things firmly under control on this flank.


On the other flank the English archers began shooting at the mounted French who were in danger of slowly taking losses if they remained where they were and so they closed to within charge distance of the English foot men-at-arms. This led to the inevitable duel between opposing leaders.


With the English serjeants having routed the men-at-arms in the field and the crossbowmen looking like they were in trouble the French leader was eager to extract some vengeance.


Even a victory in the duel would leave the French mounted having to face the archers in the woods and the foot men-at-arms.


In a blow to English prestige the French leader wins the duel and strikes down the English leader.


Despite the shock of losing their leader the English units handle their courage tests very well and stay in the fight. The victory in the duel was not enough to swing the battle the way of the French who are unable to overcome the combination of men-at-arms and the archers. While over in the field the English serjeants are able to deal aggressively with the crossbowmen and drive them from the field.

Another enjoyable game with plenty of action and fortune swinging one way and the other. The six man units are often very tough opponents but their relatively small number of men does make them brittle and so they have to be committed carefully. Courage tests become harder to pass once any unit has sustained casualties and we found that you cannot ask too much even of the larger twelve man units once they have lost four or five men.

Both scenarios provided a good narrative and the variety of unit types gave players plenty of options for trying differing tactical approaches. Light as they may be I found the rules gave an engaging game experience and an easy way to fill a couple of hours.