
The publication of Chain of Command v2 inspired me to tackle a project I've been mulling over for a while now. I've been trying to come up with game markers that reduce the amount of clutter and blend in more with the figures and table. With that in mind, I've created a few alternatives to the markers I use currently.


They are made from 3mm thick MDF, which makes them quite chunky and, despite using them for several years, I still find them a little obtrusive. I think it doesn't help that most are larger than they need to be to serve their purpose. That's certainly accentuated when playing in a smaller scale, like 20mm.

That said, the Overwatch marker does serve a very specific purpose, as it defines the 90 degree firing arc.

What became apparent quite quickly was that, because each has a unique shape, we didn't need to read the words on the marker to know what they represented. That then begs the obvious question, why did we need words on them at all? Perhaps I can blend these into the table even more by relying on shape alone? I then took it a step further.
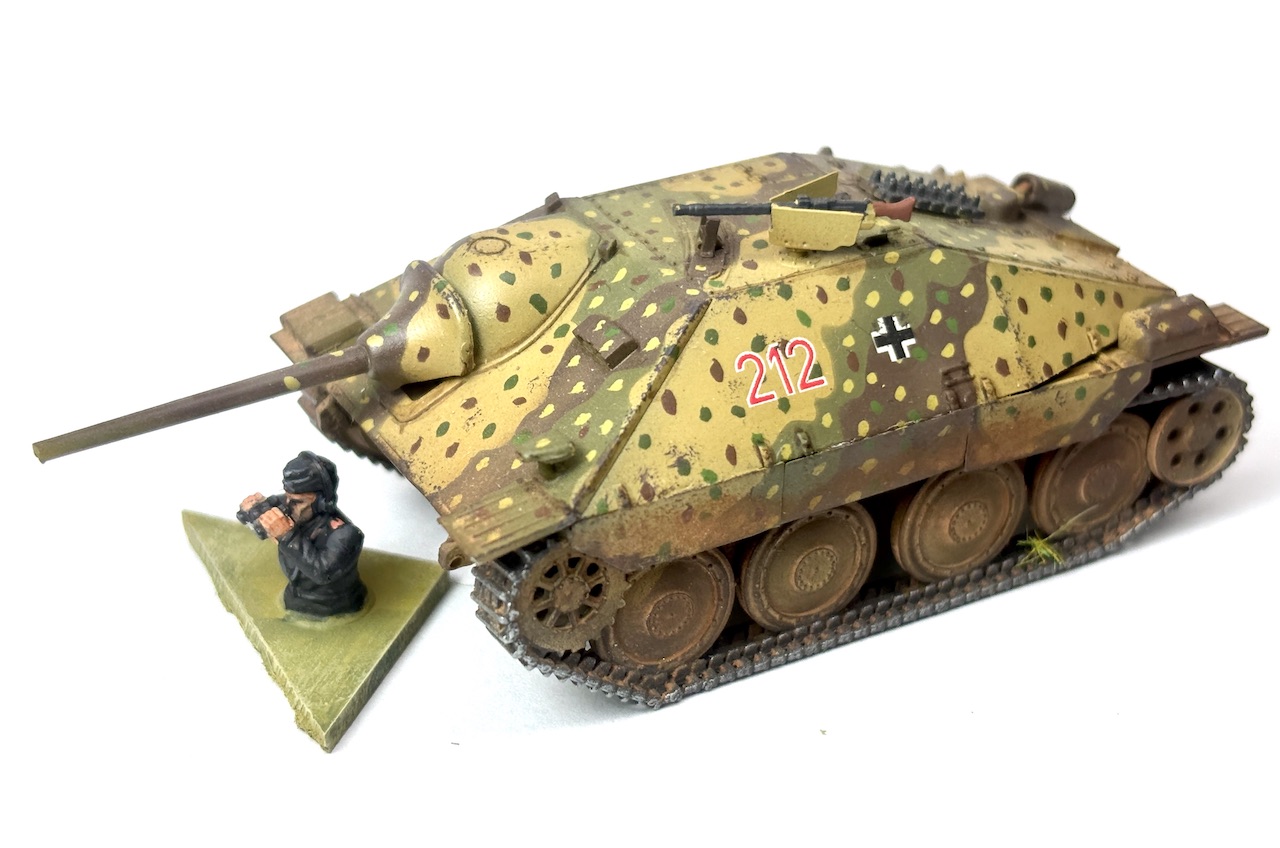
I have a lot of spare figures amassed from various projects. Many are from the Plastic Soldier Company, either left over when I replaced them with metal AB Figures, or surplus to requirements from one of their gun or tank sets. That's given me a lot of excess tank and gun crew figures. Many of the poses include figures pointing, or looking through binoculars, perfect to theme an overwatch marker.

It remained important that any new overwatch markers continue to define a unit's arc of fire. That would still determine their size and shape. I cut a suitably sized piece from MDF, using a 90 degree angle to indicate the arc of fire.


It was then just a matter of adding ground material to match my usual basing style. Of course, it's not necessary to put a figure on them, but as I had so many spare it seemed a shame not to do it. These below are British gun crew figures from Plastic Soldier Company sets.


I think these make for a much more visually appealing game marker. They should work in nicely for the game report photos.

Ironically, they are slightly larger than the original overwatch markers. Time may tell if they need trimming down a little. Nonetheless, I think they certainly look the part.


Well, they did have a point. In my defence, I've since broken the habit of sticking these right on top of vehicles and now place them at ground level.

That's not an ideal solution and, frankly, I don't know why it's taken me this long to address it. As with the infantry overwatch markers, I've wanted to come up with something that blends in more with the vehicles and the table. In this instance, I've gone for a much smaller shape (as it happens, they are just the MDF offcuts from the infantry overwatch markers). Each is painted in the base AFV colours that I use for their respective nationality.

The idea is to place them at ground level, beneath the main gun, to indicate the direction of the arc of fire.


The T34/85 has an average turret speed and the marker works just as well to indicate that arc of fire.


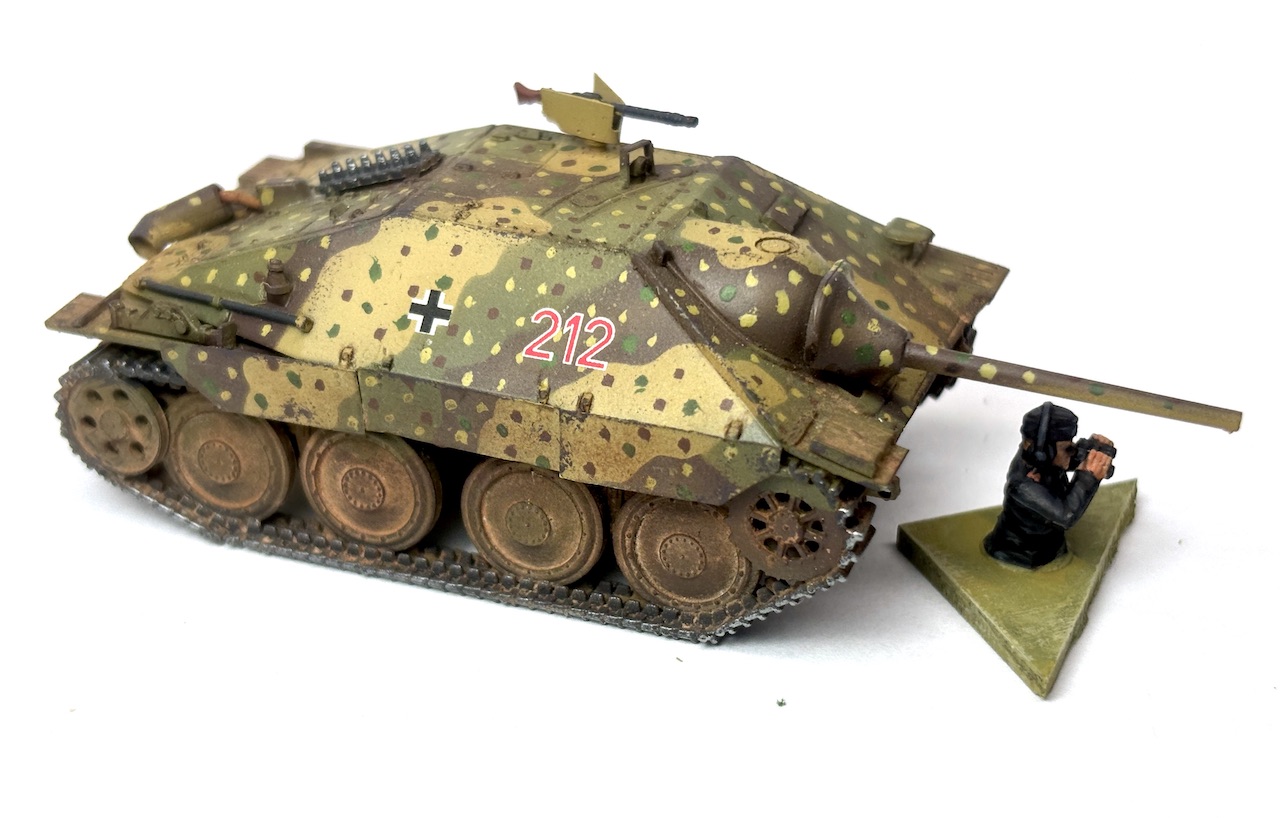

Although perhaps a little top heavy in some cases....

Of course, I don't need to put figures on any of these markers and I do intend making some generic ones, although, having said that, I suspect there are enough spare figures in the boxes to give me what I might need for most of the nationalities I collect. Tragic really.

When it came to considering tactical markers, there was no particular reason for any specific size or shape.

Given a tactical stance represents units finding better cover, I thought the best solution was to mark this with a piece of terrain. These don't even need to be based, but I wanted to ensure they could be distinguished from other pieces of scatter terrain.


These are certainly larger than the markers they are intended to replace, but I don't have an issue with that. They will be used to represent better cover for a section of up to ten or eleven figures, so they need to tell their story visually.
To mark shock, I've been using micro dice in themed dice frames. For now, I can't think of an easier way to do this that serves its function better.

Originally, I used 7mm dice on a square base.

Now, I've gone one size smaller with 5mm dice on a round 20mm base. A bit fiddly at times, I must confess, but less intrusive on the table.
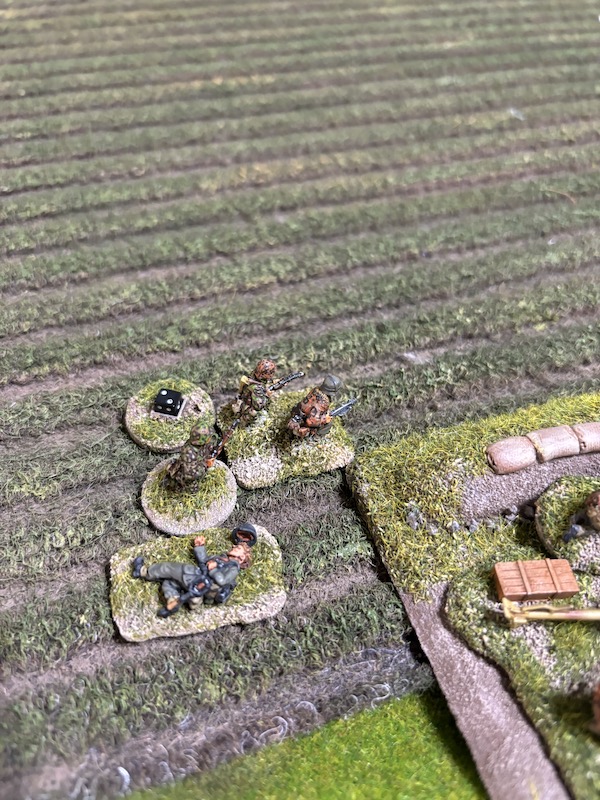
That then left me wondering how best to represent pinned and broken markers. Once again, the aim here is to minimise markers and table clutter. Both pinned and broken status come about as results of excess shock. Currently, I add a second marker to indicate that.

In the case of this small group, that makes for more clutter than I really want.


So, I questioned if I really needed to devise new markers for pinned and broken. Could I not combine this into a single marker, one that covered both the level of shock and the status it imposed on the unit? One idea was to create single sabot bases for the shock dice frame markers, one version for pinned and another for broken. Then I could simply put the shock base into the sabot. I've done something just like this to mark my wounded junior leaders.

I think the solution I'm going to try, is to use different coloured dice in the shock markers. This would eliminate the need for any additional marker or sabot base. Currently, I use black mini dice to indicate shock. When a unit becomes pinned or breaks they remain at that status at least until a turn end, so it's not a status that changes back and forth. As a result, changing the colour of the shock dice to indicate a change of status could achieve my aim. I will use grey for pinned and red for broken.

If nothing else, it sees a drastic reduction in the need for markers.

I don't intend changing the way I mark wounded junior leaders. The leader figure is placed in a discrete sabot with a medical kit to indicate their wound.


The issue I do have, and it's one of my own creation, is that my senior leaders are on more irregular, rectangular bases. It achieves the objective of distinguishing them from junior leaders and other ranks, but the wounded sabot bases don't work. Up until now I've been using a variation of the wounded markers but mounted on a separate 20mm round base.
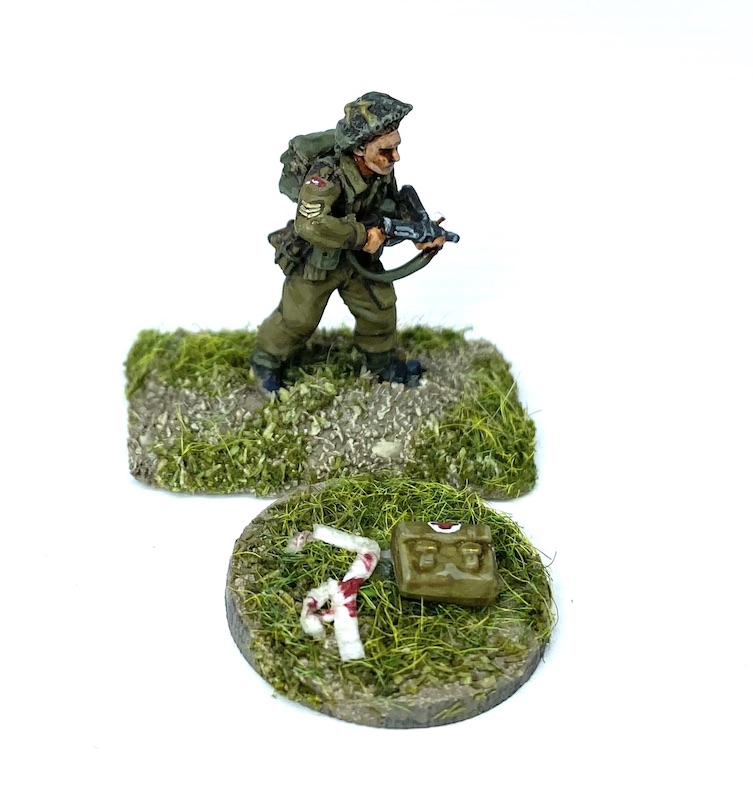
I've come up with two solutions. If the leader is stunned I will use one of these prone figures as a marker and place it alongside the leader's figure. If he's wounded and loses Orders, I will replace him with a casualty figure, where I have one. Again, the spares box has helped me out here.

It's been an opportunity to do a conversion and a tiny bit of scratch building. The American leader below is from AB Figures. I have several armed with Thompson SMG and more than I need, so I removed the head and replaced it with one of the bandaged heads from the Plastic Solider Company German set.

The British leader below is also from AB Figure. In this case he was already bare headed and all I had to do was sculpt the bandage from Milliput. Once again, I have more British figures with sten guns than I need, so this was a good use of a surplus figure.

The figure in the middle is another from AB, but he comes from their Aid Station set and required no additional work, given he's already perfect for the role.

As always, the true test will come when playing a game and I'll soon know how practical all of this is compared to the current system. No harm in trying something new and it's always good to give those figures in the spares box a new lease of life.


