
This is the start of The Scottish Corridor, a campaign for Chain of Command, set in Normandy in late June 1944. The Germans are mounting a series of counterattacks, with the aim of cutting off the British salient formed during Operation Epsom.
While this campaign is self contained, it can be linked to the outcome of Operation Martlet, which we played last year. This is what we have chosen to do. The Germans secured a minor victory in that campaign, so they benefit from an extra platoon for the first two games of this one. If you want the full background, you can find game reports for the earlier campaign starting here - Operation Martlet.

With freshly printed copies of Chain of Command v2 in our hands, we will be playing this campaign using the latest rules. Where possible, I'll try to indicate when we've been using those and how I think it's impacting the game. So far, I like everything I've read. I was involved in some of the play testing, so I'm already familiar with several of the mechanics, but this is my first playing with the final version, as it is for Dave, my opponent.
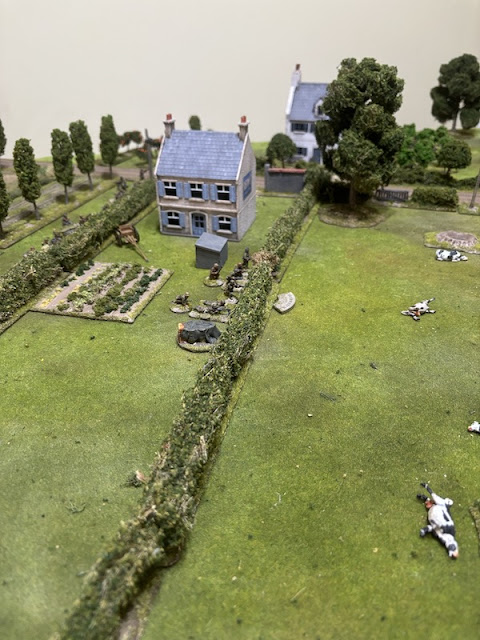
The opening round of the campaign sees advance element of Kampfgruppe Frey probing the outer British defences at Bas de Mouen. As with Operation Martlet, I will be commanding the British and Dave will be handling the Germans. Here they make contact with an infantry platoon holding a position near a farm.


This is a Probe scenario, but we will play it using the v2 rules for the Probe Mission. There are two key differences from the earlier version.
First, it is no longer enough for the Germans to exit a team off the opposite edge of the table, they must also capture a British jump-off-point.
Second, the Germans are under time pressure to achieve those objectives. The game will go to only two turns, after which the final countdown mechanic will apply (the remaining number of phases will equal German force morale). As part of this time mechanic, the British must use each full CoC dice to end the turn, doing it at the completion of the phase where the full CoC die is reached.
Both of these add a new dimension to the scenario, giving the attacker more to do and, potentially, less time to do it in. At the same time it gives the defender the option to either, stand and fight to prevent the attacker achieving their objectives, or, to stall for time by fighting a delaying action. I like the way both of these elements now add more depth to the scenario.

We will use the support list values as set out in the campaign and not adjust those for any changes in the v2 rules. That's not really any compromise, because the support lists for any of the pint sized campaigns have always been specific for the campaign and, where different, take precedence over the main rule book. Business as usual in that sense. While those lists remain unchanged, we will add a few of the new supports - a Replen Point for each side, the Red Dice option for the German Panzer Grenadiers, and, while not adjusting the points value for a tripod mounted MMG, it will now come entrenched.

One of the changes in v2 is the way force morale is assigned. A small change has made quite a difference. The odds now favour the likelihood of both sides having a force morale of nine or ten, with an outside chance of a big difference of eight to eleven. Well, no sooner have Dave and I discussed this change, that he rolls six for his force morale, giving him eleven, and I roll one, to give the British a starting force morale of only eight. Well, so much for an outside chance.
This scenario looks like it could be a tough assignment for the British. With only six support points, they face a powerful panzer grenadier platoon, backed up with sixteen support points. They are unlikely to stop the Germans, the best they can hope for is to delay them and, in the process, inflict casualties. With a little bit of luck, time could work against the Germans, but I would be unwise to plan my game around it.
While I need to consider how to deal with the German infantry, I must also factor in the likely presence of armour. I can't ignore it, but if I decide to select a six pounder AT gun, it is going to use up virtually all my support points. What if the Germans opt instead to make this an all infantry assault? Then a 6 pounder is going to be of little use.
I don't think I can win either way. In the end I decide to hedge my bets. A Vickers MMG team will be on hand, to help deal with the panzer grenadiers, as well as an extra PIAT team, as insurance against the presence of tanks. I suspect neither is quite enough to do the job. Regardless, I won't know what supports the Germans have selected until they make an appearance.

The British make progress in the patrol phase and it enables me to place one jump-off-point close to the forward farmhouse on their right flank. It has the potential to enfilade the German advance and might be worth defending.

In the opening phase I discover the Germans have selected a Red Dice. The campaign already gives them the benefit of elite status, where any single six in their command roll converts to a five for a CoC point. With the additional uses for CoC points in the v2 rules, I expect the combination of this and the Red Dice to give the Germans even greater tactical flexibility. The British may be hard pressed to hold them back.
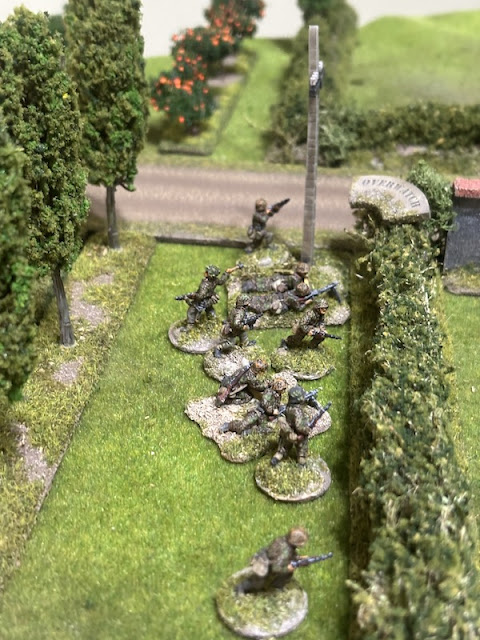
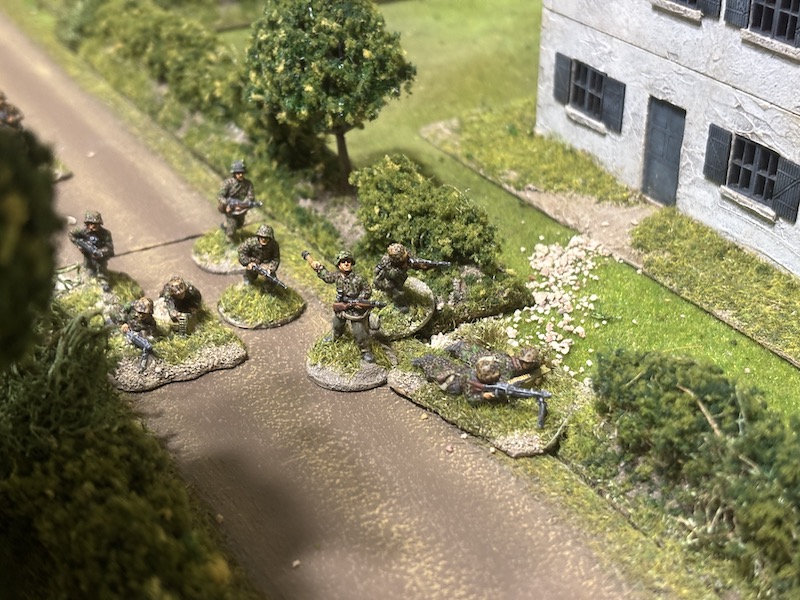
Their first deployment comes in the centre. A squad takes up overwatch positions behind a hedgerow.


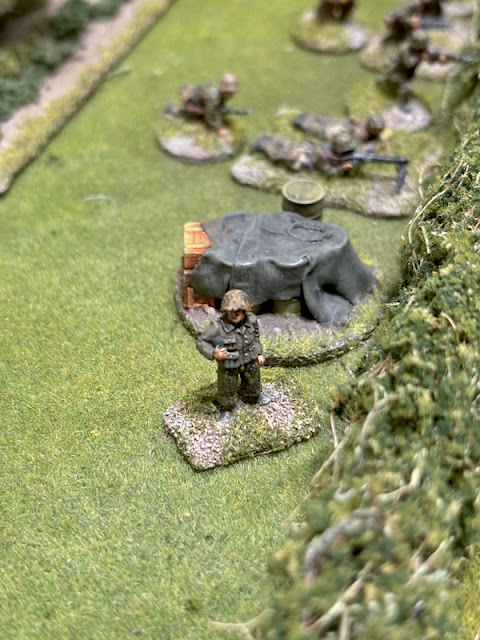
A second squad deploys at the hedgerow behind and an Oberscharführer (senior leader) joins them.

He orders one of the LMG teams to suppress the upper level of the farmhouse that overlooks their position.


Both of these locations are within deployment distance of the nearby British jump-off-point. This highlights another of the new mechanics in v2. Suppressing fire includes all the mechanics of what was previously Covering Fire, but adds an extra dimension. The area under suppression covers a zone back 4.5" from the suppressing fire marker. Any units trying to deploy into this suppressed zone do so as if Hesitant (in short there is a 50% chance they fail to deploy). The zone also prevents any unit moving through it at double time. These changes make suppressing fire an even more useful tactical tool and Dave is quick to exploit its advantages.
The oberscharführer directs the squad to his left to move out across the road. However, they are slow to respond and only make it as far as the road.

More panzer grenadiers deploy around the oberscharführer, taking up some of the space recently vacated by the other squad.

One team lays down suppressing fire on the farmhouse. The other team doesn't have line of sight to the British jump-off-point in the orchard and so they're unable to cover it with suppressing fire.

The sound of tank tracks heralds the arrival of German armour in the form of a PzIV F. That's not entirely unexpected. While I'm not surprised, it does make me wonder whether I might have been better choosing a Sherman M4 as a support option? That would have given me anti-tank and anti-personnel options in a single package. Naturally, that's with the benefit of hindsight. What if I'd selected a Sherman and the Germans had a PzIV G/H with its much more powerful gun? The Sherman's presence might have proven short lived. We will never know.


From there the gunner can cover the walled farm. Between its 75mm gun and the supporting fire of a panzer grenadier squad, the prospect of crossing the open field may appear less daunting to the Germans. It remains unclear which avenue of approach they intend to take, so I don't want to commit the British prematurely. Whatever happens, facing this amount of firepower will make the timing of their deployment tricky.


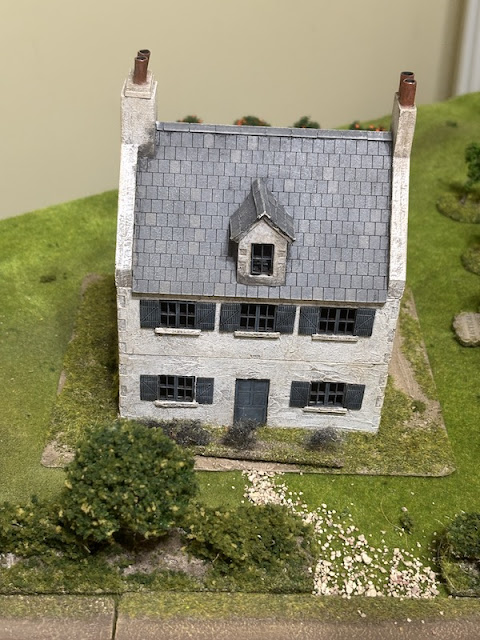
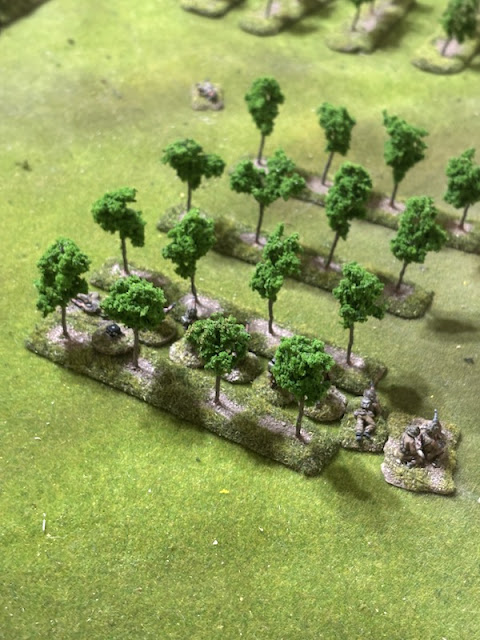
I did consider deploying into the farmhouse itself. It's tempting, but the upper level is visible to two panzer grenadier squads and already under suppressing fire. I suspect it could be neutralised fairly quickly. From the orchard, the section can take up position without exposing themselves to German fire. At the same time, they are well placed to cover movement around any side of the farmhouse.

That flank appears to be the obvious avenue of approach for the Germans, especially given the wide open space they need to cross on the opposite flank.

Despite that, it's a flank the British cannot ignore. Not least because the Germans look like they may be setting up a base of fire to cover a potential move. The British need to carefully think about deployment given their small force and the danger of being overwhelmed.

The Germans are determined to make the farmhouse as inhospitable as possible. Defending it remains an option, but I'm not so sure it's a good one. A single section is unlikely to win a firefight with a panzer grenadier squad and, with the PzIV close by, the building could turn into a death trap. With only three sections I want to avoid being destroyed in detail. I need to keep in mind that the most likely hope of success will come from delaying the Germans, not in winning the firefight.


It looks like the Germans are prepared to make a push on this flank after all.

The British continue acquiring CoC points. With the added time pressure on the Germans the section on the right falls back, moving tactically.

They need to remain a viable threat and, most importantly, one that forces the panzer grenadiers to move cautiously. A delaying, fighting withdrawal might be the wisest option.


He directs the second squad to move up and join the others at the hedge line.

Despite what I thought was a careful withdrawal from the orchard, one of the panzer grenadier teams is able to trace a line of sight through a gap in the hedgerow and orchards. The other team can't see the same target and so they maintain their suppressing fire on the farmhouse, but the first team opens fire.

One of the British riflemen is taken casualty.


It lands on target and gives them the cover they need.


In the centre, the scharführer (junior leader) orders his squad over the hedge.


The oberscharführer tags along with the squad.

A second oberscharführer deploys in the centre behind the hedgerow. That additional senior leader may indicate the Germans have more units to deploy and, if so, they are likely to appear near the recently arrived the leader.

From there, he is well positioned to direct fire to cover the advance across the open field.

He orders the nearby squad to put suppressing fire on the barn and hedgerow.

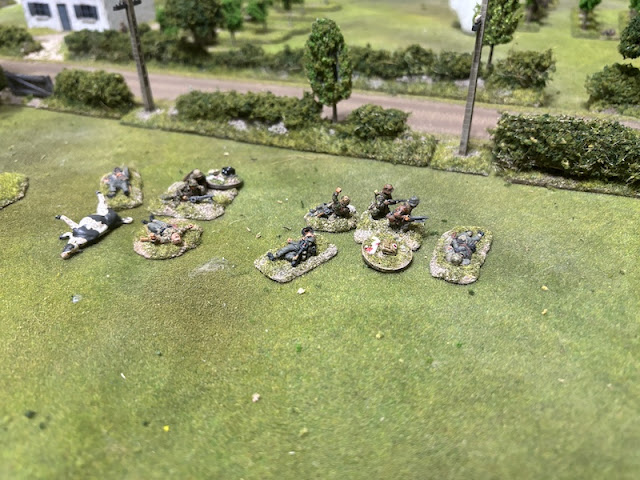
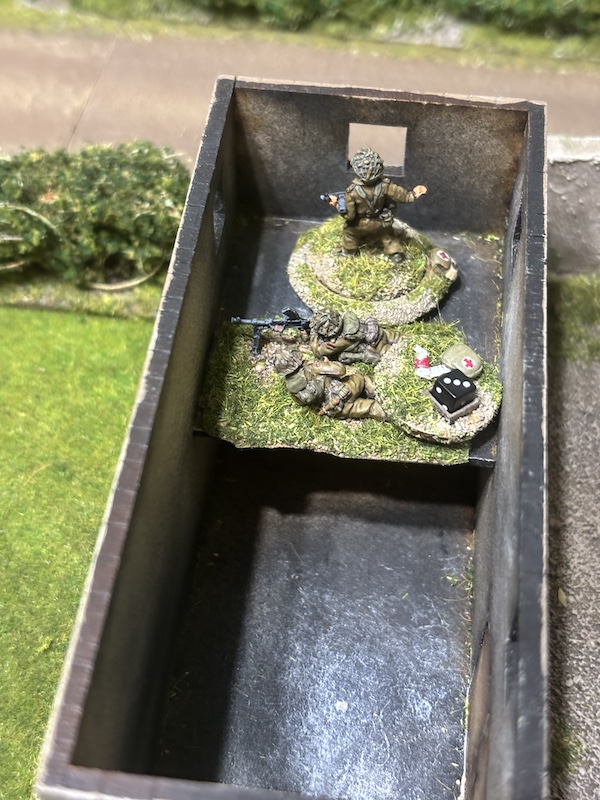
In the British phase the 2” mortar team make a desperate attempt to evade the attention of the PzIV.


The British platoon sergeant deploys into the orchard.

He rallies shock from the section and puts both teams on overwatch.

I want to ensure the Germans can't take advantage of the covered approaches to outflank the British position.

In the following German phase the PzIV pivots and reverses. From this new position it can just see around the smoke and so fires once more at the 2” mortar team.

That's enough to kill the remaining crew member and wipe out the team. British force morale drops to seven.


The British are on overwatch, but there are too many intervening orchard trees for them to have a line of sight.


In the British phase I decide to try to deal with the German move in the orchards. The Vickers MMG deploys from a position where it can see the panzer grenadiers near the farmhouse and opens fire.


The British won't have many opportunities to overwhelm the Germans, but there may be a fleeting opportunity here to work with the Vickers and drive off those panzer grenadiers.

The PzIV commander has other ideas. He orders the driver to move back to the hedgerow and target the Vickers MMG team.


The scharführer at the orchard transfers a man between the LMG teams to bring them both up to two crew members each. They then both return fire at the Vickers team.

Despite the volume of fire, the Vickers crew escape with a single casualty and a point of shock, however that now brings the crew down to two men.

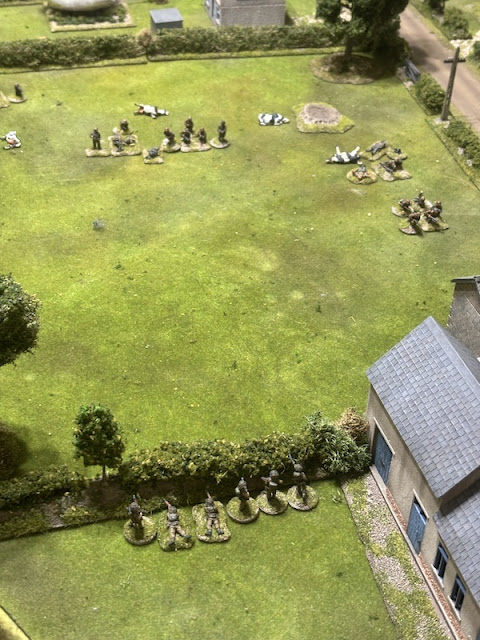
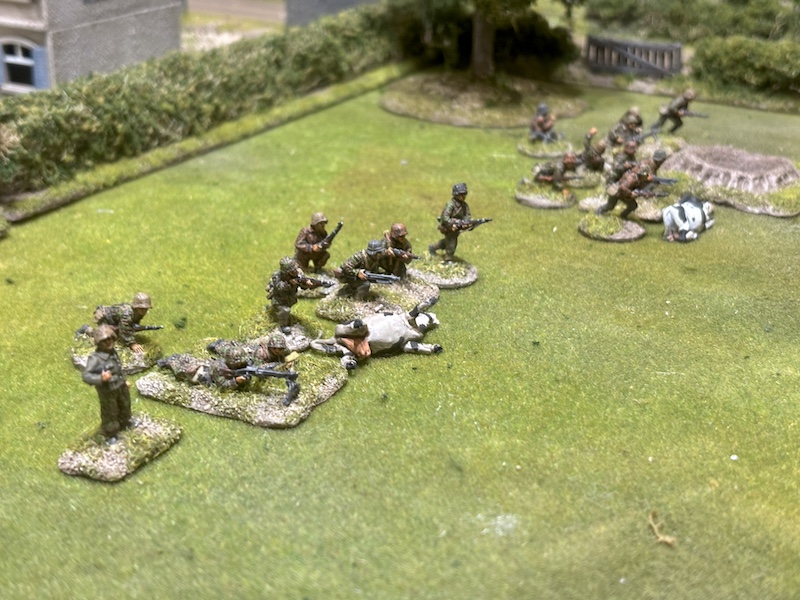
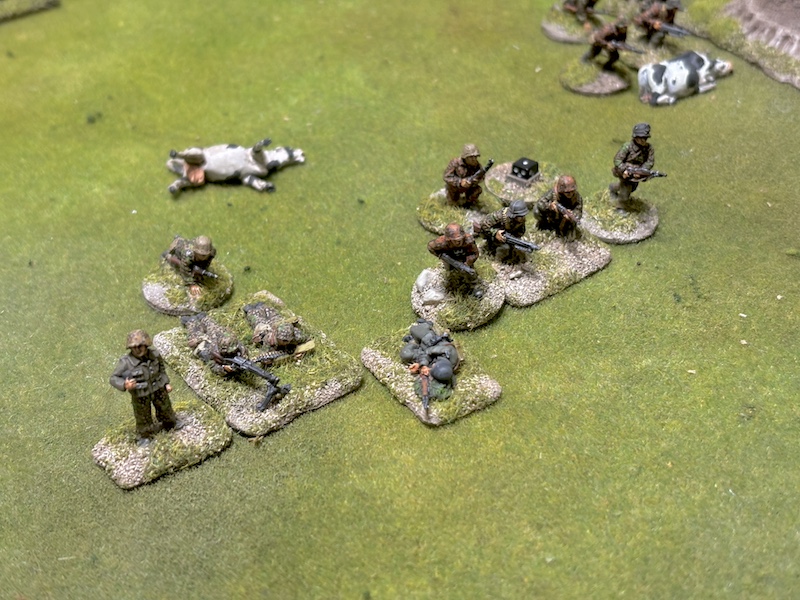
The Germans make an aggressive move into the open field. The oberscharführer leads the second squad over the hedge.

They make for a very tempting target, but I need to find a way to bring fire to bear.


One of the LMG teams that was already in the field puts down more suppressing fire on the hedge line opposite.


They are slowly making progress across the field. More notably, they've done it untroubled by the British.


The Germans use a full CoC die to interrupt and shower the crew with a hail of MG42 fire.

Despite the number of hits the Vickers crew suffer a single point of shock. Nonetheless, the only thing that saves them from pinning is the presence of the platoon sergeant. The fire from the Vickers proves equally ineffective, inflicting only a point of shock on one team.


The best they can manage is to inflict two points of shock.

The corporal uses concentrated fire to focus on the nearest German LMG team. Using this national characteristic now gives the Bren the benefit of storm of steel, increasing the chance of more hits.

In the end the fire proves deadly, without the effects of storm of steel. The team loses two men and suffers two points of shock.

Hopefully, that puts a stop to that team encroaching any further forward.

In the German phase the PzIV gunner ignores the appearance of the Bren team and maintains fire on the Vickers MMG team.

This time the HE round inflicts only a single point of shock, but it's enough to pin the team down.


The platoon sergeant is hit and stunned.

The Vickers crew suffer another point of shock, and with the sergeant out of action, that's enough for the team to break (v2 rules make it clear that a stunned leader does not count for shock purposes).

The men fall back, leaving the stunned sergeant behind. The wounding of a leader and the breaking of the Vickers team sees British morale drop to five.

A fourth squad of panzer grenadiers deploys directly into the open field, near the other oberscharführer.


The nearby oberscharführer orders the squad to his right to move slowly and also fire at the barn.


The Bren team respond to the move, using three CoC points for a react fire. Those points could have contributed to a turn end, but I feel I need to do something before I'm overwhelmed with German fire. The panzer grenadiers lose one man and suffer a point of shock.


He flees back into the farmyard.


The stunned leader is left behind in the barn. That's another blow to British morale, which drops to four, and a salutary reminder about how much firepower the panzer grenadiers can generate.

The scharführer of the closest squad to the barn rallies off shock and then leads the squad's second LMG team forward.

The Germans are determined to keep on pressing ahead.

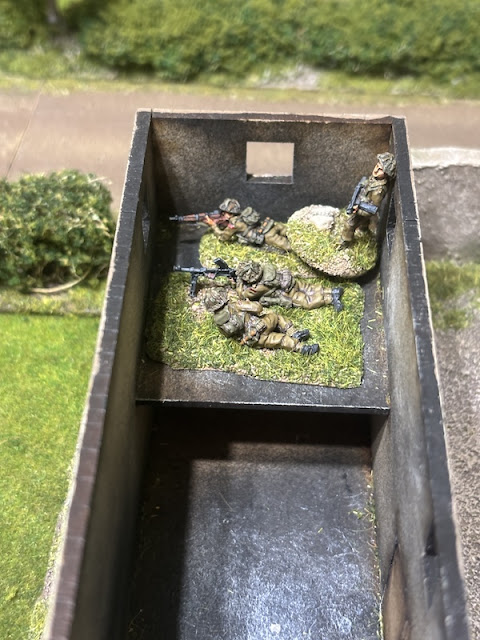
The British are determined to stop them. The platoon's third section deploys into the farm and their Bren team have the unenviable task of taking up firing positions in the upper level of the barn.


The corporal directs the Bren team to use concentrated fire at the nearest MG42 team.

The Germans lose another three men. Neither MG42 team is wiped out, but now each gun is crewed only by a single man.


It has no effect. The British have the numbers to overwhelm the remaining Germans in close combat, but while they have both MG42s functioning, it would be unwise to even consider a frontal assault.

Inevitably, the PzIV commander now turns his attention to the Bren team in the barn.

The first round of HE is not particularly effective, inflicting a single point of shock, but considering how much firepower can come their way, I wonder how tenable this position can be.

The scharführer with the lead squad transfers the sole MG42 gunner from the other LMG team to form a single two man team.

He knows his squad won't survive much longer in this position and he leads them to the cover of the hedgerow by the road.

They are still in line of sight of the barn, but at least they are no longer in open ground.
More alarmingly, they now present a threat, with the possibility they can make their way unimpeded down the road to achieve their objective of exiting the table.

The British have quite enough on their hands, without siphoning off men to deal with a new threat.


Over in the orchards across the road, the second oberscharführer rallies shock and then has his men move slowly towards the road.


The sound of tank tracks heralds the arrival of German armour in the form of a PzIV F. That's not entirely unexpected. While I'm not surprised, it does make me wonder whether I might have been better choosing a Sherman M4 as a support option? That would have given me anti-tank and anti-personnel options in a single package. Naturally, that's with the benefit of hindsight. What if I'd selected a Sherman and the Germans had a PzIV G/H with its much more powerful gun? The Sherman's presence might have proven short lived. We will never know.


The British may be reluctant to reveal themselves, but they have started to acquire CoC points. That begins to put the Germans under time pressure. As it appears that at least one squad of panzer grenadiers is looking to advance into the orchards, a British section deploys to slow them down. They take up tactical positions near the jump-off-point by the farm.


In the German phase the PzIV driver activates and moves forward along the road. Here is another welcome feature of v2, there is now the option to activate individual crew positions, without the need to activate the tank commander first.

The scharführer commanding the squad at the rear hedge has one LMG team continue to put suppressing fire on the farmhouse, while the other team is placed on overwatch.


The squad nearest the oberscharführer then clambers over the hedge and moves toward the next hedge line.


The oberscharführer shouts out orders.


The PzIV moves to the hedge.

The next British command roll brings up a further two CoC points and a full CoC dice, which means the first turn must end at the completion of this phase. At first I'm disappointed to lose the CoC points, which I had hoped would come in handy reacting to German movement. On second thoughts, if this added time pressure forces the Germans to take more risks, or simply run out of time, perhaps that is not such a bad thing after all.
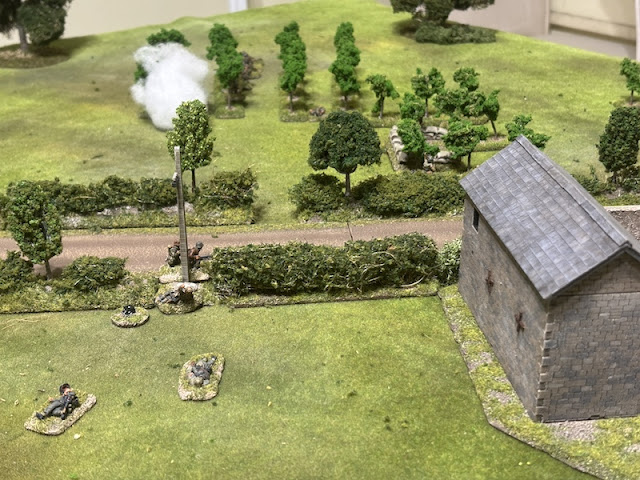
In the meantime the 2” mortar team deploys into the orchard on the right hand side of the road. I want to ensure the section on the right can pull back safely. The mortar team targets a round of smoke to block the German line of sight through the gap in the hedgerows.


With the benefit of that cover the section no longer moves tactically and makes a quick withdrawal towards the back of the orchard.

Unfortunately, they may have avoided the attention of the panzer grenadiers, but not the keen eye of the gunner of the PzIV.

He's been scanning the area on overwatch and can see the movement over the hedgerows.

A 75mm HE round crashes into the orchard, killing another rifleman and inflicting a point of shock. So much for a safe and steady withdrawal.


At the conclusion of the phase the British CoC die is used to end the turn. That does mean the removal of the mortar smoke but, more importantly, it reminds the Germans that they have limited time to complete their mission. I knew the smoke would be short lived. Unfortunately, while it served its purpose of protecting the section from the panzer grenadiers, I hadn't factored in the line of sight from the tank.

In the German phase the PzIV turns its attention to the 2” mortar team.


The blast of HE is deadly, killing two of the crew and inflicting a point of shock. The only good fortune for the British is that the mortar crew in the v2 rules is now made up of three men. That saves the team from being wiped out.....for now.


It's a move with some risk, but the squad has the backing of the PzIV and the men at the hedge to provide fire support.

The squad near the road makes a rapid move that brings them close to the farmhouse.
That exposes them to a potential British deployment from the nearby jump-off-point, but other than inflicting a few casualties, I'm not sure what else could be achieved from that position. It would put two thirds of the platoon on that side of the road, just as it appears the Germans are making their main push on the other flank.


While a German approach across the open field looks uninviting, the reality is that the British have few options from where to engage an advancing enemy. There is a single window in the upper level of the barn and there is the hedgerow. The nearest jump-off-point is well placed to allow deployment to either position, however with the area covered by suppressing fire, any unit looking to deploy will be hesitant. There's a good chance they may fail to deploy at all. Even if they do, both positions face the prospect of being swept by the fire of two panzer grenadier squads and the PzIV.

They aim a round of smoke and it lands on target. For now that limits the threat of the tank.


The panzer grenadiers near the farmhouse move past the house and make contact with the British jump-off-point. That gives them one of their objectives and I feel I may have surrendered that too cheaply.

The Germans are careful to remain at the rear of the orchard where they cannot be seen by the British section.


The oberscharführer in the centre continues to direct the assault on this flank.

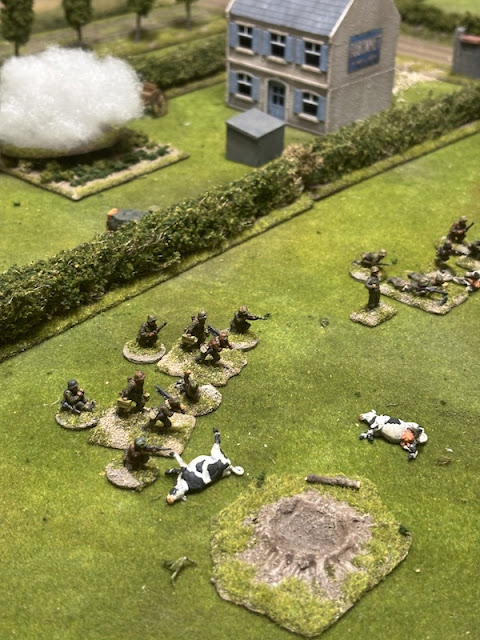
He wants the squad in the field to continue moving towards the farm.
They make steady progress.

They are very exposed and still have some way to go.

And I'm not sure the dead cows offer them much in the way of protection....

That protection is far more likely to come from other supporting units, like the squad behind the hedge.
They provide that by maintaining suppressing fire on the farm. Here, it's easy to see how useful suppressing fire is as a tactical tool. Not only will it make any return fire less effective, it will make it non-existent, if it can prevent the British deploying.

In the British phase I decide to try to deal with the German move in the orchards. The Vickers MMG deploys from a position where it can see the panzer grenadiers near the farmhouse and opens fire.
Dave utilise a new option in v2 and spends three CoC points to have the Germans hit the dirt.

Despite a quick reaction, and moving to better cover, the Vickers wreaks havoc with the panzer grenadiers, cutting down four of the squad. For once, it doesn't feel like the Germans have all the fire superiority.

With the German squad losing nearly half its men, the British seek to take advantage. The platoon sergeant swings into action.

He has the section in the orchard throw a smoke grenade and move forward tactically.


The team may be entrenched but the tank's high explosive round is powerful. Two of the crew are killed and the remaining men suffer a point of shock. I think I may live to regret not having a better anti-tank weapon.


The Germans don't intend making that easy.


The other team makes its way forward.


In the British phase the action continues on the other flank. The Vickers prepares to fire again.


The section in the orchard has a line of sight through the trees to one of the German LMG teams and opens fire.


With the Germans out in the open field I decide now is the time for the British to commit themselves. A section deploys into the barn. Unfortunately there's only a single window, which means only the Bren team can open fire.


The oberscharführer rallies shock from the remnants of his squad and they too open fire on the Vickers crew.


They open fire immediately at the Bren team in the barn.

The hail of gunfire kills one of the crew and inflicts two shock.


Sure enough, when the Germans fire, another torrent of firepower strikes the barn. Two of the Bren crew are killed and the corporal is stunned. An additional point of shock is enough to break the survivor.


The section's rifle team deploy behind the hedgerow.


The rifle team target the same squad.


They are finding it costly to move in the open, yet despite inflicting the casualties, I can't help but feel the British have inadequate firepower to hold off the full German force.

The platoon lieutenant joins the two sections in the farm. Other than the two PIAT teams, that's the full British force deployed and it feels completely inadequate to deal with the Germans. So far, they have failed to make a dent in German force morale, while their own has dropped to four, with a subsequent reduction in command dice. That's even less chance of gaining the CoC points needed to end the turn.

Over on the other flank the Bren team continue firing into the orchard opposite.


The oberscharführer orders one of those panzer grenadier squads to target the barn. This time their fire proves less effective, but it does see shock start to accumulate on the small Bren team.

The oberscharführer is determined to continue pressing the platoon forward. He then directs the squad to his right to advance on the farm.


Despite the relatively small amount of fire, it proves deadly. Two of the Bren crew are killed and, with the shock they already have, that's enough to see the team pinned.

The oberscharführer then has one of the panzer grenadiers throw a smoke grenade at the orchard.

It lands alongside the British smoke grenade and effectively hinders any line of sight from that section to the Germans.

When the British phase arrives I decide there is no point continuing the fight, it's clear the direction this encounter is heading and the platoon should withdraw. With their force morale at four, it is becoming harder to fight back and any chance of accumulating enough CoC points to run down the clock seems remote. Not only that, the Germans have a chance to achieve their second objective and move a team from the table.

I'm not certain any British unit can react fast enough to stop them. The section in the orchard is under threat from the panzer grenadiers opposite if they try to move in that direction.

The sections at the farm have their hands full dealing with the two squads of panzer grenadiers heading their way (all with the support of the PzIV). In all likelihood, the outcome will be more casualties. That will serve to lower the Men's Opinion as the campaign progresses. You only have to look at the firepower the rifle team at the hedgerow could potentially face to know the outcome is not in doubt.

Talking of casualties, the Germans will recover nearly all of their losses. This is down to the difference in force morale, which is substantial - eleven to four. So, despite trying to put up a good fight, the British have little to show for this initial clash. At least that is all it is, the first probe by the Germans on a lightly held position. Given the disparity in forces this was the most likely outcome, so now I need to pull back to a stronger defensive position in the village of Mouen itself.
After that initial game the British CO's Opinion drops to -1, as does the Men's Opinion. Not the best start. The commander's outlook is Content. Unsurprisingly, things looks brighter in the German camp, where the CO's and Men's Opinions are both +1. Their commander's outlook is Secure.
Meanwhile, we will move to the other flank of the salient for the next game. There, elements of Kampfgruppe Weidinger will attempt to breakthrough the British positions at Le Valtru in the hope of fighting their way to Kampfgruppe Frey and pinching out the salient. You can follow what happens next in this post.
Our thoughts on playing with the v2 rules were overwhelmingly positive. While the game felt very familiar, there were several new additions or refinements that added to the experience.
There's no doubt that suppressing fire is a very effective tactical tool. Dave combined it well with fire and movement to drive his panzer grenadiers forward. I can see us making much use of this in future games.
The use of smaller numbers of CoC points for certain actions gave each of us the ability to respond, often in adverse circumstances. Dave made use of hit the dirt and we both used react fire. CoC points are now more valuable than ever, but they are no more plentiful. This scarce command resource still needs to be used wisely.
Storm of steel proved effective and encourages use of certain weapons and national characteristics. It can make quite a difference and it certainly incentivises use of those characteristics like concentrated fire and maschinengewehr, which both Dave and I made use of during this game.
The Scottish Corridor is a pint-sized campaign published by Too Fat Lardies. You can purchase this as a downloadable pdf from the Too Fat Lardies website.
If you've enjoyed following along and would like to Buy Me a Coffee to help support the blog you can click through at the link or on the tab in the right hand column of this page.
Fantastic battle report. Great looking table.
ReplyDeleteThanks very much!
DeleteAnother terrific report. I have CoC2 but haven't yet had a game. Hope to rectify that soon. ;)
ReplyDeleteThanks Doug. I think you'll find lots to like. It stills feels very much like Chain of Command, just....better.
DeleteA great report of a v2 battle. I am enjoying the new rules too.
ReplyDeleteThanks, yes, lots to like in the new rules without really changing the way the game feels.
DeleteGreat report there, that Panzer lurked around like very menacingly. What to do against that sort of German firepower is a real challenge - you may have been correct and gone for a Sherman to give you something to frighten their advance.
ReplyDeleteThank you, yes, the tank was a menace, I definitely could have done with a better anti-tank weapon.
DeleteNice to see the v2 rules in action and the very determined German approach - that was a solid approach using the beefed up covering fire to good effect.
ReplyDeleteI think we will be using suppressing fire a lot more in future games, while many of the changes in v2 are quite subtle they add a lot of interesting tactical options.
DeleteVery entertaining. It was always going to be a tough battle for the British. I've got my first game of CoC2 this coming Sunday. I'm really looking forward to it.
ReplyDeleteThanks Carole, I think you'll enjoy it. My only word of advice is, even when you think a rule hasn't been changed for v2 read it carefully. There are often small little changes that you don't notice or skim over assuming nothing's changed.
DeleteA great report of looked and sounded like a great game.
ReplyDeleteThanks Ray, it was a good game, even if I took a bit of a beating. The good thing about a campaign is that there is always the next game to try and turn things around.
DeleteExcellent report. Great game and terrain.
ReplyDeleteThank you!
DeleteThanks for posting such a great report. It certainly highlights the changes in v2.
ReplyDeleteThanks Dennis, we're finding v2 has taken nothing away from the game we like, but added plenty more to make for an even richer game.
DeleteExcellent report and nice to see a tank being used properly as infantry support rather than swanning around the battlefield like a self-important princess.
ReplyDeleteThanks, I think gave a bit of a masterclass in using fire and movement with plenty of supporting fire to help things along. Naturally I think the only proper use for that tank is as a smoking wreck :-)
DeleteSuperb looking game and a really enjoyable read as well, top notch stuff!
ReplyDeleteThanks, it's good to be back playing a CoC campaign again, especially with the new rules.
DeleteAnother excellent report and supporting photos with useful insights into how the new parts of the rules work and effect game play. Looking forward to my first run out a week on Tuesday. A well earned coffee is en route.
ReplyDeleteThanks, glad you enjoyed it. I think you'll find the new edition adds lots to game play while staying faithful to the core mechanics. Many thanks for the coffee, that's much appreciated!
DeleteAnother excellent report. Given the 90degree field of fire restrictions now plus needing lear line of sight for each figure, it wasn't clear to me that the second German section had the house in their field of fire to do suppressive fire on it right after they deployed. couldn't really tell from your photos. We tried our first CoC2 game with the first probe scenario from the Robin Hood's Black Gold campaign. The Germans were cautious and also ended up poorly placed after the patrol phase so the new time limit and better Home Guard luck frustrated them fairly quickly doomed them fairly quickly.
ReplyDeleteThanks. Worth noting the 90 degree line of sight only applies in the context of overwatch and react fire. Rich wrote a primer on firing on the Patreon site (also posted it on FB) where he explains units can turn and fire in their phase without it being considered movement, so they have a 360 degree arc in that sense. The 90 only applies to the reaction type fire. Also worth noting that only four men in the squad are normally firing and require a line of sight (the MG42 gunner and one crew). So unlike other squads there is less of an issue with figures blocking sight. The new Probe mission now offers some great extra twists and the outcome is less predictable given the changes to victory conditions. All good stuff. Thanks for taking the time to comment.
DeleteGreat looking game and AAR Mark! I really enjoy these. Was there no option to take a 3” mortar, that would have really slowed down those Panzergrenadiers.
ReplyDeleteEither that or a Sherman, that would have made a huge difference. Looking forward to the next game.
Thomas Moore
Thanks Thomas. No option for a 3" mortar unfortunately in this scenario but there are options for pregame barrages in other scenarios. I think the Sherman might have helped, but of course, that's with hindsight. The Germans have a Tiger available, had they taken that, then the Sherman would have been in big trouble.
DeleteAnother fascinating AAR, I'm glad to see you're having as many problems as me trying to cope with panzergrenadiers. I did wonder about your opponent bringing on his second senior leader before all his troops had deployed - he must've got lucky deploying the fourth section's hesitant deployment?
ReplyDeleteI should be posting my first v2 game later today, also a Probe scenario, but as I don't take notes and often forget to take photos it's nowhere near as good a narrative. Like you I like most of the changes, but haven't used armour yet under v2 so I'm concerned that allowing crew members to activate on a '1' will make tanks too powerful, they're already pretty scary. It's odd that they haven't considered the issue of tanks operating heads out vs buttoned up as it's in the much simpler WaT rules and heads out allows anyone to try and shoot the commander and buttoned up makes acquiring any target, especially infantry and emplaced ATGs really hard.
Thanks, those panzer grenadiers are quite a handful. Dave had an Adjutant as a support so that allowed him to bring the second senior leader on and not worry about later deployments. As for CoC2 and tanks, I like the activations on a 1, as there are never enough 3s to go around for all the junior leaders. However, bear in mind, the new rules require a tank to test to see if the crew member activates if there is any shock, the greater the shock, the greater the chance they fail to activate. You won't know this until you try and, if you fail, you waste that command dice. So the rules give with one hand, but take away with another. Yet to see how it all works in practice, but it sounds like a reasonable balance.
DeleteTerrific report as usual and an excellent primer for v2. Thanks.
ReplyDeleteThanks, while there are several elements that are new in v2, there is also much that is familiar. As Rich Clarke has said, it’s an evolution not a revolution.
DeleteExcellent batrep and scenery. It’s got it all going on. Never looked at CoC before but this tactical style battle might be worth me exploring in the future. Cheers for the inspiration!
ReplyDeleteThank you. CoC really hits the sweet spot for me for WWII tactical gaming, particularly if you want a set of rules that tries to replicate the period. It’s an excellent blend of history and playability.
DeleteExceptional AAR and very handy as we all go to school for V.2. One point, I believe the Probe scenario description states that the Final Countdown only starts after the defender's have expended 2 CoC dice to end turns - turns that end on a triple 6 don't count to that total. (We made that error in one of our games before re-reading the mission more closely.)
ReplyDeleteThanks, glad you enjoyed it. The first turn ended with the use of a CoC die by the defender (me), I knew I had no choice, as the command roll in that phase included two 5s and I had four CoC points already. That ended Turn 1 and we never reached a point when I could end turn 2. Had either of us rolled a turn end we probably would have double checked the mission conditions, but under the circumstances, that was moot. However you make a good point and all the missions need to be read very carefully to avoid errors.
Delete