

I've tried out a few different methods for representing explosions for either destroyed tanks or to represent the area hit by a barrage. My first method was using the fibres used for stuffing cushions. They have a better quality that cotton wool and with some colour I've found they are more than acceptable.
For smoke grenades and smoke rounds the plain white fibre works well and can be teased into shape. I made up 3" diameter round bases to conform with the size of smoke for Chain of Command and simply stuck the unpainted fibres to the flocked bases. Quick and easy.

Using the same fibres, but this time using three lengths of wire inserted into a smaller 40mm base I created distinct columns to represent smoke and debris as the result of an HE explosion. These were used as my barrage markers.

Clumping foliage can work out fairly expensive, plus it's the wrong colour, but I came across a tutorial online that showed how to make and colour your own. It seemed quite simple. Roughly tear up some foam (I used some from an old foam mattress we were throwing out). Mix the foam with some water and put it in a kitchen blender (the water serves no other purpose than to give the foam some weight so that the blender blades can bite into it). Blend until the foam is in suitably small pieces and then drain it in a sieve, squeezing out the excess water. By the way, this doesn't appear to do any damage to the blender and it just needs a quick wash afterwards to leave it ready for more domestic duties. That said, I cannot accept liability for any relationship breakdowns that are a consequence of this misuse of kitchen appliances......
Next, add a generous quantity of PVA glue, some black acrylic paint and, if needed a little more water. Wearing rubber gloves, thoroughly mix it all together (it gets messy, do it in an old bucket). Then squeeze out a handful at a time, roughly shape to the size of a small sausage and leave them to dry. The drying will depend on how warm an environment you leave them in. I use direct sunlight in my backyard (I live in Sydney, so the sun has plenty of warmth to it). It can take up to 24 hours to dry. I'd suggest you do some test samples first to get your measurement right before embarking on a larger batch.
The first things I made were some explosion markers to represent knocked out AFVs. I glued a piece of wire to a metal washer and then used super glue to attach the clumping foam to the wire, slowly building up the layers. It's very messy and you will get a lot of super glue on your fingers, I wouldn't bother with this method again, I think you can work with PVA, it's slower, but a lot easier to use.
They look effective just as black columns of smoke, but I wanted to add some drama to mine and so I painted the bottom with red and yellow acrylic paints.


Happy with this, I thought my barrage markers could do with an upgrade. Using a round 40mm wooden base, I drilled three holes and glue in three different lengths of wire. I'd made sure I had plenty of PVA in my clumping foam mix and so I found I could break off reasonable sized pieces and using PVA as the glue, thread the wire through the foam and slowly build up the shape. The glue doesn't dry as quickly as superglue, but then again it doesn't stick your fingers together either.

Once again these work well just in black, but I wanted to break up the solid black colour and so gave them a dry brush, alternating with burnt umber and some neutral grey.
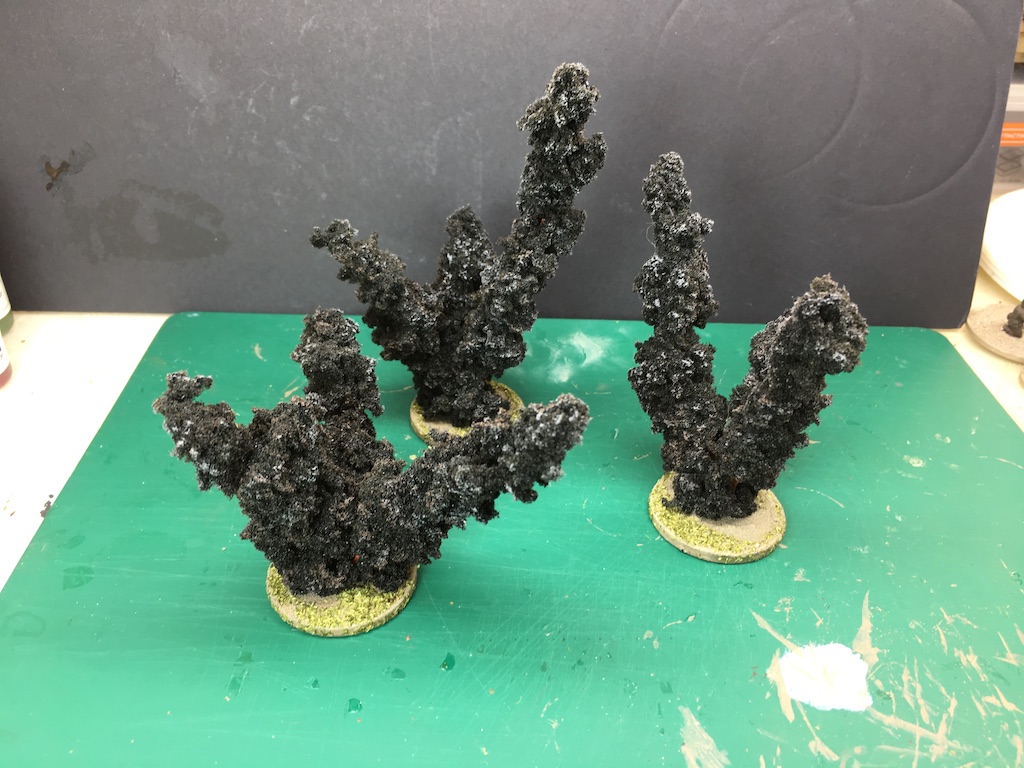


I'm very happy with these, they look quite dramatic and should be very effective on the table.
 |
| A PzIII comes to grief in a barrage |
Very good! Thanks for posting this. I have heard about using clump foliage before, but this is a very clear explanation of the process.
ReplyDeleteThanks, I think the end result is pretty good and they seem sturdy enough to survive handling.
DeleteVery nice work Mark, the barrage does look very effective,I need to make some up as I still have no markers for a Barrage, thanks for sharing.
ReplyDeletecheers John
Thanks John, now that surprises me, you seem to have covered everything else off so well! They look great on the table and are well worth the effort. I'm thinking of making up some simple shell holes that I can add to the overall effect.
DeleteNicely done! They add a lot of drama to the tabletop. Thanks for the tutorial, I'll try this.
ReplyDeleteVery nice! I've been reading through your blog the last few days, and was just wondering after reading the last AAR how you had made these. :-)
ReplyDeleteGreat stuff. I made some recently using an old bag of clump foliage and it took a lot of black spray paint to get them black. I'll try your lender and black acrylic method next.
ReplyDeleteHaving said that, here's some advice: Tarzan's Grip. It glues anything. Great stuff. Cheap and easy to find (you can even find it in Woolies).
Great stuff, I have also experimented with steel wool for the explosive effect
ReplyDelete