

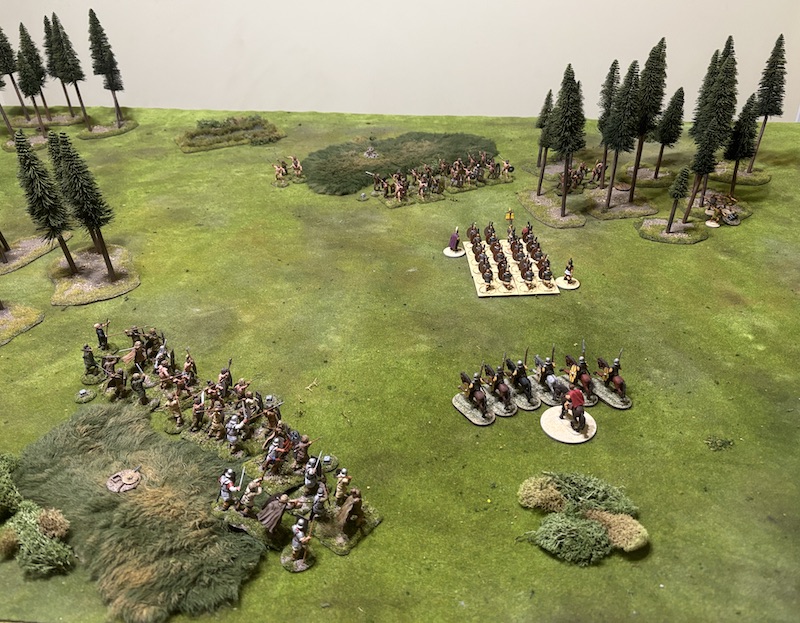
This game uses the General Engagement scenario, so is a fairly starightforward clash, with the winner the player who can force his opponent from the table. The terrain is a suitably rough, wooded area on the borders of the Roman Empire.


This gives the Germans quite a few options and plenty of reasons to make the Romans cautious....even anxious. Well, that's the hope anyway. The terrain certainly suits the German style of warfare, but time will tell.


They let fly missiles at their Roman counterparts and inflict a point of shock.


This time they prove deadly. Only a few hit their mark, but it's enough to kill two of the Germans. The survivors hurl missiles back, but can only inflict a single point of shock in return. First blood to the Romans.


They break and flee back through the forest. The fanatics have made short work of them.

They are unlikely to play any further role in this encounter.


That sees the Romans focus all their attention on the barbarian mob to their right. Can the remainder of the German force take advantage? Could they emerge from the rough ground behind the Romans and knock them off balance?


They are fired up with fervour and this powerful force now sits behind the Romans. The question is, will they be able to move fast enough to prevent them overwhelming the other mob of warriors?


Having said that, holding the Romans where they are gives the other warriors less distance to cover to strike them in the flank or rear.


Much now depends on how quickly the German commander's force can influence events. Ideally the Romans find themselves attacked from two directions. Timing is everything here!

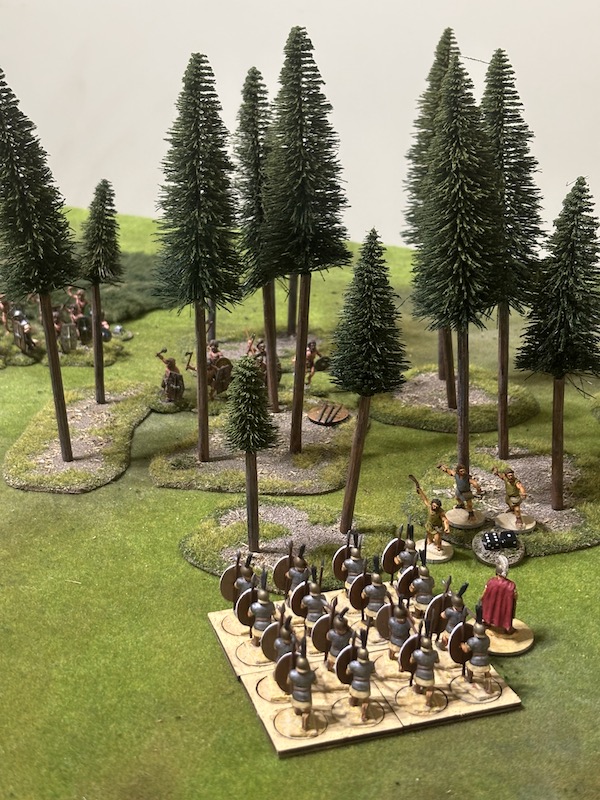
He marches his recruits to the tree line and then forms them into close order.


This leaves the Germans woefully unprepared to face the violence of close combat. They lose far more men than the Romans and add to their already considerable shock. The leader is wounded and both groups are pushed back. German force morale drops to eight.

The Germans desperately need to pull back and rally, before the Romans can break them completely.

They fall back to the women.

In the process they put some distance, and the rough terrain, between themselves and the legionaries.


The Romans have really seized the initiative and while the main German force remains potent, it's a long way from where it needs to be.


Despite catching the Romans off guard and striking them in the flank, the fanatics are unable to inflict any real damage. Roman armour does much to protect the legionaries, nonetheless, two men are killed and they suffer a few points of shock. However, the fanatics suffer three casualties, fifty percent of their strength, and lose all of their fervour.

To make matters worse, the Romans have won this round of combat. That means they turn to face the fanatics, who lose the advantage of attacking from the flank.

The odds swing massively in favour of the Romans who have a four to one advantage in this round of combat. That's more than the fanatics can handle. They are dispersed and disappear from the table.


He has only one command initiative, so use of a signa card allows him to rally off the point of shock and use his other CI to move his legionaries towards the German mob. They are in a very brittle state and even an assault by a single group of Romans might be enough to drive them off.

The legionaries won't move fast enough to make contact this turn, but they want to get as close as they can.


Things are not looking so promising for those Germans. Their opportunity to catch the Romans in their flank or rear seems to have passed.


Despite moving quickly, they still have a way to go.


He then orders the two groups forward into the rough terrain. He senses he has a good chance of making contact before the arrival of the fresh warriors. In fact, he may well have enough time to drive off the battered mob facing him, before turning to face the new threat behind him.

The slingers have no intention of hanging around and they evade before the cavalry can catch them.


He uses his last command initiative to have the single group move forward and then a signa card to order the formation to move forward. He is determined to finish off the Germans.

The Romans are slowed by the rough terrain, but move fast enough to just make contact.

The carnage continues. The German leader and more warriors are killed. The shock piles up. One group breaks and one is pushed back. The wailing women watch on in horror and German force morale falls to four.


After two rounds of combat the outcome is undetermined. Each side has lost a man and suffered some shock, so they remain locked in combat.

It now seems futile for the Germans to try to reach the Centurion, the damage is done and the Romans have plenty of time to turn and receive them. Instead, he decides to try and overwhelm the Optio and his recruits.

He orders both groups to move off and try to join the Oathsworn warriors.


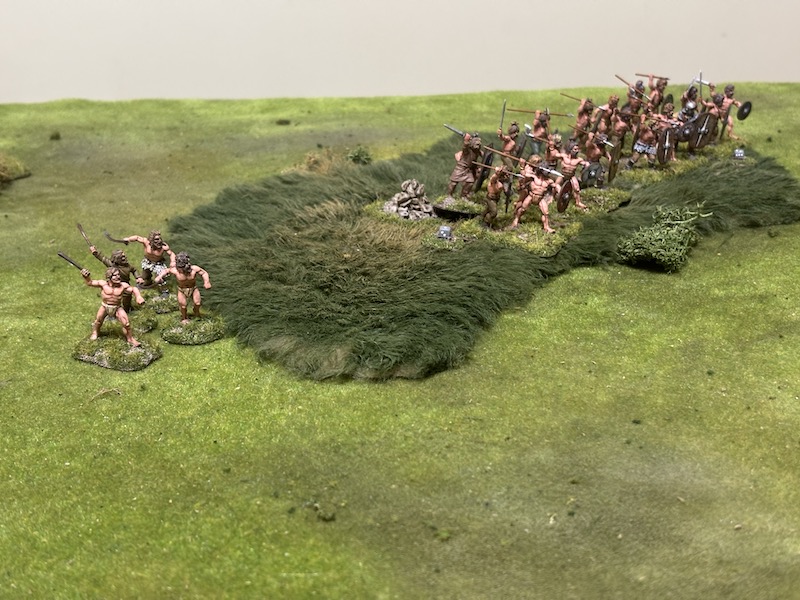
They plough into one of the mobs of German warriors. They are already reeling under twelve points of shock so it comes as little surprise to see them shattered under the impact. They rout off the table taking German force morale down to three as they do so.


We are very much in the early stages of getting to grips with the rules, so I was keen to try as many different support options as I could for the Germans. With 25 points I decided to put a large slice of that into a group of Fanatics - a small group of only six figures. That does make them brittle, but they have a number of characteristics that make their first strike quite powerful. I'm keen to see how that might play out.

The Wailing Women provide a very useful Rally Point, especially as they can be deployed at any time. It might be the solution to rescuing my warriors when things are going badly in close combat. I thought they would make an interesting and colourful addition.

A Secret Way is an option to negate the movement effects of one area of woods. That might allow for a rapid and surprise manoeuvre, another thing that plays to German strengths.

Last, but not least, I thought a Musician, to accompany the German commander and extend his command range, could also come in very handy.

Before the game begins, Roman Cavalry scout areas of rough terrain and turn one into a deployment point. They also scout out one of the pieces of terrain where there is a German ambush point. They are successful and that turns into a regular deployment point.

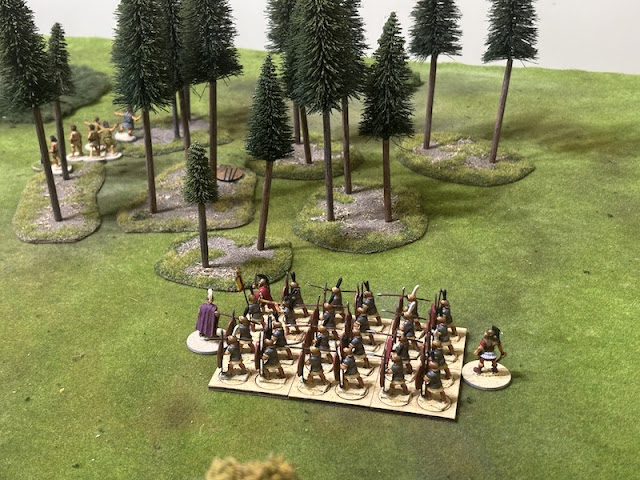
Both sides start with their force morale at ten and the Romans are the first to make an appearance. Their Centurion leads three groups of legionaries forward in march column. His men are fresh from North Africa - look, you can still see the sand between their toes! In fairness, these are Dave's Romans and he based them for action against the Carthiginians, no surprise they look a little incongruous in the dampness of the German forests.

Meanwhile, a group of Roman slingers emerge from their deployment point in the nearby woods. They hover at the treeline, awaiting suitable targets.

The Germans remain furtive and lurk in the shadows. The main force is in no hurry to reveal itself, only their slingers are bold enough to make an appearance.


The Roman cavalry deploy to cover the left flank of the Centurions legionaries.

The Tempus Fugit card appears and that ends the first turn and so we move quickly to Turn 2.
For now at least, the Germans seem content to skirmish and not reveal their full force. They remain cautious. It's the Roman slingers who are quick off the mark. They shower the opposing slingers with missiles.


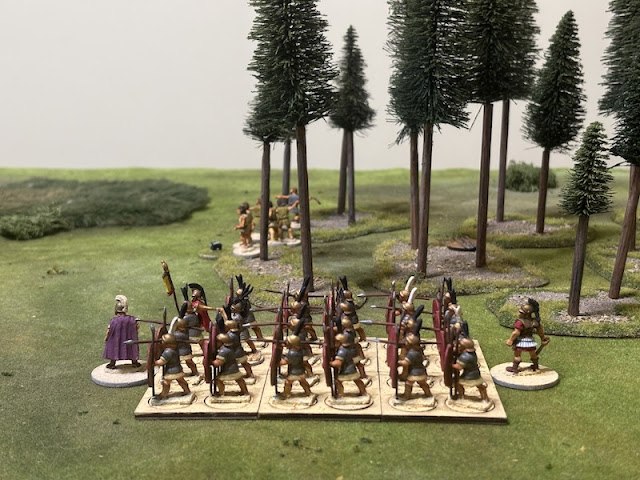
Unlike his German counterpart, the Centurion shows no signs of caution and continues marching his legionaries forward.


Another fairly short turn ends. With nothing to activate in the end phase of Turn 2 we move on to Turn 3.
The Optio, leading two groups of recently recruited legionaries, deploys not far behind the Centurion. The recruits lack the discipline and drill of the more experienced legionaries, but still remain a formidable force.

The Centurion continues to set a rapid pace. His men follow him briskly.

He seems to embody all the arrogance of the Romans. It's as if he's goading the Germans into making an appearance.

Wisely, the surviving German slingers decide to pull back. They use step out to do so and ensure they put some distance between themselves and the Romans.

The German commander continues to wait, opting to keep the main force concealed. However the Centurion's advance has been enough for one of the other German leaders to bring his two groups of warriors forward. He rouses the men with fighting words and their fervour increases.

They present the Romans with a real threat. However, much hangs on the ability of the German leader to whip up the men's fervour to capitalise on a violent charge before the Romans can react.

The nearby Roman slingers show their nuisance value by letting loose their missiles at the recently arrived German mob. This time it's not particularly effective, only reducing the fervour on one group.

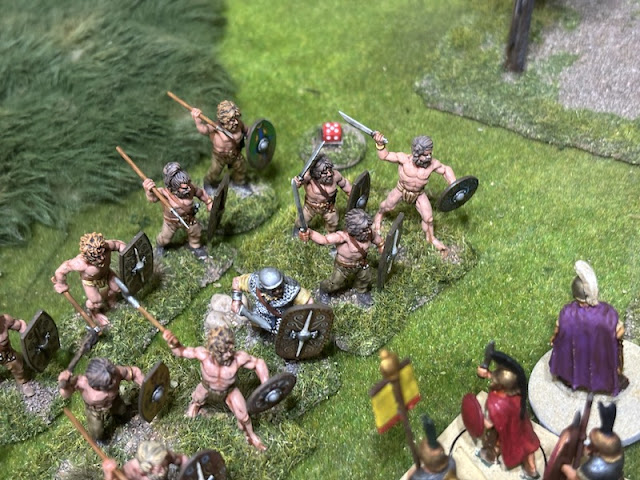
However, it's enough to enrage the Germans. A group of fanatics bursts out from the mob, using their ability to launch an ambush.

They take the slingers completely by surprise and give them no time to evade.

The fanatics suffer only a single point of shock in the ensuing combat. The slingers, on the other hand, are shattered by the assault, suffering three casualties and significant shock.


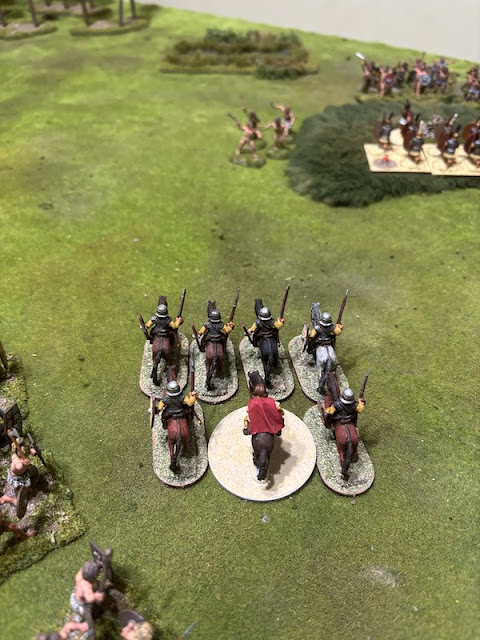
The Roman cavalry commander senses the danger. He turns his men to face in the direction of the enemy and they move towards the legionaries.

The Tempus Fugit card appears and the timing of the turn end favours the Romans. It gives the Centurion time to get his house in order before the Germans can set upon him. He wheels the march column to face the mob. With it goes any chance the Germans can react fast enough in the next turn to hit the Roman flank.

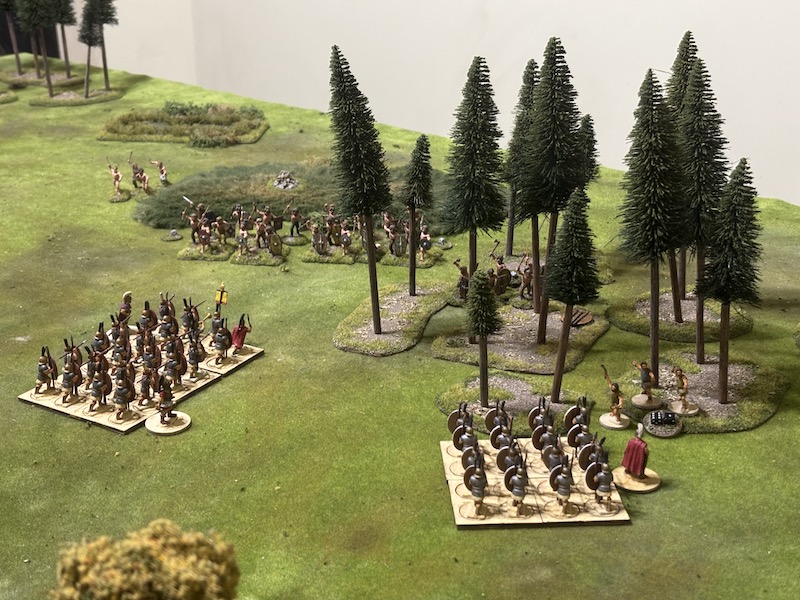
The Optio turns his men to face the woods and the oncoming fanatics.


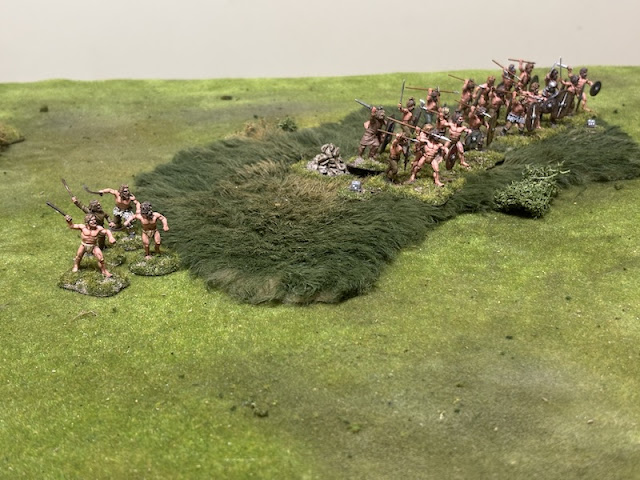
The German commander's card is the first one turned at the start of Turn 5. This is his moment and he deploys a mob made up of two groups of warriors and one of oathsworn warriors.


The German slingers are emboldened by the sight of the fanatics chasing off their nemesis. They return to the fray.
The German leader directs the nearby mob to move toward the Centurion. In hindsight, that was a rash move. Perhaps it would have been better to have the men hold their ground, while he instilled more fervour? That would also give the Romans more distance to cover to reach them, particularly given they would be slowed by the rough terrain.

Nonetheless, it's a difficult balance, as the odds favour the Romans and the move forward with limited fervour could prove costly. Time will tell.

The fanatics are still lurking in the woods and the Optio wants to ensure they cause no further mayhem.
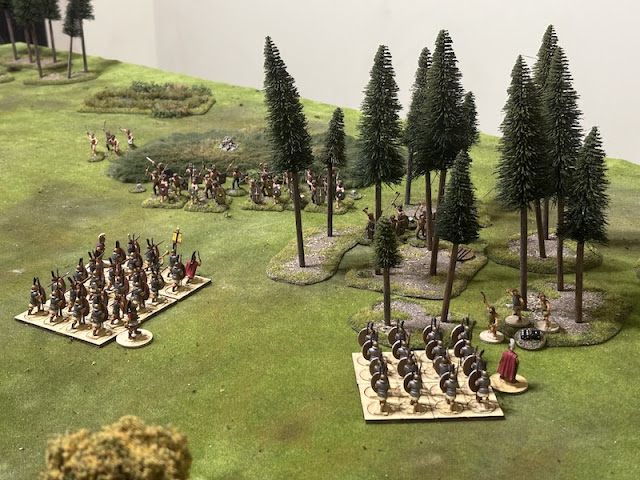
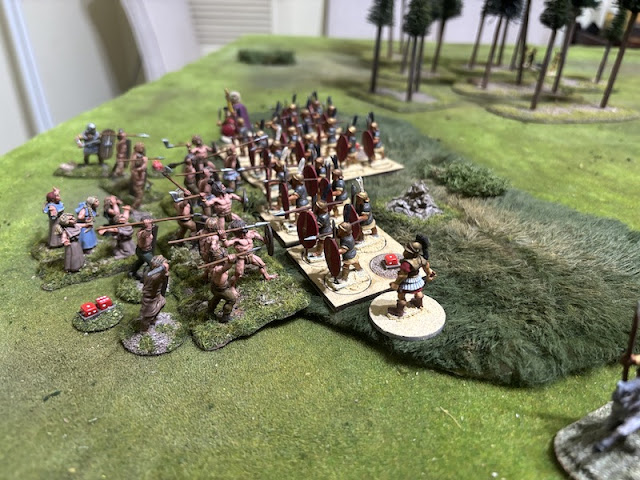
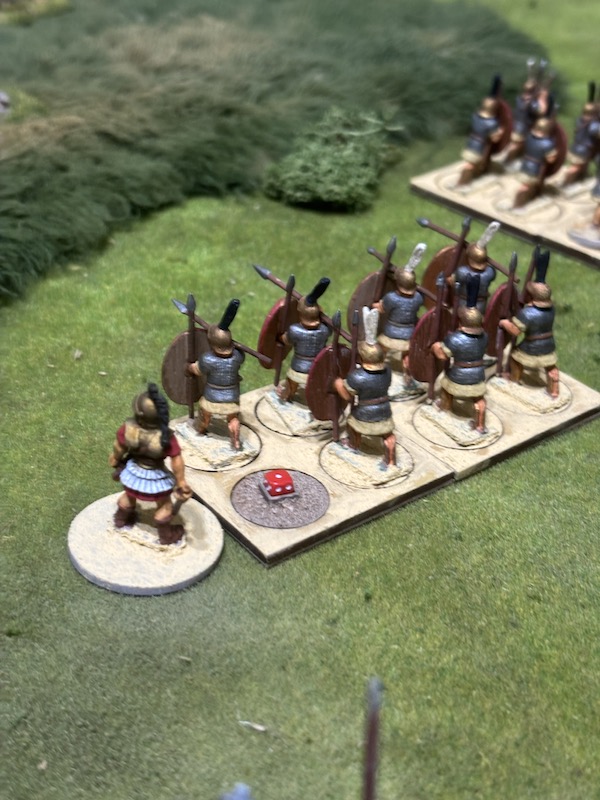
Unfortunately for the Germans, the Centurion is quickest to respond. This could spell trouble. He orders the legionaries to change formation into line.

He then unleashes the full might of Roman fury. His men advance into contact and hurl two volleys of pila as they do so. The lightly armoured Germans are about to face a brutal introduction to the Roman way of war.

The storm of pila fails to cause any casualties, but it's a terrifying blow to German morale. It wipes out all their fervour and adds considerable shock.


This seems an appropriate moment for the wailing women to appear as a rallying point.


The Roman cavalry commander sees an opportunity. He uses step out and his men gallop in the direction of the slingers. They don't get close enough, but their intentions are clear.


The turn ends with the Tempus Fugit card. I sense the game is delicately poised and much will be decided in the coming turn or two.
While all the attention has been focused on the clash between the warriors and legionaries, the Romans have neglected to keep an eye on the fanatics, who have not been activated this turn. They lurk menacingly in the woods and waste no time surging out to attack the legionaries.


German force morale remains unmoved at the outcome, after all, is anyone really shocked if fanatics are wiped out?
While the legionaries have mauled the Germans, their formation has been broken in the process. Now would be a good time for the Germans to try to take advantage of it. However, at the start of the new turn, fate is cruel and the Centurion's junior leader is first to react. With the formation broken he is free to take independent command of his group of legionaries.


In a rather desperate attempt to slow them, the remaining German slingers unleash their missiles. It does no more than inflict a single point of shock, but it could prove enough to impede their movement.

With the fanatics no longer a concern, the Optio orders the recruits to change formation and they move off to face the main German force.


The wounded German warrior leader makes a rather feeble attempt to rally shock and even use of a signa card makes nothing more than a small dent in the total.

The German commander tries to bring his force into action. He despatches a subordinate with the Oathsworn warriors to engage the Optio and his recruits.

He then leads the remaining two groups in an uncontrolled charge in the direction of the Centurion.

Despite moving quickly, they still have a way to go.

The Centurion displays a cavalier disregard for the approaching warriors. He's determined to finish off the battered remnants of the other two groups. Using two signa cards to boost his command initiative, he rallies off shock.


The Tempus Fugit card appears and the Roman cavalry finish off the turn by charging at the slingers.


The Roman Centurion is the first to react in the new turn. He rallies off a point of shock from the nearby legionaries and then has them form up.


The Roman Optio card is next, but he simply holds his ground. His men are in close order and ready to receive the enemy. The German commander uses the musician to order the leader with the oathsworn warriors.

They charge into contact with the Optio and his recruits.


With an air of desperation the German slingers fling missiles at the Roman cavalry, but to no avail.

The turn ends with Tempus Fugit and the initiative firmly in the hands of the Romans. No surprise then that the Roman cavalry show complete scorn for the slingers. They charge ahead. The Germans scatter before the horses. However, the cavalry has more important game to catch.

They plough into one of the mobs of German warriors. They are already reeling under twelve points of shock so it comes as little surprise to see them shattered under the impact. They rout off the table taking German force morale down to three as they do so.

It's now looking desperate for the Germans. Their rallying point is about to be overrun and the remaining warriors face another onslaught by the legionaries. The writing is on the wall and it's time for the Germans to throw in the towel, before their force morale collapses entirely.

Well, that was a fairly comprehensive victory for the Romans. Our first game had a very different outcome and so there is much we can both learn from the experience. In that initial game I had concentrated the Germans and overwhelmed the Romans when they had allowed their force to become split up. I failed to carry the lesson across to this game and allowed the Germans to be destroyed in detail. Dave, quite rightly, took full advantage and managed to inflict all the damage before the main German force could come into play.
It is the asymmetry between the forces that makes Infamy, Infamy! so appealing to me. It's a matter of learning to play to the very different strengths of the Romans and the various barbarian armies arrayed against them. That's the sort of challenge that can really engage my interest and I'm looking forward to playing more.
Super looking game and a very enjoyable read too. Lovely table and the miniatures are really very nice.
ReplyDeleteThank you, despite the defeat it was an enjoyable game to write up, so I'm glad you enjoyed it.
DeleteBrilliant - very interesting write up. Cheers!
ReplyDeleteExcellent. Harry Sidebottom? Ben Kane? Anthony Riches? Move over!
ReplyDeleteLOL, I first read that as 'Frank' Sidebottom and wasn't sure what you were alluding to, then I realised you were paying me a compliment, thank you....very much!
DeleteAn interesting game, but I found it hard to follow the the vagaries of the Tempus Fugit card and understand which groups had missed their turn. I don’t have Infamy Infamy, do ‘buy’ your entire force, or like CoC is there a baseline force that you supplement with purchased units?
ReplyDeleteTempus Fugit plays the same roll as Tiffin or Tea Break in other Lardy games. It is essentially an unpredictable turn end. However, in a similar way to Sharp Practice, there is provision, if you have the cards, to activate any unit that didn't activate during the turn. I wasn't quite sure how to document that in the narrative without accounting for every card as it is played (which could make the read a bit dry). The rule book contains a selection of suggested forces for each side, but you are free to construct your own. We used ones from the book, to which you then add support units in much the same way you would for CoC. The system has a fair bit of Lardy DNA in that sense.
DeleteNot sure why that came out as anonymous, Rob
ReplyDeleteYou are not the first person to have that happen to in recent weeks/months. Not sure if there's some glitch in Google or something else.
DeleteGreat battle report Mark, thanks for the post
ReplyDeleteAmazing game! I can’t wait to see the next one
ReplyDelete