
The first German attack of Campaign Turn 7 was successful in clearing the Americans from Map 1. Their next attack falls upon Map 3, with a second attempt to take Holzthum village. With Map 2 in German hands and platoons at Assembly Point B they can choose to come at the village from either of those directions, or execute a flanking attack from both directions simultaneously (if you are unfamiliar with how the campaign works you can find out more in this post).

Whichever way they choose to attack they know they are facing a fairly strong American position. The defending platoon lost only one man in the last attack on this map and with five soldiers from another platoon withdrawing into the village after the defeat at Map 2 they have been able to replace the casualty and return to full strength.


Dave shares his thoughts on his plan of attack for this game:
'For this attack into Holzthum from the outskirts, I have decided to use the option to make a flank attack. Hopefully I can stretch the defence or even get a sneaky jump-off-point in the village area. My planned approach is to use a Panther and an iG18 in the middle on the road to provide fire support while the infantry advance and try to lure the Americans out.'
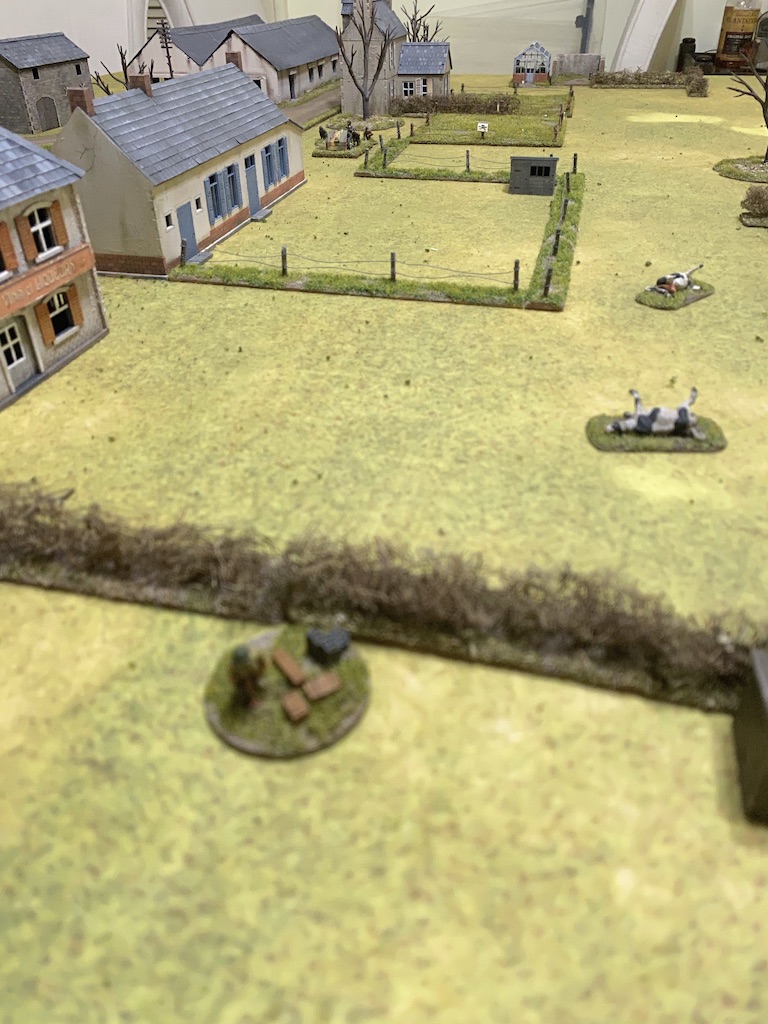
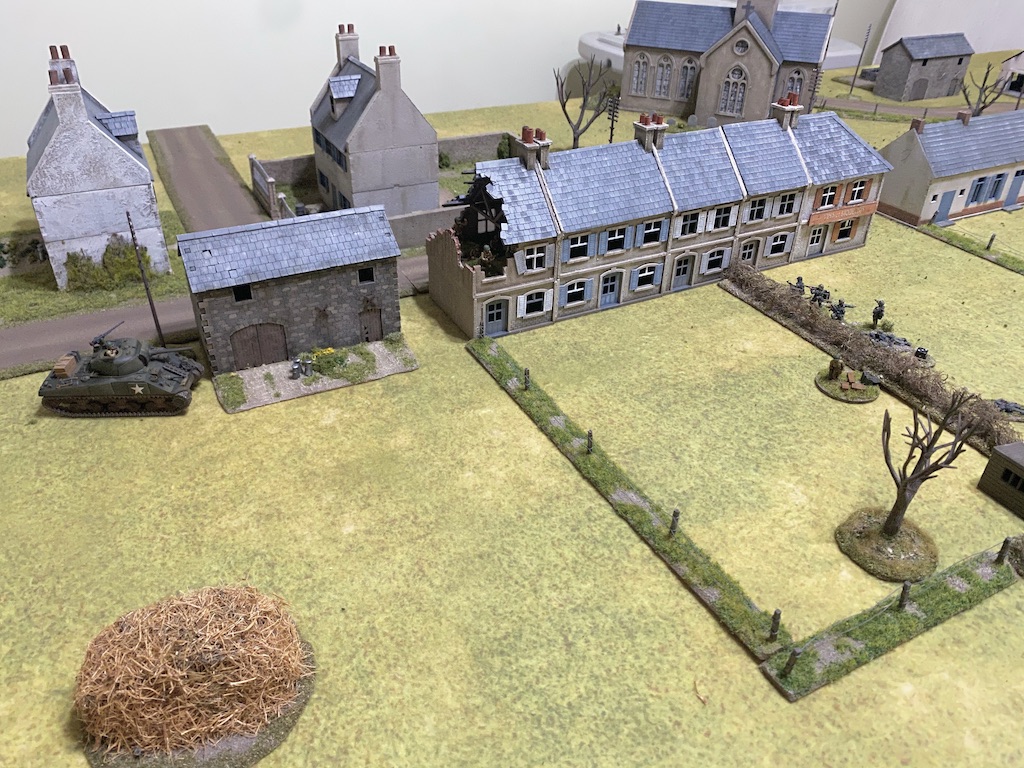
With the Germans opting to make a flanking attack the Americans are fortunate to get off to a good start in the patrol phase with three free moves. I manage to prevent the Germans working their way too far around either flank, nonetheless the barbed wire will prove extremely useful. I can use it to block off the flank near the village church and to channel the attack into the centre of the village along the road. Jump-off-points are placed as shown. I have gone out on a limb with one of them and placed it out by the hedge rows. If nothing else I'm hoping it will make the Germans wary about approaching from that open flank.

As for the Germans they will be attacking with a fresh Volksgrenadier rifle platoon. This is the weaker of the two types of available platoons but they will have twenty support points for this scenario, which means almost certainly that I will be faced with a Panther. That may prove far more than the Sherman and the platoon's bazooka team can handle. We shall see.

The Americans start with their force morale at ten while the Germans are at eight. Prior to the first phase I place the two sections of barbed wire.


The Germans open the game with a command roll of 66652. The last time that happened they lost their pre-game barrage before it had a chance to interfere with American deployment. Fortunately that's not one of their supports for this game and so the impending turn end will have no negative impact. The first Germans to appear are one of their support units and an LMG squad deploys into the large agricultural building.


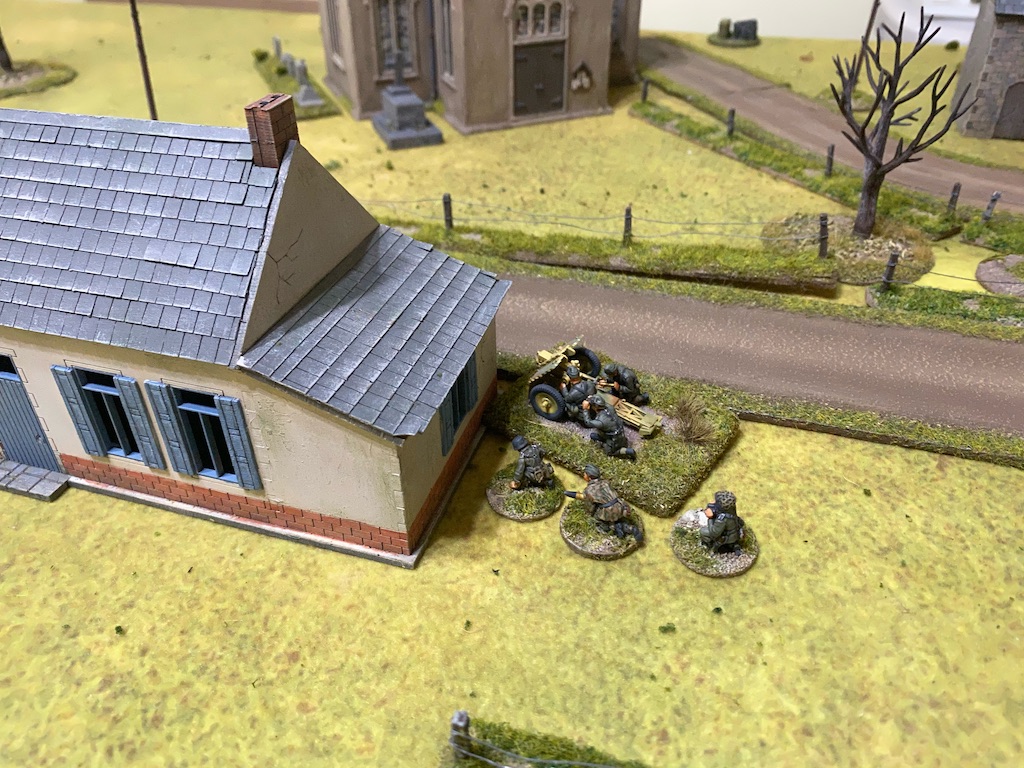
More ominously, but not unexpectedly, a Panther appears on the main road into the village and the commander puts the gunner onto overwatch.


In their phase the Americans choose to remain concealed and wait to see how the attack develops. The following German command roll is 66211 and could be an opportunity for them to close on the Americans before they can react. A Volksgrenadier rifle squad deploys on the flank.


More fire support arrives in the form of an leIG18 infantry gun which takes up position in the road next to the agricultural building.


The American command roll is 54442 and is very restrictive. While I'm concerned about the threat to my jump-off-point I don't see a good opportunity to stop German progress without exposing a unit to a lot of return fire. Instead I decide to maintain my concealment. Other than the possible impact on force morale I don't consider loss of that jump-off-point a disaster, if need be I'd rather lose it than compromise the overall defence of the village.
In the German phase the squad continues to move toward the jump-off-point and the rifle team is sent forward along the hedge.


The American command roll is 65441, once again it restricts deployment options, but this time I decide to try and deal with the single squad on the flank. I want to avoid deploying too many units into the row of terrace houses. There's a real danger they become trapped in there and with the Panther and the LMG squad covering the main road behind I fear they will be unable to fall back if the Germans gain the upper hand. The command dice of 1 allows a 30cal team to deploy into one of the houses. There they can target the squad on the flank without exposing themselves to return fire from any other German unit.


They open fire but manage to inflict only a point of shock on each team.


The German command roll of 65444 limits their tactical options. Fortunately they have brought in a second senior leader, an Unterfeldwebel, to assist the attack and he deploys on the flank within command range of the squad.

His first order is to have the rifle team throw a smoke grenade in the direction of the 30cal team. It doesn't go as far as they would like, but it does offer additional protection.

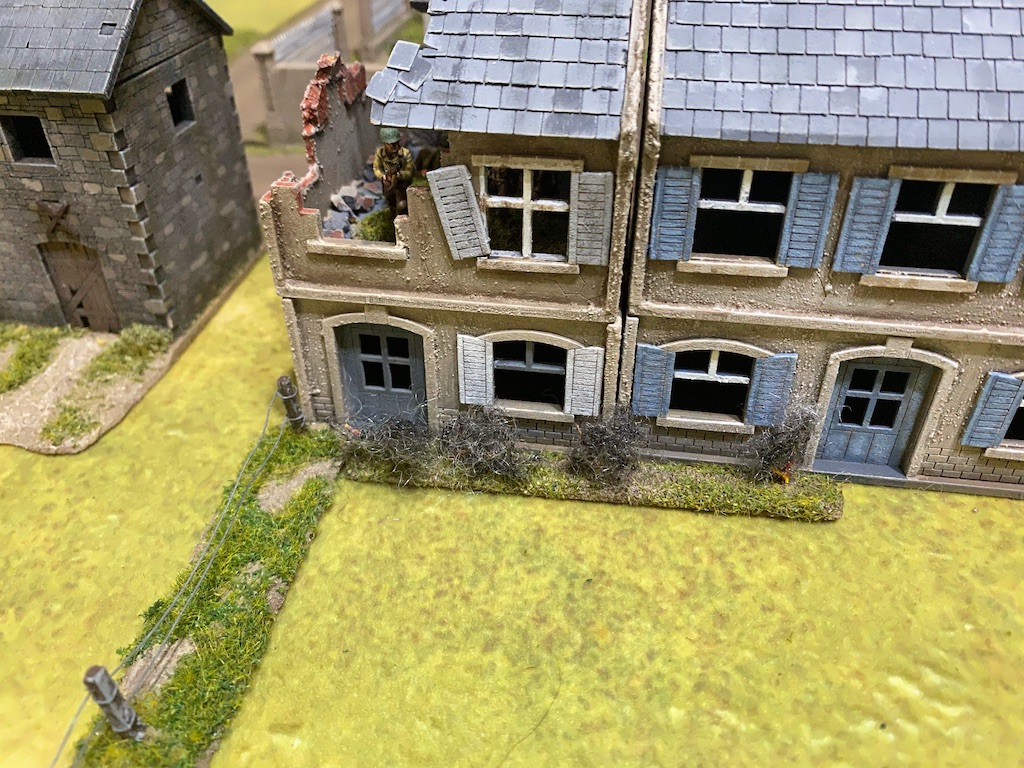
It provides just enough cover for the rifle team to climb over the hedge toward the American jump-off-point and close it down.

He then directs the LMG team to put covering fire on the house where the 30cal team are located.

The following American command roll is 66542 and the opportunity to make the most of a double phase. The platoon sergeant joins the 30cal team and orders them to engage the Volksgrenadier rifle team.

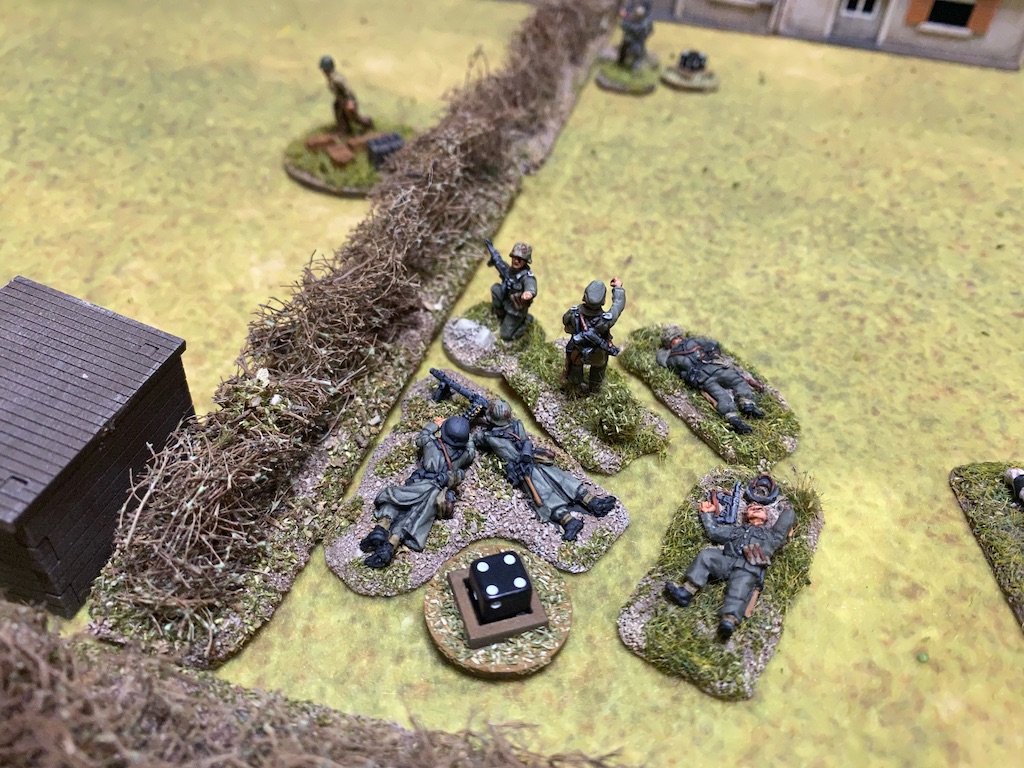
Despite the covering fire from the MG42, the fire from the American machine gun is deadly and two of the rifle team are casualties. This really exposes how brittle the Volksgrenadier squads can be. This single burst of machine gun fire has reduced the threat of the rifle team down to two men carrying a point of shock. They will also have to face another American phase.

The 30cal team fires again, this time the Germans suffer only two points of shock but that's enough to see the team pinned down.

The next German command roll is 66644 and although they will have a double phase they will be limited in their activations. The Unterfeldwebel realises he is needed at the forefront of the action where he has an opportunity to rally the rifle team before the turn end.


He rallies a point of shock, enough to bring the team back into good order once the turn ends.

With his last command initiative he orders the LMG team to move up and join him. With that the turn ends. The smoke is removed and the rifle team are no longer pinned.


The German are having problems cooordinating their actions today and the following command roll of 65553, while not useless, is limiting what they can achieve in the phase. The squad Obergefreiter orders the rifle team to move towards the village and out of the arc of fire of the American machine gun.


He then orders the MG42 team to return fire on the 30cal team.

The Americans benefit from the hard cover of the building and suffer only a single point of shock.

In the American phase the platoon sergeant rallies off the shock and orders the machine gun team to maintain their fire. Dave has a CoC die and decides now is a good time for an interrupt and the LMG team and NCOs move over the hedge before the Americans open fire. However they don't move far enough to escape the burst from the machine gun. The LMG team lose one man and suffer a further three points of shock. It is only the presence of the two NCOs that spares the team from pinning.

Once again the Germans struggle to coordinate the attack and a roll of 65441 leaves the command decisions to the Unterfeldwebel. He rallies shock off the LMG team and orders them to move forward to join the rifle team and escape the fire of the American machine gun.

Now it's the turn of the Americans to use a CoC die to interrupt. The 30cal opens fire once again.

The fire is much less effective this time around. The Germans suffer a single point of shock before continuing with their move and escaping the line of sight of the 30cal team. That felt like the waste of a valuable CoC die.


The leIG18 gun crew continue to manhandle their weapon forward and take up position by the road. They turn their attention away from the flank and return to directing it down the main road.

This might just allow me to deal with that flanking squad while it remains unsupported by other units and before it break into the village. In the next American phase the Sherman is called forward to help clear the Germans from the flank. It takes up position alongside the road and behind the cover of a barn.

The Sherman fires off a round of HE. It kills another member of the rifle team, reducing it to a single man. Not only that, it wounds the squad's Obergefreiter, who is knocked out of action for the remainder of the turn. That's enough to see German force morale drop to seven.

The Sherman follows this up with a burst from the bow machine gun. That kills the remaining man in the rifle team and the LMG team suffer a further point of shock. German morale holds steady despite the loss of the rifle team, but there is now a very good opportunity to inflict further casualties.
I decide to take a risk and deploy a squad out from the jump-off-point in the barn. If they can finish off the German squad I'm hoping I can then move quickly either into cover or back across the road to where I sense the main German assault may arrive.


In the German phase Dave considers his options. The chance of both NCOs making it to cover inside one of the houses is very unlikely. A movement roll of six might be sufficient, but we consider whether it would be possible for the Unterfeldwebel to carry the wounded Obergefreiter with him and still move normally. Given the impact the loss of these two NCOs would have on German morale Dave decides the opportunity of taking the village in this game has been lost. He accepts that the attack has, in his own words, 'been poorly conceived' and so withdraws.
Dave's assessment may be correct. Yet, while the chances of succeeding had become very slim, I do wonder whether he should have persevered with the sole aim of inflicting losses on the Americans. In particular it might have been worth trying to knock out the Sherman and leave the defenders without armour support. Looking at the picture below of the Unterfeldwebel behind the hedge brings to mind the well known newsreel footage of SS-Sturmbannfuhrer Werner Potschke at Stoumount.
In one sequence he can be seen turning and walking towards the camera to pick up a panzerfaust that is lying on the ground. In this campaign the Volksgrenadier squads are equipped with two panzerfausts for each team, I could see no reason why the Unterfeldwebel could not pick up one of those to fire at the Sherman. The photographic evidence suggests that would certainly be playing the period!

Similarly it might have been worth using the Panther to try and do the same thing. In many ways there would have been little to lose. German armour is plentiful and who knows, using the Panther aggressively might pay off? The worst outcome would be loss of the Panther and loss of the scenario, but as the latter was already expected the advantages of destroying a Sherman the Americans could not replace would appear to outweigh the disadvantages. I guess we will never know.
The game was a further reminder of how brittle are the Volksgrenadier squads. With seven men and an NCO it doesn't take many casualties to reduce the effectiveness of a squad and increase the likelihood of teams pinned, broken or wiped out. To make matters worse, as Green troops they make for easier targets, something made all the more deadly when asked to operate with limited cover in the face of plentiful American firepower. Considerable care needs to be given to the sorts of tasks they can be expected to achieve. Isolated and unsupported the Volksgrenadier squad in this game became easy pickings for the defenders.
Dave reflects on how the game unfolded:
'Well the early phases went as planned. Unfortunately I fell victim to my own rashness when I decided to deploy that squad on the flank. The idea was to seize the exposed American jump-off-point on the flank, or at least force some Americans to set up there and split/wrongfoot the defence. Unfortunately that single 30 cal team managed to cut up the squad, and to rub salt in the wound the American squad and the Sherman arrived to finish them off. Terrible command rolls limited all my attempt to do anything other than try and save the squad: in retrospect, it was a flawed option.
'I did consider sticking around to try and cause some casualties or even destroy the Sherman, but the problem was that I had two NCOs trapped in an exposed position. The almost certain loss of them will not only put a serious dent in my FM and make the platoon ineffective, but the post-game rolls for NCO loss will further dent the overall men’s morale for the campaign. I am also running short of intact platoons and so I decided to withdraw accepting that I misplayed the attack.'
The campaign turn has seen a mix of outcomes for both sides with one victory and one defeat each. The German Men's Opinion improved after the first game but was cancelled out by this recent loss. Overall they see a slight improvement and they go into Campaign Turn 8 with their opinion at -3. The commander's outlook remains Bitter. The American Men's Opinion remains good and despite the defeat it ends the campaign turn at +5.
That brings us to the end of campaign turn 7 and puts the German timetable in danger of falling well behind schedule. The next few games will be critical in determining their prospects for victory and you can find out what happens in Campaign Turn 8 in this post.
You find reports for all the games in this campaign and many other campaigns on the Chain of Command Campaign AAR page here.
It seems to me that the Germans have been running out of steam in this campaign. A few times they've packed it in rather than press home an attack. The clock is ticking and things aren't looking good for their offensive.
ReplyDeleteI think you may be right, a little more aggression might pay off.
DeleteGreat report and photos as usual, although his plan was probably unraveling I think Dave was a little hasty in his decision to pull back so soon in this one.
ReplyDeleteThanks Phil and I agree, while Dave is being careful with the core platoons he could risk more aggressive action with the support units, if only to wear the Americans down.
DeleteVery enjoyable AAR once again! If anything I think it shows how much influence the players morale has in the game in addition to the Force Morale l. I certainly lost a few games when my morale broke while my force still would have had some fight in them.
ReplyDeleteI think Dave’s assessment that the scenario had become unwinnable was probably correct, although, as mentioned, I suspect he could have got up to some mischief with that Panther before withdrawing.
DeleteIs Dave ok? It seems like his morale failed before his troops' did. Hang in there, Dave!
ReplyDeleteI think losing 1/3 of his platoon without inflicting a single casualty on the Americans was enough to convince him that he was better off withdrawing before losing any more men. I think sometimes you just know it’s not going to be your day.
DeleteEasy to say with hindsight, but pushing an isolated squad and senior leader out unsupported on a flank looks like an uncharacteristic blunder by Dave. Ah well, we all have off days.
ReplyDeleteI think the German foot troops are "done for" before the battles begin.
ReplyDeleteUnless the supports can deliver victory, it's a really tough campaign for Jerry.
It’s definitely an uphill struggle, the small squads a very brittle and rarely can get close enough to make most effective use of their Stg44.
Delete