
They now arrive at Map 4 and the sixth of the campaign. This is a chance for the Japanese to carry out an attack that, should it succeed, could put the Australian platoon in peril. A clear victory would mean they have cut off the Australians' line of retreat, which will force them to fight their way back through a Japanese blocking position. Already below strength following the earlier clashes, the last thing the Australians need is a desperate breakout battle on their hands. They need to play this game shrewdly. Victory would be ideal, but a losing draw would be enough to deny the Japanese outright victory and allow the platoon to fall back in good order towards the river.
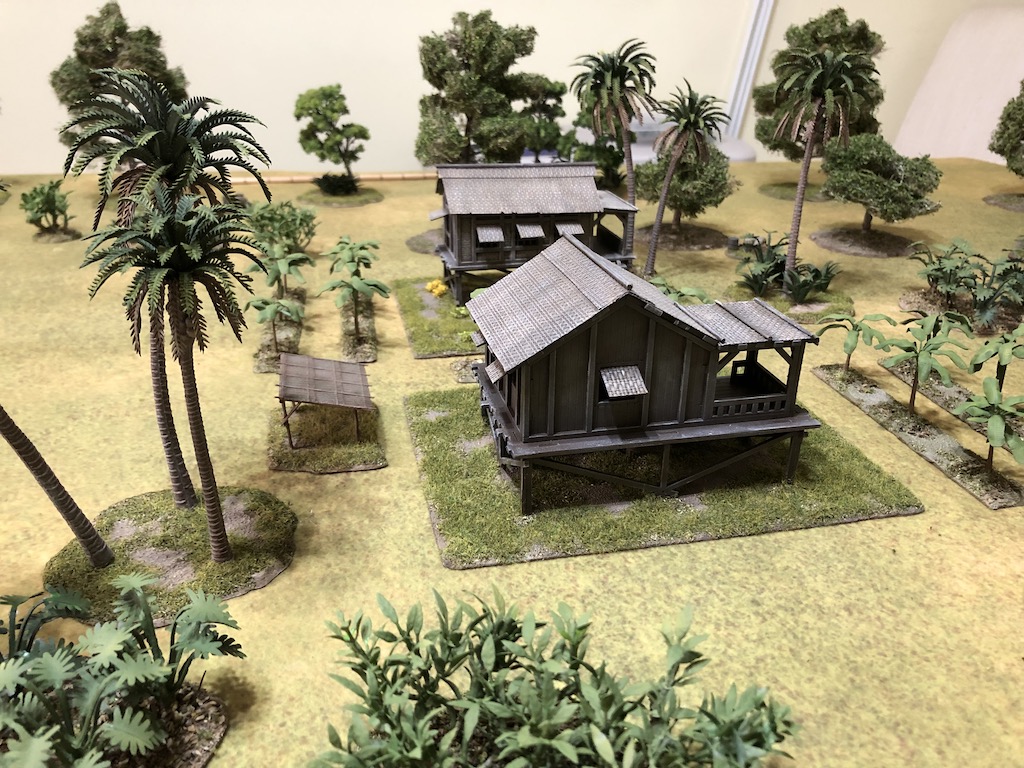
The action will take place in a jungle clearing surrounded by a few huts and a rubber plantation.


It will give me a chance to use the Sarissa Far East huts that I made for this campaign.
This scenario is a Flank Attack, using all the features from the main rule book. The Australians will start the patrol phase within the grey perimeter area and the Japanese will enter from the two table edges marked in red.

The support roll is six. The Japanese receive a +1 bonus for their CO's opinion and so have seven points and the Australians have a +3 for the difference in force ratings and so have six points.
I think this game calls for a lot of movement by the Japanese. Much will depend on having my squads get close enough to come to grips with the Australians. I have no doubt that Dave will want to pull back with few losses and so intends to play this very conservatively. With that in mind I decide my support should help my squads at the sharp end and so call on a Type 92 MMG team and a Type 92 70mm infantry gun for added firepower. The open ground in the centre of the table provides me with a good opportunity to have a base of fire at the edge of the jungle that can sweep the huts and jungle surrounds. I plan to deploy the grenade discharger squad, MMG and 70mm infantry gun in that area to provide covering fire for my squads to assault from one or both flanks. Finally, to hinder the Australian deployment I will call on a pre-game barrage in the hope of disorganising their defence.
Both sides start with force morale at eleven, however as this is a Flank Attack the attacker has initiative automatically in the opening phase. The Japanese gain three free moves at the start of the patrol phase. I want to ensure I actually conduct a flank attack and so my aim is to ensure options on both flanks. As always, I fear an Australian mortar barrage and so I need to be able to avoid bunching up my units and have alternative avenues of approach should a barrage close down a jump off point. We end up with the Australian jump off points grouped close to their starting perimeter and the Japanese spread across the table.
Dave then announces he has two strips of barbed wire and these are placed across his left flank protecting some of his jump-off-points and restricting movement through the jungle.

We had only one piece of wire to hand, but some quick improvisation with some soldering wire provided a functional, if unsophisticated solution.

With the announcement that a pre-game barrage was falling on the Australian lines we were ready to begin. The Japanese start by deploying the grenade discharger squad and put them on overwatch. They are joined by the MMG team who take up tactical positions. As I had planned, both units have good lines of sight across the jungle clearing.


The Australians find the pregame barrage hampers their deployment and much like the previous scenario the first two sections that attempt to deploy are unsuccessful. However the third section has more luck and cautiously takes up positions on their right flank, taking care to stay concealed within the cover of the jungle. The 2" mortar team emerge through the barrage in the centre of the Australian deployment area. I'm then relieved to hear that the Forward Observer has had trouble deploying. He won't be missed by me, that's for sure.

The Australian section is wise to lurk concealed from the eyes of the grenade dischargers and the MMG.

The Japanese then roll a double phase and while three 1s don't leave a lot of options it is enough for the first Japanese squad to appear at the back of one of the huts. Just in case the next command roll inhibits my options I decide it would be prudent to place them on overwatch.


My next command roll brings mixed fortunes with a triple 6. Another double phase is always welcome, but it will mean the end of the pre-game barrage. As always, multiple sixes mean limited activations and so I use the remaining dice to deploy the Gunso, that way I can activate two units. With an eye on what I may be able to achieve in the following phase, I have the Gunso order the MMG team and the squad to make their way forward, which they both do at a smart pace.


The subsequent Japanese phase sees the Gunso move forward to join the squad and MMG and with his remaining CI he orders the squad to take up overwatch positions.


With the Australian platoon short of six men I want to try to take advantage of my numbers and stretch their defence as much as possible. With that in mind I deploy a second Japanese squad, this time on the left flank near the edge of the rubber plantation and they take up tactical positions.


I now have a ring of units around the jungle clearing and can bring a fair amount of fire to bear on any Australians who dare brave revealing themselves.

The Australian command roll now delivers a double phase and with the pre-game barrage out of the way Dave can now plan to deploy in a more organised fashion. First, a second section deploys from his central jump off point. Like the previous section they keep back from the edge of the jungle and out of sight of any Japanese. The platoon sergeant deploys with them and uses his CI to place both teams on overwatch. He also instructs the Bren team from the squad to his right take up overwatch positions.


In the subsequent Australian phase a third section deploys on their left and joins the others in taking up overwatch positions. They are joined by the forward observer who makes contact with the mortar battery. With the wire and the FO I now know there can be no more Australians left to deploy. This means I am up against the weakened platoon and so need to make my numbers count before the barrage can interfere with my plans.


I'm now determined to stretch the Australian defence and come at it from both flanks. This will serve two purposes. I will avoid having my units concentrated in a single area where the barrage can cause a lot of disruption and I will keep the Australians from being able to concentrate their fire. With that I deploy the third squad on my right flank in the jungle.

In the centre the Gunso orders the MMG team forward to join a firing line with the Japanese squad, ready to tackle the Australians opposite them.


With nearly all units deployed I can now get a sense of what I need to try and do to defeat the Australians.
The Australian command roll is 65522, which doesn't give a lot of options, but what it does do is see them come out for a fight. The platoon sergeant orders the two sections in the centre to move with one dice towards the edge of the jungle and then fire at half effect at the Japanese around the huts.


With this move line of sight opens up and a furious firefight erupts. The Japanese suffer three points of shock and take two casualties, one of which is the squad leader who is lightly wounded. Japanese force morale drops a point to ten.

The Japanese squad was on overwatch and so returns fire and in turn inflicts exactly the same result on the Australians. They suffer three points of shock and two casualties, one of whom is the section corporal who is also lightly wounded. In turn, Australian morale drops to ten.

Ominously for the Japanese the last act of the phase occurs when the sergeant orders the FO to move tactically up to the edge of the jungle.

The Japanese command roll offers a host of opportunities for activation. Firstly, the squad on the right flank moves quickly through the jungle to work its way around the barbed wire and towards one of the Australian jump off points.

In the centre the Gunso orders the squad and MMG to continue firing at the Australians opposite.

The Australians take another two casualties and this time the corporal from the other section is hit and also takes a light wound which drags their force morale down to eight. I was hoping the FO might be one of the leaders hit, but that was not to be.

On the Japanese left I take advantage of the fact the Australians are too deep in the jungle to observe the plantation and so make the most of the opportunity to try to work my way around this flank.

Finally, the grenade discharger squad unleashes a barrage of its limited smoke rounds in an attempt to screen off the Australian sections and the FO in the centre.

We rolled for each discharger's accuracy and while the first two fell right on target, the third was long and so failed to screen off the forward observer.


In the Australian phase the sergeant orders the section in the centre to fall back into the jungle, while he has the section on his far left turn to face the left flank from where the Japanese squad is approaching through the jungle. Finally and inevitably he orders the FO to take a risk and call down the barrage without first calling for a ranging shot. Given the close proximity of our units this is quite a risk.
The barrage roll is a four, which means it will not land on target and could deviate up to 4D6 inches in any direction. Naturally I'm hoping it goes the maximum distance in the direction of the Australians (who wouldn't?). However Dave's luck holds and it falls only 9" from the target, landing almost exactly in the centre of the table. It was for just this reason that I wanted to work my way around both flanks. While the barrage hits my MMG team, one squad and one of the grenade discharger teams, it still leaves me with two full squads and two of the grenade discharger teams in action. In addition I still have the Rikugun (SL) and the Type 92 70mm infantry gun to deploy.


The barrage inflicts some damage, causing four casualties, two in the squad and two in the MMG team. The last act of the Australian phase is to pull their right hand section back into the jungle away from my squad in the plantation.

The arrival of the barrage has brought my advance through the huts to a grinding halt, but I'm determined to get to grips with the Australians with my remaining squads. The Japanese platoons are able to replace men and receive reinforcements, a luxury the Australians don't enjoy to anywhere near the same level, so I want to act as aggressively as possible. I can afford to engage in costly hand-to-hand combat if need be and I'm prepared to do that in this game.
With that in mind I order the squad on the right to move around the wire, but they find the going a bit tricky and don't move as fast as I would wish.

The squad on the left in the plantation are not far from the Australian jump-off-point. I'm eager to get them into the jungle and so have them move out of the plantation.

Again, I have the numbers here and I sense Dave's reluctance to be drawn into a costly, close range fight. In particular, one that could be enough to tip the balance in the scenario and lead to Australian defeat. That would have near disastrous consequences, with the platoon forced to attempt a break out through a blocking position at their rear. Even if they were to succeed it's not difficult to imagine that they wouldn't be in much shape to continue the fight.

I can't see a way to bring the 70mm gun into action and so decide it will be more useful to bring on the Rikugun where he can make more happen on the left flank. He arrives and orders the two grenade discharger teams that have escaped the barrage to join him at the edge of the plantation.

They leave their comrades behind, cowering in the jungle under a hail of mortar rounds.

At this point the Japanese have lost five casualties to the Australians' two. If the Australians were to withdraw now they would lose the scenario, but with this ratio of casualties it would constitute a losing draw, enough to avoid a clear victory for the Japanese. As I said earlier, this game requires shrewd play from the Australians, as outright defeat has dire consequences for their chances of holding off a Japanese campaign victory. At which point Dave decides to call for a withdrawal while the going is good and he can continue to fall back in good order.
So far he has held off the Japanese long enough to avoid a decisive campaign defeat. If the Japanese can win the next two games that will give them victory within nine games, just enough for a minor and historical level of victory. To try to stop that happening Dave needs to keep his platoon as intact as possible and ready for the end game. In that context his withdrawal now makes perfect sense. Naturally I would have liked to close in on the Australians and cause them more losses, but will have to settle with continuing to drive them back once again.
The Japanese had three casualties from the core platoon and two from the MMG support. With the Japanese holding the map and a difference of two in force morale, two of those men return immediately.
The Australians only suffered two casualties, so one is permanently lost and one wounded and out of action for the next scenario. All up they now have seven men permanently lost and so with the wounded man away will be eight short of a full platoon for the next game.
The Japanese CO is very happy with progress and his opinion increase from 5 up to 6, which will mean +2 level of support and +1 for any reinforcement rolls. The Men's Opinion is mixed, but results in it remaining at 4, which will mean a +1 for the force morale roll. The platoon leader's outlook is Confident.
The Australian CO is a little less happy and his opinion is now at -1. The Men however are in relatively good spirits and Dave's careful conservation of their lives sees their Opinion at 5, which will mean a +1 to the force morale roll. Despite the CO's opinion, the platoon leader's outlook is Relaxed.
And so we move on to Map 5, another flank attack, with the Japanese pursuing the Australians as they fall back. You follow what happens in that game in this post.
I'm still hooked on this yarn - another ripping game, gents.
ReplyDeleteAn enthralling campaign of cat and mouse. Most entertaining.
ReplyDeleteGreat AAR Mark, its a different world in the jungle.
ReplyDeletecheers John
I'm perplexed by this, pg12 says 'If the Japanese win a clear victory' so I would count a losing draw draw for the Australians as a clear win and proceed to play the special Attack & Defend Scenario
ReplyDeleteE.g. The Australians have been obliged to withdraw, even if in good order....
Delete