

Nothing reinforced that thought more than when I was watching one of the excellent Beasts of War videos where Rich Clarke was playing Sharp Practice against Justin and they constantly referred to their force rosters to remember which leader was which as the various chips were drawn. This convinced me that I needed to find an easy way to know which leader was which with just a glance at the table.
When I saw the individual sabot bases from Supreme Littleness Designs, I immediately thought there's my answer. Here was a simple way to identify my leaders and know their initiative level. As I posted earlier the base is a simple sabot with a backing piece of grey board.


The next thing was to work out how best to identify the individual leaders. It would make sense to have the markers relate to the chips I planned to use. I had painted the MDF chips supplied by Too Fat Lardies with the rules and so I photographed them.

I then printed these out on my very average printer at home in a much smaller size, one suitable to fit on the bases.

The quality of the print on my home printer wasn't great, so I knew I'd need to find a bitter quality laser printer to produce a higher resolution image. Next I wanted the bases to be a little less obtrusive, so I took my Dremel with a sanding bit and sanded down the edges, as I have done with my larger sabot bases.

Next, I wanted to also include the initiative level of the leader, so I textured the surface with sand and added small stones, with one stone representing each initiative level. This first one was a bit of a 'proof of concept' and although I wasn't happy with the way the chip number had printed out it was heading in the right direction.
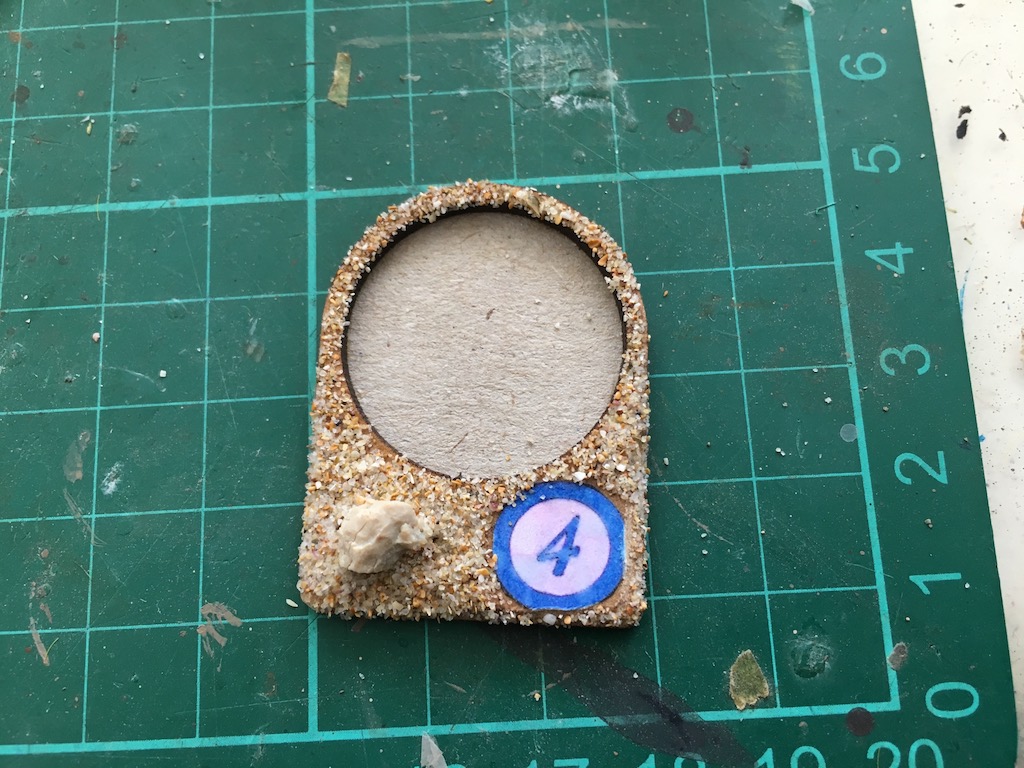
Once I had printed the chip numbers on a better quality printer, I then made up enough for all the possible variations I could envisage for the AWI games I intended to play.

These were then painted and flocked, the same as I would do for any other base.

While this seems like a lot of bases to make up, the other option is to make up leaders with a varying number of rocks attached to their bases. One way or another I need to make up a lot of variations and I think this way I have more versatility for my leaders and at the end of the day the bases are quicker and easier to make up than individual leaders.
So here's how they look with a figure in place. I think they are visually unobtrusive and I'm happy with the way the numbers match the chips we will draw during play. They now complement their units better with all on a sabot base.


Happy with the result, the bases for the red chips are following closely behind.

Excellent! This is a great idea!
ReplyDeleteThose individual sabot bases are great for this sort of thing (and dice frames for games where you have wounds and such to track).
ReplyDeleteIt occurs to me that you could do something similar with colored flower clumps instead of the numbers, i.e. 1 red flower clump for red chip one and so on.
Nice idea and certainly more picturesque!
DeleteThis is brilliant. Stealing it for myself
ReplyDeleteLOL, help yourself.
DeleteNice system for SP2, and pretty too. 😀
ReplyDeleteThanks, I wanted it to be functional but look good on the table, I think it achieves that.
DeleteCool idea.
ReplyDeleteCreative and very nice job on these markers!
ReplyDeleteThanks, I can’t help myself, I spent too many years playing hex and counter board games to ever settle for a dull marker in my miniatures games.
DeleteCool idea. Does look like a lot of work though, esp for the hamfisted among us. I tend to keep a unit roster on a whiteboard, with full leader names, and space for force morale (saves having a separate card and counters for that).
ReplyDeleteNo more work than normal basing other than getting the numbers done, but I just photographed them with my phone and then printed. A bit of fiddily scissor work, but I've been modelling for years so didn't see it as an obstacle. To be honest you don't even need to cut them perfectly, but the time you texture and flock the base you can cover up any imperfections.
DeleteSo cool. Too bad I already glued my leaders to the square bases.
ReplyDeleteJust letting you know I'm going to be guilty of Plagiarism or in english I'm going to copy that ! Just a thought, print the leader numbers on glossy 210gsm paper , and once dry use xtra large roll of clear sticky tape to cover them ? Do you use Mounted Officers ? Could the idea be used on a General ?
ReplyDeleteCopy away, anything posted here is to be shared! At the moment I don’t use mounted officers, but I’m only just getting into this period, so that may change. The important thing is that you can quickly identify which leader corresponds to which chit while you are playing. If your mounted officer is the only one you are using and is going to be Leader 1 then I suspect you don’t really need to do anything for him as he will be easy to spot. Do what works for you - it won’t be wrong.
DeleteThanks for such a creative idea! This is really helpful and very well done! Huzzah mate!
ReplyDelete