The Japanese had mixed success in the first phase of the campaign but were still on schedule to achieve a major campaign victory. All they needed to do now was rout the British from the last two maps. That brought us to Holding the Line at Jitra where the 1st Leicesters were waiting at a partly completed defensive position.

Time was still on the side of the Japanese so they spent a campaign turn carrying out reconnaissance before mounting their attack. Once again that had them fighting across the width of the table.
The British start with twelve support points but gain an additional four for the time it has taken the Japanese to complete Phase One of the campaign. For this scenario I found myself considering a number of options. I had little doubt the Japanese would open the game with a Zero attack. Given how close they were going to start to the British position it was quite possible they would make serious gains before the defenders deploy. I decided to call on AA artillery to minimise the possible disruption. I also considered minefields, but the cheaper option was barbed wire which would also slow Japanese movement.
Tanks were inevitable and so a 2 Pounder AT gun was on hand. Lastly a Vickers MMG team was called on for use in the pillbox.
The pillbox is well sited to cover the open space either side of the road and much of the surrounding paddy fields.

The Japanese didn't make as much progress as expected during the patrol phase and I managed to prevent them placing a jump-off-point in the plantation. My gut instinct told me that was the obvious avenue of approach and it was where I had planned to place the barbed wire. When the patrol phase unfolded and it appeared their emphasis was on the other flank I chose to place the barbed wire there instead.

Well, more fool me. The Japanese had a ruse and used local guides to advance their left flank jump-off-point into the plantation where I had originally intended to put the mines or wire. Perhaps I should always trust my instinct! (In hindsight we may have played this incorrectly. I think a correct reading of the rules might put the order as follows - normal jump-off-points are placed at the end of the patrol phase, once that is done the Japanese announce the ruse and move their jump-off-point. Now that all jump-off-points are in position and the game is about to begin then defensive supports like minefields, roadblocks and barbed wire are placed. That said, I could see a case for playing it as we did as the ruse represents an unexpected development).

As I fully expected the game was preceded with a Zero attack, so the decision to take AA Artillery proved a wise one.
The Japanese began with their force morale at eight while the British were at ten. That was an advantage that gave the British the first phase which, considering the Zero attack and the sudden move forward of a jump-off-point, made it sensible to attempt deployment immediately. Fortunately a section arrived on time and without any shock.
I had them covering a part of the plantation from the protection of the jungle fringe, although they couldn't deploy far enough to cover the whole plantation.
Nonetheless the timely deployment of the section in good order prevented the Japanese considering any rapid advance down that flank.
When they did arrive they were cautious and remained tactical.
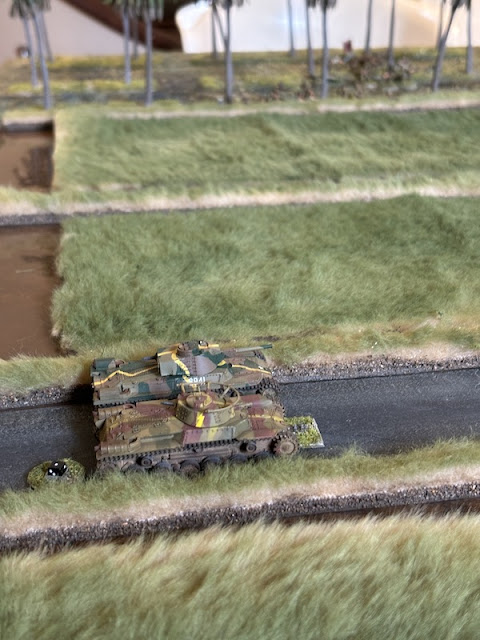
A Chi Ha tank appeared on the road and that presented more of a threat.
At that point I began to think that a roadblock may have been a good idea. At that early stage I was reluctant to commit the 2 Pounder, it seemed too early in the game to show my hand.
Instead the anti-tank rifle team deployed entrenched near the pillbox. Not the best decision in hindsight. I forgot how pitiful was its firepower. Ideally it should have been held back for when there was an opportunity for a rear or side shot. Needless to say it wasn't very effective against even the relatively weak armour of the Chi Ha.
The Japanese were quick to respond and deployed the grenade discharger squad near the edge of the plantation. From there they targeted the AT rifle team.
Within two phases they had killed one of the crew and broken the surviving man who fell back. That was a waste of the AT rifle.
Fortunately the British acquired a full CoC die quickly and I ended the turn to remove the effects of the Zero attack. That did mean the AT rifle man routed off the table but I felt it more critical to be able to deploy the 2 Pounder without interference. I couldn't let the Japanese tank have free rein.
While the gun managed to inflict shock on the crew of the Chi Ha and damage the tracks it was not neutralised. What made matters worse was a second tank appeared, this one commanded by a senior leader and a sign there were more tanks to come.
Sure enough there was a third and that moved quickly forward.
The 2 Pounder crew continued firing and managed to knock out the first tank. That was a good start but it still left two tanks to deal with.
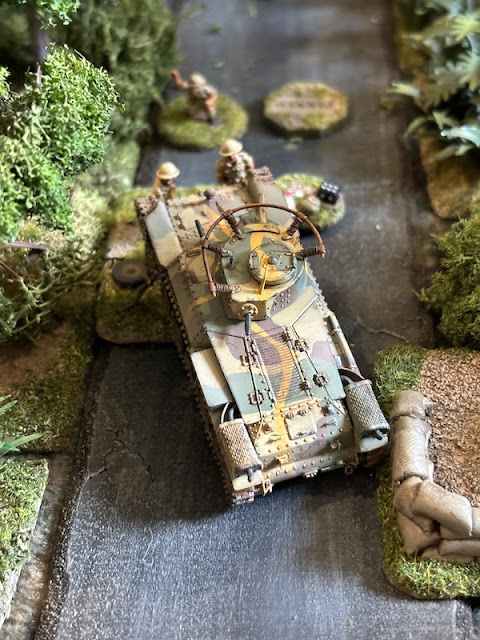
The most advanced Chi Ha moved forward aggressively. Before long it had approached the pillbox and was soon bearing down on the 2 Pounder.
The Japanese were throwing everything they could at the 2 Pounder crew and a squad deployed on the road to add its weight of fire.
Shock began accumulating rapidly on the gun crew. That called for desperate measures on my part. The platoon sergeant had already deployed on the right flank and reluctantly I sent forward the platoon lieutenant knowing the remaining units will have trouble deploying without a senior leader.
Despite the presence of the lieutenant the duel with the tanks eventually saw the gun crew pinned down. With the odds stacked against them they took what was most likely going to be their final shot. Pinned and suffering shock they needed to roll an 11 or 12 to hit and fortune smiled with a double 6. Not only a hit but a critical hit and three additional AP strike dice. Surely with eight AP dice the Chi Ha was in trouble? With four successful strikes it looked like the tank was doomed but it survived against the odds with two net hits.
However it was enough to knock out the main gun.
That proved to be the last act by the 2 Pounder as it was soon overrun by the leading Chi Ha, destroying the gun and dispersing the surviving crew members.
That was a disaster from the British perspective. They no longer had any anti-tank weapons and yet the Japanese had two tanks still in action (admittedly one of them has lost its main gun, but in the kingdom of the blind the one-eyed man is king).
The most forward Chi Ha moved on to capture the British line of communication marker which had severe implications for force morale. However the test occurs only with a turn end and those didn't arrive that frequently. I was able to use a CoC die to avoid taking the first one and that helped to keep British morale from dropping too fast.
The Japanese sensed their opportunity and pushed aggressively forward with their infantry. A squad moved out of the plantation trying to close down one of the jump-off-points.
They came very close, but not close enough.
The British were quick to respond and a section deployed and fired.
The corporal had them throw a grenade and the nearby platoon sergeant had them throw two more.
Caught in the open the Japanese suffered greviously.
The Chui, the Japanese platoon commander was wounded and they fell back hastily into the cover of the plantation.
The Japanese then tried to push down the road behind the tanks.
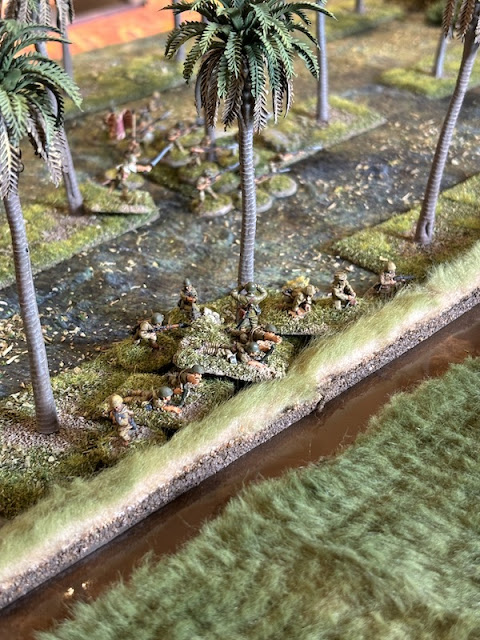
However they exposed themselves to the British who deployed along the jungle fringe and poured fire at them. The Japanese infantry grabbed what cover they could and took up tactical positions. They were reluctant to move any further forward for fear of being targeted by the Vickers in the bunker.
Instead they remained where they are, hoping the tanks would do the work and this proved their undoing. Casualties and shock accumulated. An LMG team was wiped out and leaders were wounded, all further impacting their force morale.
The Japanese tanks could harass the British but the jungle is impassable to them, so without infantry they were unable to dislodge the defenders. They had to rely on firepower and that's where the added weight of firepower from the main gun in the platoon commander's tank was sorely missed.
The light machine guns of the infantry and the Vickers in the bunker tried to ward off the tanks but they all proved ineffective. It was soon apparent that they were better off focussing on the Japanese infantry. A long range firefight developed across the paddy fields where the British had the advantage of occupying hard cover. The Japanese mistake was remaining where they were and hoping the tanks could do the work.
Japanese morale was the first to fall below five and once it hit four they not only lost their red dice but one of their regular command dice. With four squads and two tanks that severely limited command options.
Eventually a burst of fire from two of the sections broke a Japanese rifle team which routed off the table taking their Gocho with them. The Japanese used a CoC die to avoid one force morale check but needed to roll a one with the other to stay in the game. That didn't happen and their morale collapsed to zero for a surprising British victory, certainly one that didn't look possible once the 2 Pounder was destroyed.
That British success means they are very much in with a chance to win the campaign. That takes us to the second scenario Jats in the Rubber, occurring simultaneously during the same campaign turn.
This is a variation on the Flank Attack scenario and gives the Japanese several options on how they want to approach this.
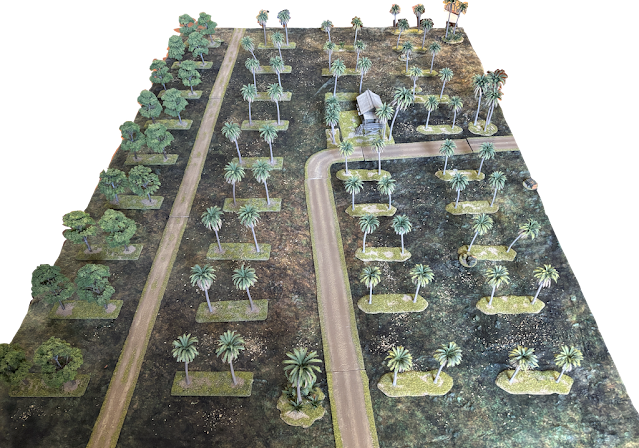
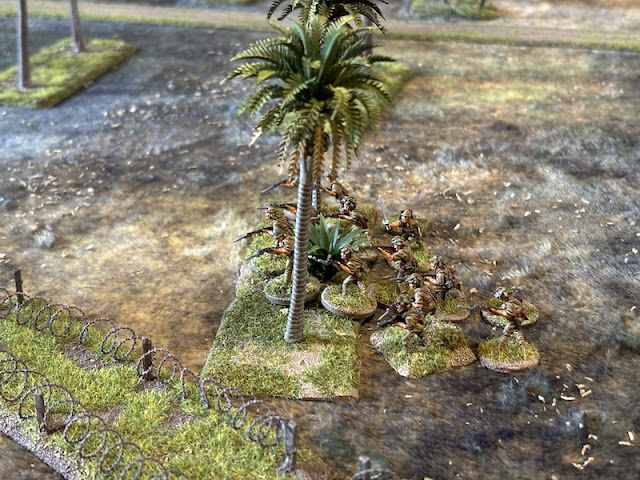
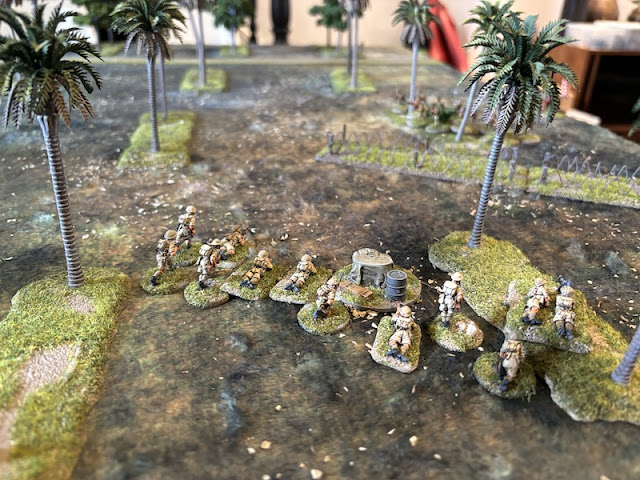
Once again I have made up most of the rubber plantation using palm trees and I'm pleased I had enough to give the table reasonable coverage given we are trying to fill a 6x4.
The patrol phase and its outcome proved pivotal in determining how this game would play out. The Japanese tried approaching from two extreme flanks and the British managed to prevent them making too much progress in any single direction, but they came very close.
The British had sixteen support points and I decided one of the most important things they needed to do was buy time and slow the Japanese. If they had a Zero attack, which I assumed was highly likely, they could deploy and be upon the British jump-off-points and LoC before I could react. With that in mind I selected a pre-game barrage of my own. I did consider a mortar barrage but given Japanese proximity I couldn't imagine there would be time to call it down before they were in contact.
Two sections of barbed wire would be used to slow movement from one direction in the hope I could deal with any attack from the other direction before turning to face the second. I took AA Artillery to maximise the chance of successful deployment through the Zero attack. Given an attack from two directions I suspected I'd need the full attention of my senior leaders and so called on an Adjutant to allow for that to occur before all units were deployed.
I then needed to consider how I'd fend off the actual attack. Entrenchments were an obvious choice and I took the maximum of four. Given the table offered armour easy passage I fully expected to fight off at least one tank, if not a platoon, so a 2 Pounder seemed essential. My final support point was spent equipping one of the section leaders with a Thompson SMG. The one thing missing was either another section or a Vickers MMG but given all possible outcomes I felt these were a luxury that would come at the expense of something more critical given the situation.
Overall I felt reasonably satisfied, however I had neglected to consider one thing - the use of a ruse by the Japanese to move a jump-off-point forward. This was to prove a major oversight on my part. By placing a jump-off-point in the plantation building I'd left a gap that allowed the Japanese to move one of their jump-off-points very close to the Line of Communication marker. It's not the first time the Japanese have used the Local Guides ruse in the campaign and I should have been more alert to the possibility.
The best way I could think to counter this was to use the barbed wire to prevent a rapid Japanese advance from the other flank. Ideally it would buy some time to deal with the threat to the LoC before the Japanese could strike from the other direction.
It was soon apparent that most of the action in this game was going to take place within a very small area.
The ruse was not the only surprise of the game. The second was that the Japanese were not calling on a Zero attack. That saw the British AA Artillery support wasted but at least removed the threat to British deployment. Considering the situation that was a relief, but it did make me wonder what the Japanese had planned.
They started with the initiative but found their initial deployment hampered severely by the pre-game barrage. Only one squad managed to deploy and the Gocho put them on overwatch. More significantly it put them immediately in contact with the Line of Communication marker. Not the best start from a British perspective. I began to think that this could turn out to be a very short game.
With British deployment unhindered by a Zero attack the first section appeared near their central jump-off-point and immediately engaged the Japanese. The section leader was the one equipped with a Thompson and he was able to engage at close range.
A firefight ensued but the Japanese had trouble deploying through the barrage and were unable to bring more fire to bear. The British had the advantage of hard cover and this soon began to demonstrate its effectiveness as the Japanese suffered shock and casualties, including the wounding of the Gocho.
The only successful deployment was another surprise - a 37mm AT gun. This was placed facing the nearby track, a possible entry point for British carriers. I had in fact considered a carrier with a bren gun as a support. I imagined that its mobility and relative protection from small arms would allow the British to use it as a fire brigade to move from one flank to another. As it turned out I opted for the pregame barrage instead and was very glad that I did. For now the AT gun was a Japanese threat that I didn't have to worry too much about. On the contrary and to its detriment it found itself caught up in the firefight and began taking casualties and shock.
Finally a second Japanese squad successfully deployed to join the firefight giving them superior numbers. As it turned out both of these squads were supports which meant the British platoon faced the prospect of overwhelming odds in this game.
A sense of urgency soon developed when the Japanese made another successful deployment this time from the other flank.
Their line of sight extended just as far as the entrenched section and they were able to engage them, although the hard cover once again provided a high degree of protection. Nonetheless it called for a British reaction and a section deployed in the plantation to hold them back.
It was now critical that the British deal with the threat around the LoC and quickly. The Japanese used a CoC die to end the turn. That brought the effects of the pregame barrage to a close and called for a roll for British force morale for the captured LoC. I avoided that by making use of my one CoC die.
Both sides then focused all their attention on the fight around the Line of Communication marker. A second British section deployed from the plantation building. They were also entrenched and together with the other section poured fire into the Japanese. Both senior leaders joined them and a succession of phases saw a hail of fire and grenades wipe out the AT gun crew and inflict increasing amounts of shock on the squads.
It wasn't going all the way of the British but their entrenchments afforded good protection and limited their losses. Their cause was helped by a timely run of phases, even if one roll included three 6s. That entailed a turn end and as the Japanese were still in contact with the LoC marker British morale dropped to five. That only increased the sense of urgency.
The firefight eventually reached the point where despite the attentions of the platoon's Chui to keep shock under control both Japanese squads were pinned. At that moment both British sections swept forward from their entrenchments and into contact. The Japanese were in no shape to receive them. One squad was wiped out, the Chui was wounded and the few remaining men in the other squad broke and fled off the table taking all the leaders with them. That was to prove a catastrophic series of events for Japanese force morale which crashed to zero.
That was a short and very brutal game. The Japanese surprised me with their approach - they had selected an infantry heavy force with two support squads to add to the four squads of the core platoon. No Zero and no armour came as a complete surprise and found my force off balance to handle such a strong infantry attack. The outcome rested on timing - an uncoordinated Japanese deployment was met by a quick, aggressive British response. The pregame barrage proved a life saver and allowed the British to deal with the Japanese in detail. Their aggressive tactics could so easily have paid off but their slow deployment and the ability of the British to deploy uninterrupted and into hard cover made a significant difference. A bit of luck also helped. A double phase came at a critical moment and it set up the situation where I could commit both sections to close combat with a high chance of success.
With the Japanese repulsed in both of the last two games that gave the British the campaign victory. This is a short campaign but a very enjoyable one, certainly with a high replay value given the different ways each scenario can play out.
If you've enjoyed following along and would like to
Buy Me a Coffee to help support the blog you can click through at the link or on the tab in the right hand column of this page.












Cracking stuff. As always, throughly enjoy your campaign reports. I would really like to play this one, but locally there's a shortage of CoC players. Oh well. In the meantime, it will have to be vicariously.
ReplyDeleteThanks Doug, hopefully you find some more local players. This is a very nicely thought out campaign that’s brimming with period flavour. A challenge for both sides.
DeleteGreat stuff as always, and a cracking British win against the odds.
ReplyDeleteThanks, both games looked like they were going to go the Japanese at so it was very satisfying to turn that around and drive them off. A very enjoyable little campaign.
DeleteThey were both exciting games; the Japanese 'JOP ruse' really brings a sense of uncertainty, if not fear, into the game that captures the British confusion when faced by an aggressive and enterprising enemy.
ReplyDeleteYour terrain as ever is splendid, but your comment about being pleased you "had enough to give the table reasonable coverage" made me think. Like you I game CoC in 20mm but found that my buildings (OO gauge) feel unduly spaced out compared to the TFL campaign maps. What I've done for a while now is to downscale the playing area in line with the smaller figure scale i.e., I treat 1" as 2cm. This way the playing area is 144cm x 96cm (c. 57" x 38"). The same is also applied to movement, shooting range, etc. so the entire game is shrunk down to match the smaller figures and buildings.
Aside from the shooting ranges looking more realistic with 20mm figures on a 6' x 4' table am I missing something?
To be honest I’m not sure if those TFL maps are drawn to any specific scale I’ve found the interpretations of terrain would be very difficult to replicate in 28mm as we often struggle to fit it in when using 20mm. Other times the scale veers the other way so I’ve always taken it as slightly impressionisitic and tried to aim for the intent rather than an exact copy. You, being an engineer, are comfortable shrinking to a scale but it gives my less mathematical brain a headache just contemplating it (Dave on the other hand is an engineer so I should leave that stuff to him). I settle for a more rubbery creative solution where close enough is good enough!
DeleteYes, in 28mm, is hard to fit buildings on the table as drawn unless they are cartoonishly small.
DeleteI was fascinated that the games panned out very similarly to the ones Alex Storm of Steel and I played; especially the firefights and bayonet work. Not so much Jats in Rubber as Jats in Trenches.
ReplyDeleteThat’s interesting. Putting the Jats in trenches seems an obvious choice to me, they will have the only hard cover on a table full of light cover. Given the Japanese can be on them in no time they need all the advantages they can get.
DeleteTwo cool looking games. A great use of terrain.
ReplyDeleteThanks Ray, I’ve really enjoyed digging out the jungle terrain and making these tables.
DeleteAwesome and gripping AAR, as always.
ReplyDeleteCracking stuff mate
ReplyDelete