

Now, we move to the western side of the salient, where Kampfgruppe Weidinger launch their attack at Le Valtru, just as the 7th Seaforth Highlanders attempt to move into the village.


A shallow stream cuts across the table. It will slow movement, but not prove a particularly difficult obstacle for infantry or tracked vehicles.


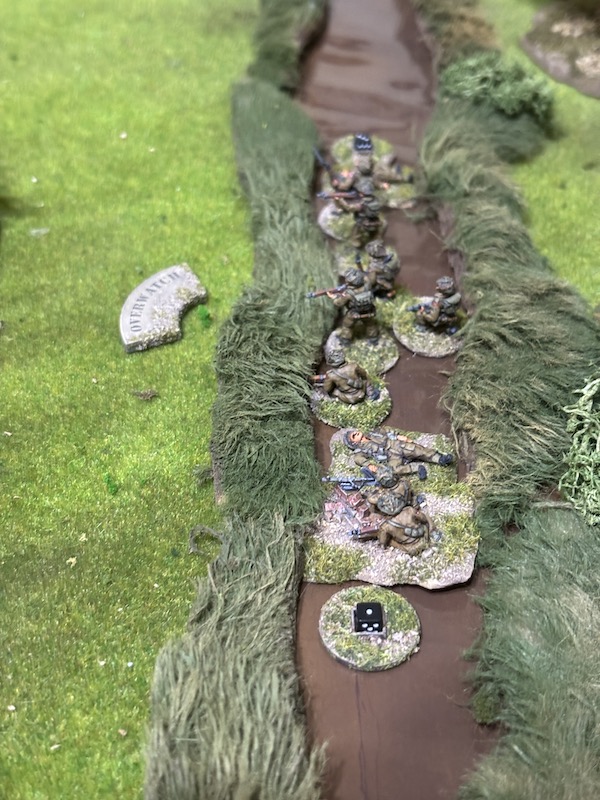
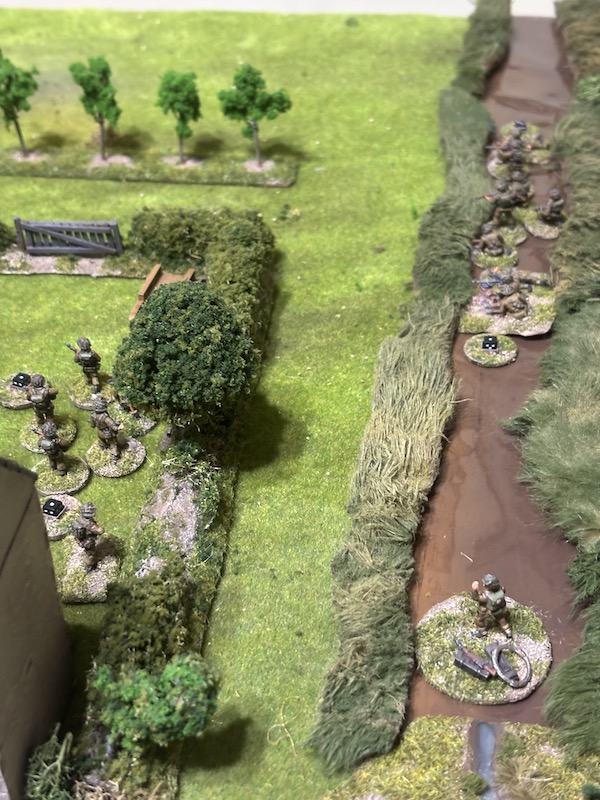
The section's corporal puts both teams on overwatch to cover the orchard ahead.


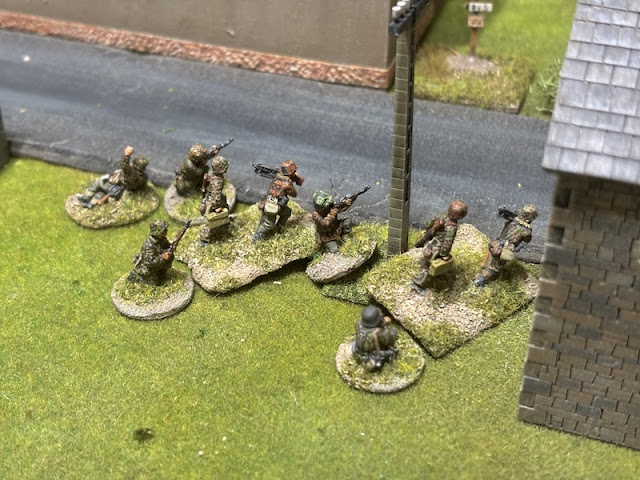
When the German phase arrives I'm not surprised to see they have added a Red Dice to their command roll. They waste no time deploying. The first squad appears on the British left.

They have a line of sight through the houses to parts of the hedgerow near the British section. They can cover that and any attempt by them to move up the road, or around the house.


Both squads are well placed to prevent the British exploiting any move into the village.


The best they can manage is to move 2" and so the Bren team makes it only as far as the door.

Should the Germans decide to act aggressively, that is going to leave most of the section vulnerable at the back of the house.

As it happens, the Germans have something like that in mind. Dave uses three CoC points to Reposition the squad in the orchard.

However, it doesn't quite go as planned. They move only 1”.

I think he was hoping to reposition the squad sufficiently forward to then move with one dice to the hedgerow and fire, catching the section in the open. That's not something they are close enough to do now. Nonetheless, they do advance, moving around the edge of the orchard to avoid being seen by the section on overwatch at the stream.

As they move out of the trees and come close to the hedge, they do manage to avoid the attention of the section at the stream.

But not the attention of the Churchill's commander. The British use their full CoC die to interrupt the panzer grenadiers as they move.

The HE round is not as deadly as it might have been (no Storm of Steel hits unfortunately), nonetheless the Germans lose one man. With his second CI the scharführer has the squad throw a grenade into the back yard, but it fails to cause the British any harm.

That's going to put the British section at the back of the house in a tight spot, especially if both panzer grenadiers squads can bring them under fire.

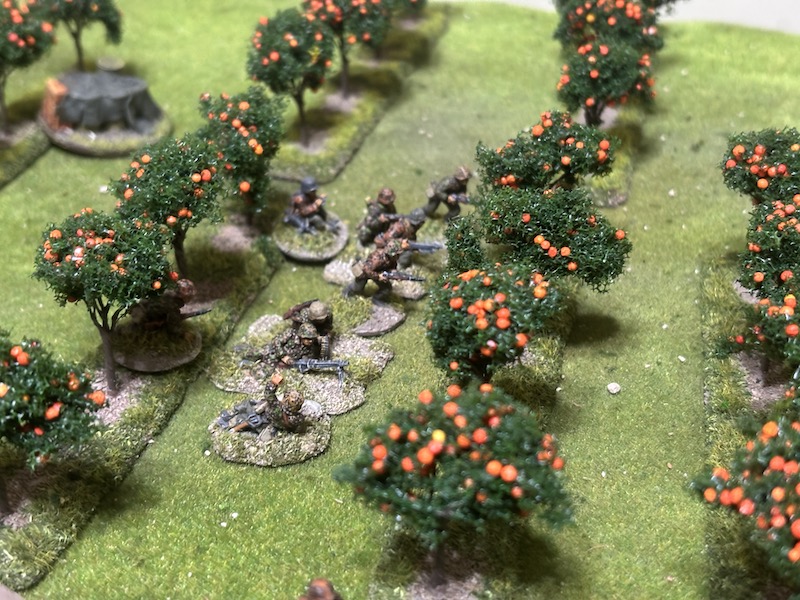
A third German squad deploys into the orchard.


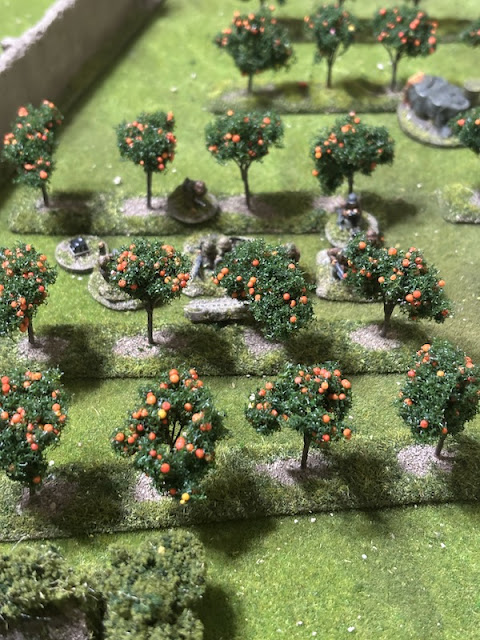
Fortune then smiles on the British, with a double phase. That said, the activation dice offer limited opportunities, with only a 1 and 4 available. Ideally, I would bring on the second Churchill and try to hammer the panzer grenadiers in the orchard. However, all is not lost. The second edition rules mean I can use the 1 to activate the Churchill's gunner. It's at this point we also notice that those two German squads are less than 4" apart and make for a bunched up target. That's just too inviting.

One of the German squads reacts quickly to the danger using hit the dirt to go tactical.

The HE round scores a total of six hits thanks to two storm of steel rolls. Despite being caught in open ground, the squads are lucky and suffer only three points of shock.


The platoon sergeant decides to keep the nearby section where it is and throw grenades over the hedge. These prove more effective and the nearest panzer grenadier squad loses another man and suffers more shock.

The sergeant has a line of sight to the stream, where the section is within his command range. He orders them to engage the Germans in the orchard.

Now that they've hit the dirt they are in hard cover. It's not enough to prevent the squad's scharführer from taking a hit. He is stunned and that drops German morale to six.

The subsequent British command roll is 54321. I think it gives me the options I need to continue punishing the Germans. I could bring on the second Churchill, but decide instead to call up the 2” mortar team.

They have a line of sight to the Pak 40 and fire off a smoke round.

That lands on target.

It effectively blocks the line of sight of the gun crew.
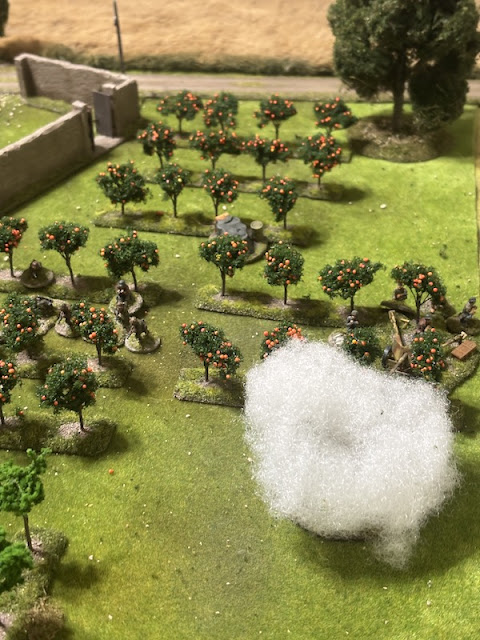
Which gives the Churchill some freedom.

It will maintain fire on the bunched up panzer grenadiers.


The platoon sergeant rallies shock before ordering the men to throw their last grenade over the hedge. This time their aim is off and the grenade explodes harmlessly.

The section has held its ground behind the house for long enough. It's an exposed position, particularly if panzer grenadiers get to the other side of the hedge. The sergeant orders them back toward the stream and better cover.


The section in the stream is suffering some shock, but the corporal decides his time is better spent directing the section's fire.

He orders them to target the orchard.


This is quite dense terrain, typical of so many villages in Normandy. Sturdy farm buildings are surrounded by high walls and orchards. Lines of sight are not very open, with much intervening terrain, it will prove difficult for either side to bring all the fire of their respective platoons to bear. This could devolve into an action that comes down to the efforts of individual squads.


This is a patrol scenario, although on a rather large scale. Think of it more as a meeting engagement of the leading units from each side. The British will start the patrol phase from the right hand edge of the map and the Germans from the left.

As the British I would really like to get a foothold across the stream and into the village. Failing to do so could mean trying to cross open ground and then the stream - all in the face of the panzer grenadiers' impressive firepower. An unappealing prospect.

Force morale for both sides proves to be the exact opposite from the previous game. This time it's the Germans starting with morale of eight, while the British are at eleven. That's a good start from my perspective and it means the opening move of the patrol phase belongs to the British. With speed the key, I'm not looking for much subtlety in this phase, it's all about placing my jump-off-points as far forward as possible. I opt for only three patrol markers. Dave is thinking along similar lines and does the same. The patrol phase becomes a race forward for both sides.

As the British, I achieve my key aim. Jump-off-points are positioned forward enough to allow deployment across the stream and into the edge of the village. The Germans have made slightly better progress, but no side appears to have a clear advantage.
Now the decision to be made is, what support will help the British platoon drive back the Germans? I can't go toe-to-toe with panzer grenadiers. That is asking for trouble. I decide to opt for armour support. As much as I can get.
While the Germans have powerful tanks on hand, like the Panther, this is not great tank fighting country. This is a job the Churchill tank was specifically designed for. I don't need speed and manoeuvre. I need a weapon with reasonable HE and thick armour that can provide close support to infantry.
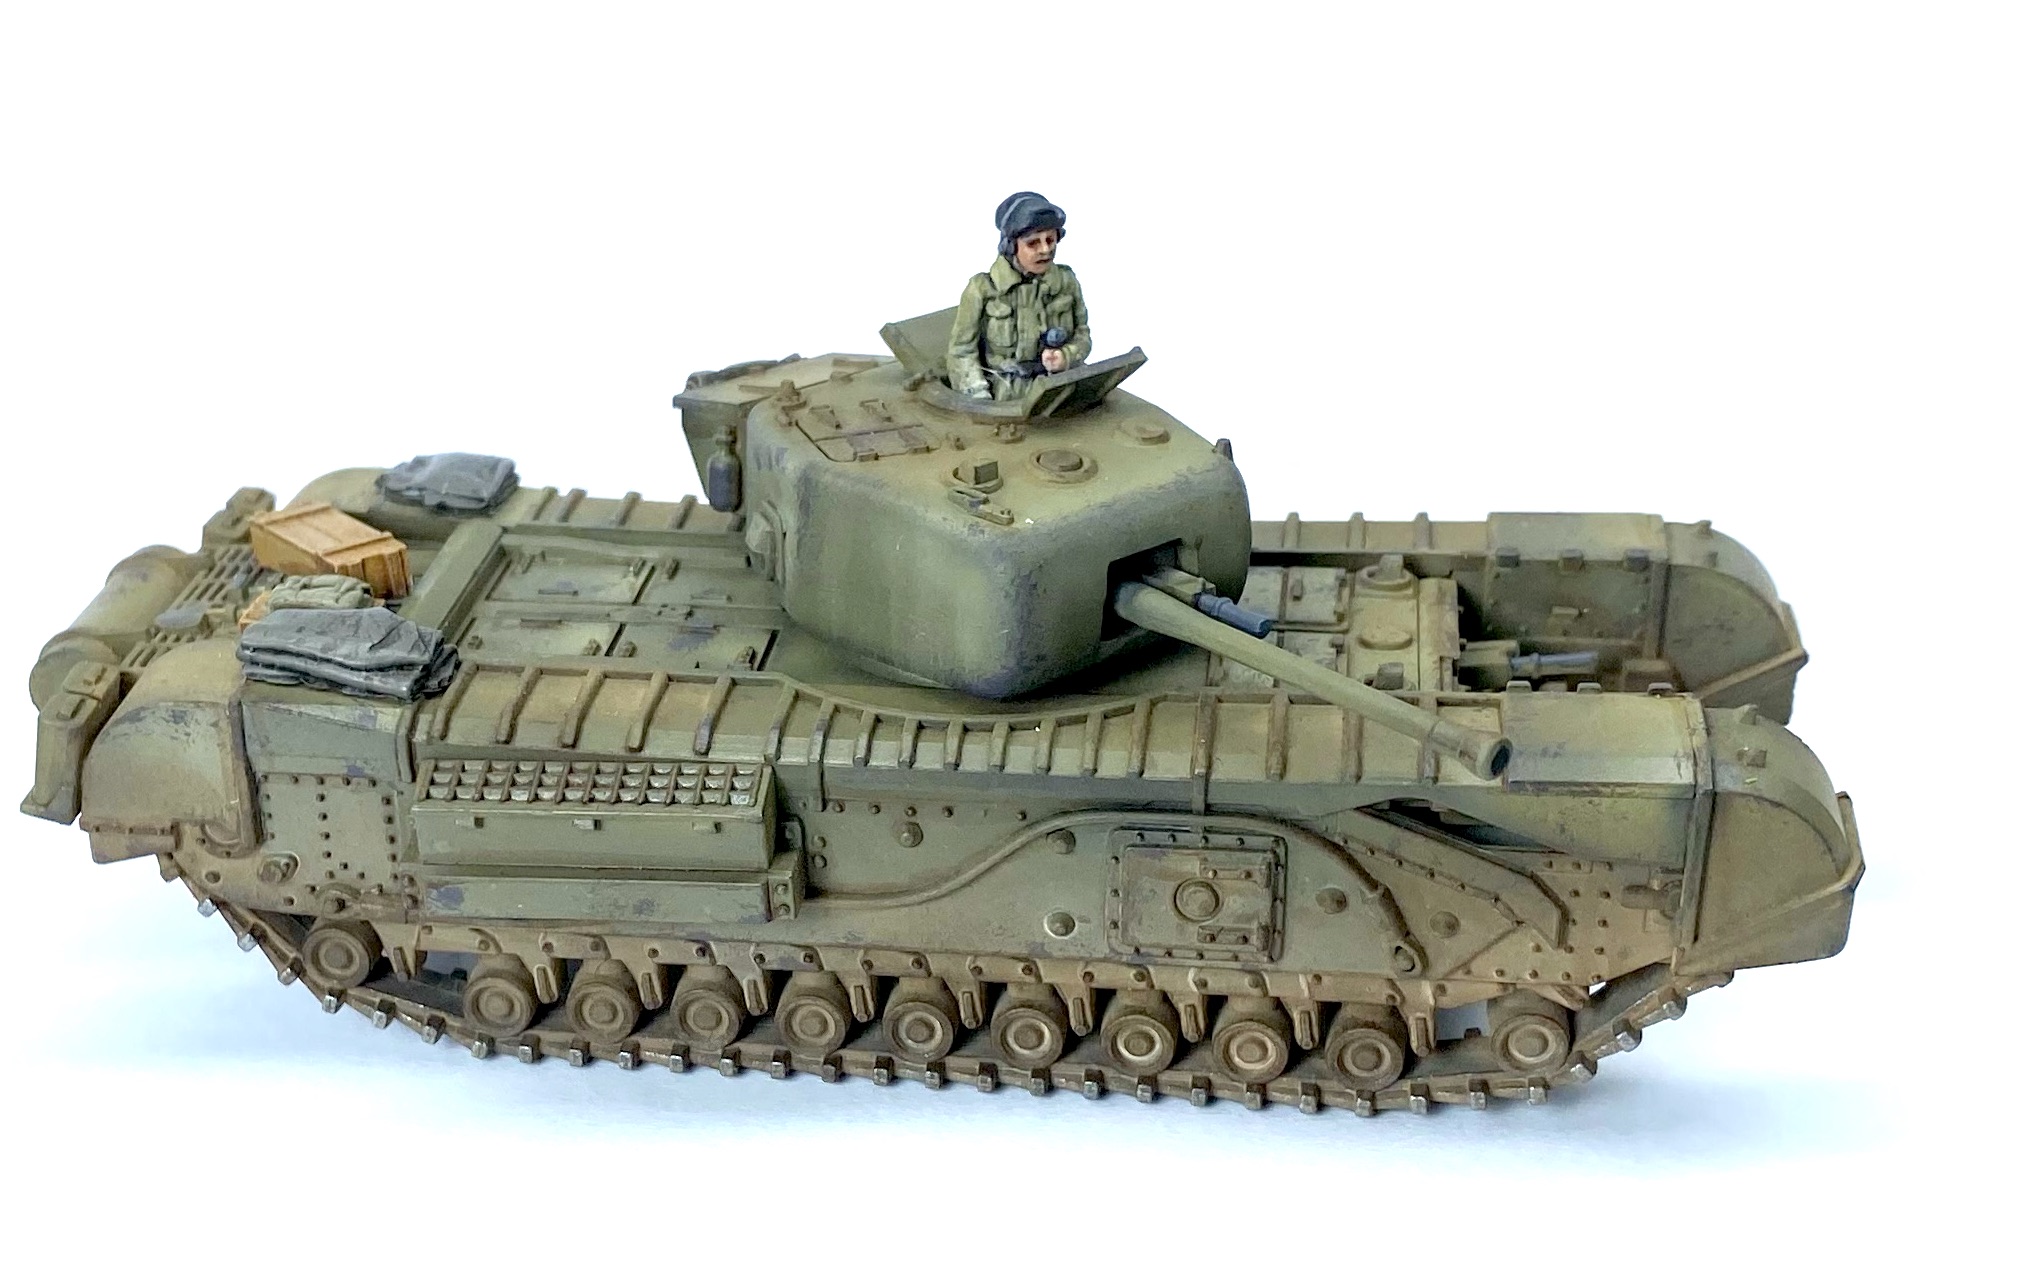
There are enough support points to take two of these and that's what I intend to do. The remaining points will be spent on an additional PIAT team. This is the sort of terrain where, if the Germans do have armour, infantry anti-tank teams have a chance to stalk them. As always, I won't know what the Germans have in support until it appears.
While it's our intention to play this using the v2 rules, we won't play to the exact letter of the Patrol Mission, as we don't feel the objective reflects the intention of the original design for this scenario, so we will revert to the objectives as set in the original rule book (victory goes to the side that forces the other to withdraw, while keeping their force morale at three or more).
We both roll for starting CoC points and gain three each. With that we are ready to begin.
The bright start continues for the British, who roll a double six in their first command roll. The Germans collect a CoC point, but this gives the British a chance to establish a decent foothold in the village before the Germans appear.
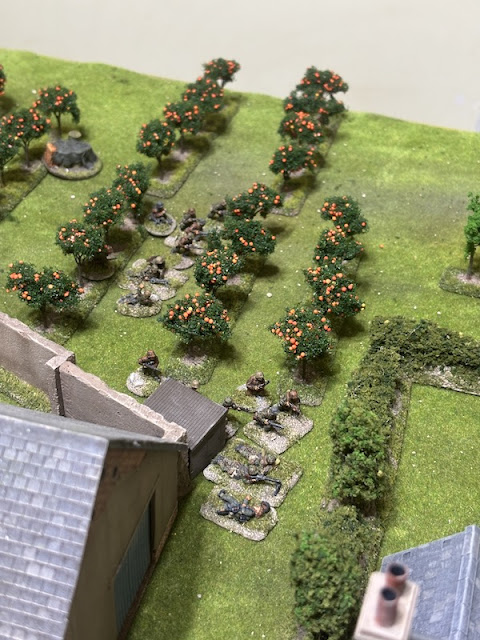
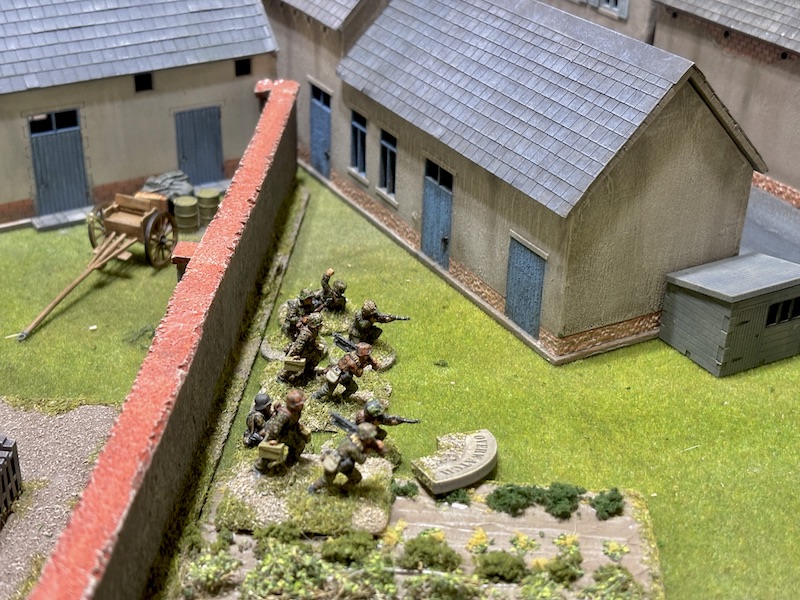
The first section deploys from the jump-off-point in the stream and takes up tactical positions at the rear of one of the houses.

There is a German jump-off-point in the orchard to their right, so they must be wary about their next move. Nonetheless, there is a window of opportunity to establish some sort of firing line, before they appear.

A second section deploys and uses the banks of the stream for cover.


When the panzer grenadiers do make an appearance, there is little doubt my men will be assailed with MG42 fire. They will need all the support they can get. To that end, the first of the Churchill VIIs makes an appearance. The gunner is placed on overwatch.

The subsequent command roll provides useful CoC points, but not a lot of other options. The section at the back of the house moves to the hedgerow, but does so painfully slowly and doesn't reach it.

Range is not an issue for the Churchill, however, I suspect the Germans will keep themselves back in the orchard and out of sight. It will need to move closer to provide maximum support and so it moves forward.


The squad's scharführer puts both teams on overwatch.
A second squad deploys into the orchard on the British right.

Both of the squad's MG42 teams are placed on overwatch.

They are set back far enough in the orchard to be out of line of sight from any of the British units.


The following British command roll adds a further CoC point, bringing them up to one full CoC die. Those CoC points could prove very handy. Meanwhile, the Churchill continues to make slow but steady progress towards the stream.

The platoon sergeant deploys at the back of the house.

I'm not sure I want a confrontation with those panzer grenadiers just yet and so the sergeant orders the men to fall back into the farmhouse.


The second squad moves to the road that runs through the centre of the village.


It certainly looks like they are going to make a concerted effort to drive out the small foothold the British have in the village.

They are close enough to the edge of the orchard to see the British section in the stream and they open fire.

The initial bursts are deadly. The section loses two men and suffers four points of shock.
The section is on overwatch and returns fire immediately, but they manage to inflict only a single point of shock.

The Germans have one more surprise in the orchard. A Pak40 gun appears.

The commander helps aim the gun and an AP round strikes the Churchill. It inflicts three AP strikes, but I chose the Churchill for a good reason. Its thick armour deflects the shot.


You might ask, why I have chosen to ignore the Pak40? That's because, I've decided to take a gamble. I really want to maximise the damage the Churchill can do to the German infantry. I'm hoping in the next phase to either, use the 2” mortar team to put down covering smoke, or use the Churchill's smoke canisters. In an ideal situation, I could bring on the second Churchill close to the first. Both gunners would engage the infantry, before the first Churchill's commander fires off the smoke canisters. Things rarely go to plan, but I think I have a few options. Let's see.


This time the HE proves deadly. Storm of steel ensures multiple hits and three more of the squad are killed. That wipes out one of the LMG teams. With casualties beginning to mount, German morale drops to five.


The Germans are in hard cover and not a great deal of firepower is coming their way. However, there's no doubting its accuracy. Three of the squad are killed.

It's been a devastating couple of phases for the Germans, who have lost almost an entire squad. Their force morale sits at five. Another drop would see the loss of the Red Dice and one command dice. The Pak40 is out of action for the foreseeable future and the remaining panzer grenadiers have little hope of overwhelming the British infantry. Quite wisely, Dave calls it a day and withdraws his platoon, before things get any worse.
Well, that was a short and brutal game. Quite a contrast to the previous one, where concentrated German firepower proved unstoppable. I think the main difference here is that the terrain makes it very difficult for either side to concentrate their fire. When Dave did try to build up a base of fire in the orchard he found the two squads were too close together. That was a painful lesson. As a bunched up target they were exposed to two consecutive phases of fire. That proved very costly.
The Germans suffered eight casualties which means this platoon suffers four permanent losses. The wounded will miss the next game, but I'm sure Dave will rotate platoons, so this won't have any consequence for future games.
The British casualties were few, only two men. Given the difference in force morale these will all be recovered, patched up and returned to action. While this platoon will be replaced with a fresh one, the recovery of losses means is important for the Men's Opinion, as it means they have suffered very light casualties. As a result the Men's Opinion returns to zero. The CO's Opinion also improves and returns to zero. On the other hand, for the Germans the outcome is negative for both the Men and the CO. Their opinions drop and that seems them also at zero.
Beautifully presented - very much enjoyed, thanks
ReplyDeleteThanks Norm, glad you enjoyed it.
DeleteReally interesting, as is all of your CoC content over the years, a valuable resource.
ReplyDeleteI can see the value of an extra command dice in the game, but what does this represent 'in real life' ?
It represents a high level of tactical ability, particularly when it comes to NCOs. It also represents a better ability to react and respond, reflective of higher levels of training and/or experience. Essentially this platoon is better, faster and more flexible. The extra dice is not an option open to just any platoon. Some very well trained/led, get it automatically. Others, like the panzer grenadiers, have it at a cost in support points, a reflection that it’s not guaranteed, for example, for this mission the CO may have made the decision to assign the job to a well led platoon with an experienced officer and good NCOs.
DeleteA splendid report with the photos carrying one through the unfolding action adding to the enjoyment. A short, but gripping game nonetheless.
ReplyDeleteThanks Phil, always good to show the panzer grenadiers who’s boss, LOL.
DeleteFantastic narrative and piccies. Loved it.
ReplyDeleteThank you, glad you’re enjoying following along.
DeleteEvery game is so different, I think that's why I like these rules so much. I was chuffed that I might be starting to get the hang of v2 as I thought the panzergrenadiers looked like a bunched target before reading the text that confirmed it - I doubt I'll stop making mistakes though.
ReplyDeleteHa, you spotted something Dave didn't, until it was too late. I suspect we will all be caught out bunching up from time to time, the temptation to concentrate a lot of fire at a critical point is just too tempting....until it's not!
DeleteYou also have to watch out for those viscious mortar bombardments, if your opponent has one and you bunch up (not even as close as the 'bunched up' rule) you'll pay heavily. A mortar bombardment should be nasty, but at only 4 points it may be too easy to get hold of - I shall have to check my campaign support options to see if they don't always have one available to buy.
DeletePerceft AAR, as usually.
ReplyDeleteWhat kind of support took German player (other then PAK)? Assault sappers? Flamethrowers? Extra squad?
Thanks. I think Dave took a Red Dice, an Adjutant, an extra panzer grenadiers squad and the Pak40. The Flamethrower team was not available for this scenario as it's a Patrol Mission.
DeleteAnother outstanding report that had me on the edge of my chair. In fact, I was so engrossed that I nearly forgot that I had dinner on the stove.
ReplyDeleteThanks for sharing this report.
Thanks Dennis, glad you enjoyed it, but hope you managed to save dinner!
DeleteGreat story telling with the photos and text each doing the part meant. Wonderful job on the figures and terrain.
ReplyDeleteThank you very much!
DeleteAnother great report and lovely to see CoC2 in action. The use of armour I think was pivotal as it focussed German die on it when squads could have been activated instead. I dunno if the support list had a vehicle but imagine a squad/team in a jeep on the initial double phase, flying down the road in to the village and trying to capture a JOP!
ReplyDeleteThanks, glad you enjoyed it. As for the jeep flying down the road, generally that ends in tears. We have a great example when we played the Bloody Bucket campaign, where it ran the gauntlet and came close to success, but not close enough. You can read what happened here https://thetacticalpainter.blogspot.com/2021/03/bloody-bucket-campaign-turn-6-scenario_26.html
DeleteAn excellent and riveting battle report….
ReplyDeleteI really must pick up the rules… They may work well for the WW1 Hundred Days Campaign.
All the best. Aly
Thanks Aly. I used a First World War variant for a series of participation games that I ran at the CanCon convention last year. It wasn’t the hundred days, but was close - March/April 1918. The rules handle the period well and are well worth trying.
Delete