The tank hunter, anti tank rifle and rifle grenadiers are all very common support elements.
A flamethrower was one outstanding addition to the support lists and this one came from Simon's Soldiers.
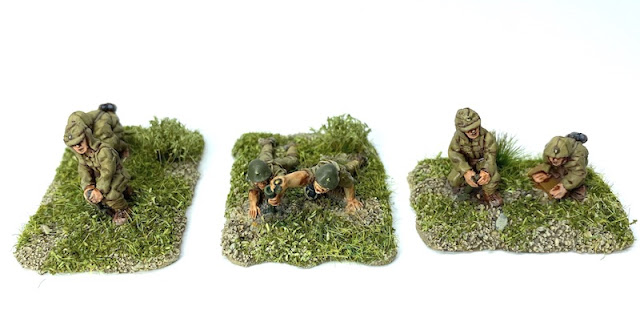
Ironically I have found a crew from Simon's Soldiers my preference to crew the Type 92 70mm gun that comes with the set.
Having said that, one of the prone figures with binoculars from that Italeri set makes for the perfect gun commander.
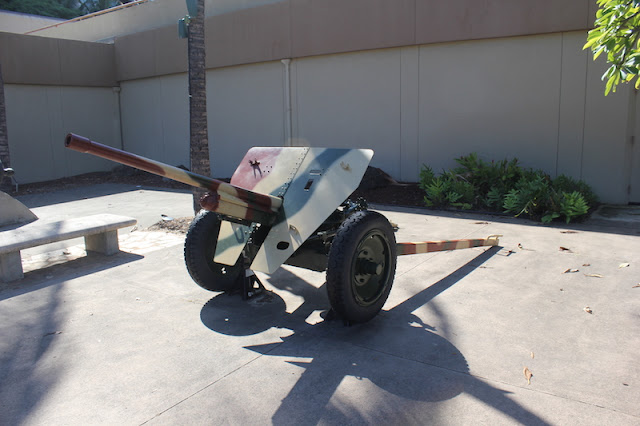
I've seen a few of these guns. This one below is in the Army Museum in Honolulu and has the metal wheels which match the Italeri model.
This one below is in the military museum in Beijing and has spoked wheels which marks it out as an earlier model. They were replaced with steel wheels after troops complained the noise from the squeaky wooden wheels was a threat.
The Australian Armour and Artillery Museum also has an earlier model with the spoked wheels.
Early War Miniatures make a Type 94 37mm anti tank gun with three crew and I use the additional crew figures from Simon's Soldiers to make up the remaining members of the crew.
Here is a Type 94 that I found in the collection of the museum in Beijing.
Also one in the Australian Armour and Artillery Museum which unlike the one above has wooden spoked wheels.
The more powerful 47mm AT gun first appeared in 1942 and proved much more effective against allied armour. This gun and all the crew are from SHQ. As I've mentioned, I find the SHQ figures slimmer than those in other ranges but when grouped together on their own in a setting like this I think they don't stand out as that different. Regardless they always paint up well and look the part.
I've seen a couple of these gun. One in the Military museum in Beijing.
And this one at the Army Museum in Hawaii.
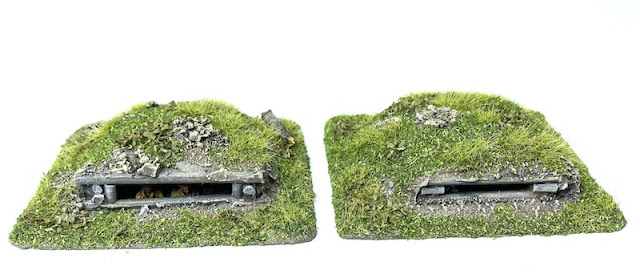
Bunkers play a key role in any Japanese defensive position and the Far East Handbook includes a number of specific rules covering their use. I scratch built several to cover those and there is a more detailed post on how I made them
here. The first two are small LMG bunkers that will be used for squad sized defensive positions.
These were supported by individual weapon pits for the riflemen of the squad, sometimes referred to as spider holes. These would be positioned in mutually supporting positions close to the LMG bunker. 172 Scale Miniatures make a set of these and all I've done is put them on slightly larger bases so that I could texture the terrain to match the bunkers.
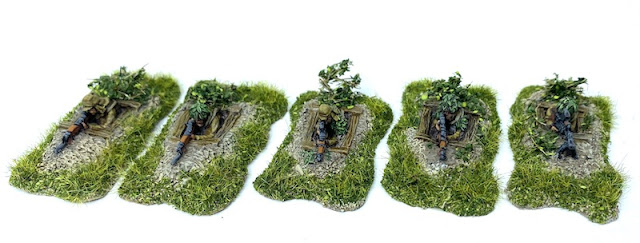
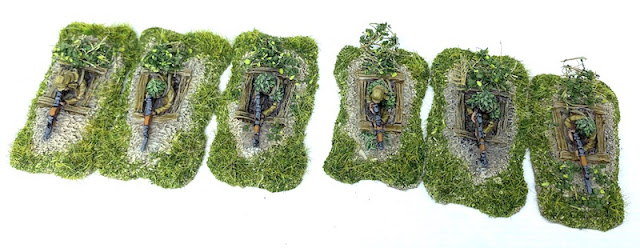
To have enough to make up positions for two squads I also scratch built a few extras making use of left over figures from the spares box. Some of the figures are from the Waterloo plastic Japanese infantry set while those with the camouflage helmets are from 172 Scale Miniatures.
The second bunker type is slightly larger than that for the LMG and houses an MMG team. The MMG barrel is another spare from one of the plastic figure sets.

Of a similar size is a bunker to accomodate a small anti-tank gun. Once again I've raided the spares box for a suitable barrel.
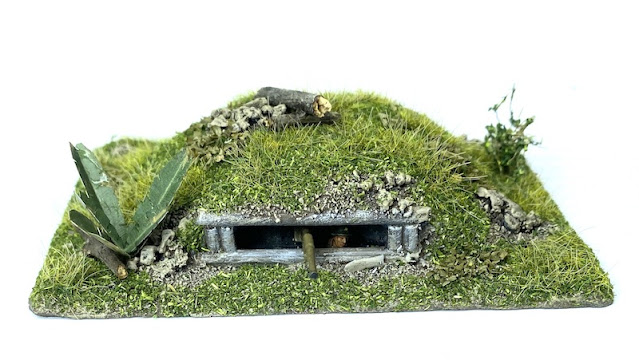
Last, but not least there is a double bunker that can house two teams.
You'll notice that the bunkers are set very low in the ground, as they would have been historically, which means there is no room inside for figures. So I've created a holding box for the occupants so we can track casualties and shock in the course of a game.
The Italeri figures with binoculars have come in useful not only to fill the role of commanders of gun crews but also for a Japanese themed jump-off-point.


The Japanese were also equipped with SMGs. These are available in the support lists as an upgrade for a junior leader. I have also discovered that the platoon HQ in a SNLF unit included three men with SMG who accompanied the platoon leader. I wanted to add these to the collection but I had trouble finding suitable figures. As mentioned earlier, at first I settled for the SMG armed figure from Early War Miniatures, as that was the only one I could find in 20mm. The sculpt didn't look great on their website and my suspicion was confirmed once they arrived. Nonetheless they seemed to be the only figures available and so I painted them up. I based some as junior leaders and others as regular infantry. Fortunately, someone directed me to
172 Scale Miniatures, a manufacturer I was unaware of, and they have a lovely set of eight figures armed with SMGs. These were not only better looking sculpts, they would also give me a greater variety of poses.
These all carry the Type 100 submachine gun, one of which I found on display in the Australian War Memorial Museum (you can see in the picture below above the light machine gun).
I think the marked superiority of the 172 Scale Miniatures figures can be seen in the picture below.
The figures with rocks on the base are to mark them as junior leaders, those without rocks are other ranks. Those can fill a number of roles including the three man team that accompanies the senior leader of the SNLF platoon.
These are a great improvement and now give me a number of different figures from various suppliers to use as junior leaders.
The 172 Scale Miniatures range also included sets of two prone snipers. My understanding is that what the Allies often considered 'snipers' were simply normal riflemen firing from concealed positions. These men were not necessarily even marksmen and yet the perception remains that the Japanese made a greater use of trained snipers than was actually the case.
Despite this I always find a few prone figures useful, even if only for additional crew members for the grenade discharger teams.
I find casualties figures particularly useful for the pictures for the AARs of our Chain of Command games that you can find on the AAR Pages. These are a set that come from SHQ.
The most common Japanese tanks for most of the campaigns I want to cover are the Type 97 Chi Ha and the Type 95 Ha Go. Not many Japanese tanks survived the war but I've come across a few in various museums.
The Tank Museum at Bovington has a Ha Go in good condition.
I also found one outside the Army Museum in Honolulu.
The Australian War Memorial has one with an interesting history. It was one of two Ha Go to land at Milne Bay in New Guinea and fight the Australians there. Both were eventually bogged down in the mud and abandoned. They were well documented at the time and the picture below (from the AWM collection) is one that often appears in reference to the fighting in Milne Bay.
I'm not sure which of the two tanks was sent to Australia but the museum has restored one of them. The lighting for the display is very atmospheric, but not the best for photography.
I bought a set of Japanese model tanks on eBay several years ago. These were already painted and required very simple assembly. While not the most detailed kits I picked up three Ha Go for a very reasonable price and with a bit of detailing and a new paint job they were fine for gaming.
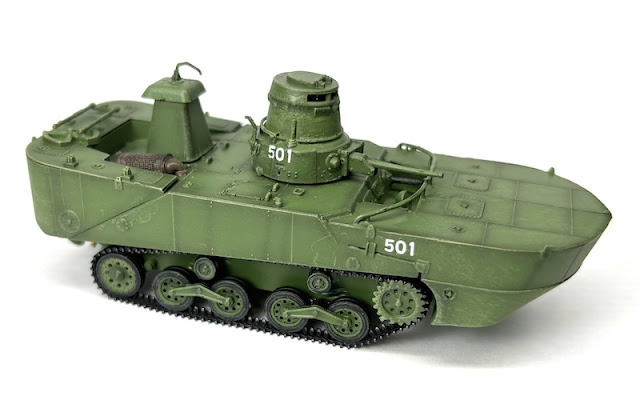
A variant of the Ha Go was the amphibious Type 2 Ka-Mi which added flotation devices among other features to the HaGo to create a vehicle for the naval landing forces. I picked this up the model below at a Bring and Buy so not sure who the manufacturer is but it makes for a very distinctive looking AFV.
The Type 97 Chi Ha is harder to find but there is one in the museum at the Yasukuni Shrine museum in Tokyo.
There is also one in the military museum in Beijing.
The model I've been using for my Japanese force is the venerable old Airfix kit from the 1970s, which I think has held up very well considering its age. I have a couple of those.
The Type 97 Chi Ha was upgunned later in the war and given a larger turret to house the more effective 47mm gun. This was known as the Shinhoto Chi Ha, where shinhoto translates as 'new turret'. This one is from 172 Scale Miniatures.
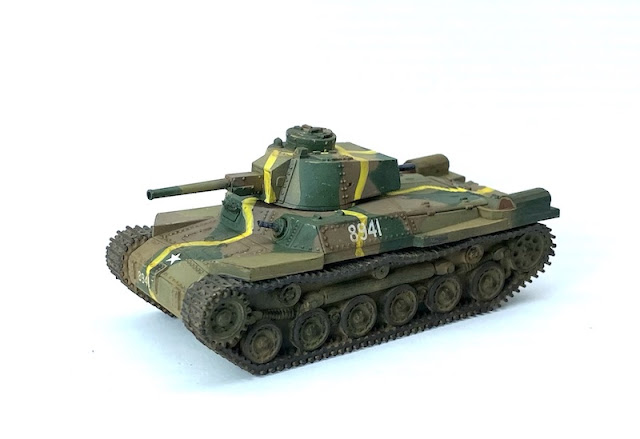
For earlier in the war and mainly for China I have a Type 89, this is a more modern and detailed plastic kit from IBG.
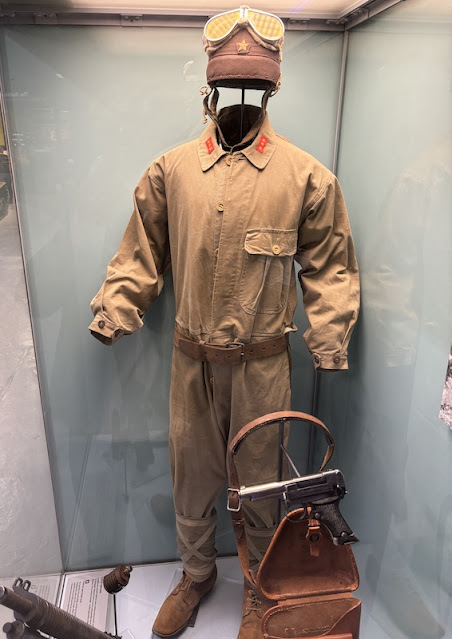
The Tank Museum in Bovington has a complete Japanese tankers uniform on display.
I also have three Type 94 tankettes. Also known as the Te-Ke these were the most numerous of the Japanese light tankettes, with many more built than the Ha Go. Most were used in China in a reconnaissance and infantry support role. While not well armoured the Chinese infantry had little that could penetrate them. They also saw action in the conquest of Java and Timor as well as Burma and the Philippines. These are resin models from Milicast.
To get some idea of quite how small these tankettes can be, here are they are alongside a 20mm figure.
Late in the war the Japanese also developed a self-propelled gun that could serve as both artillery and a tank destroyer. The Type 1 Ho Ni used the Chi Ha chassis and mounted the 75mm Type 90 gun. As far as I'm aware these were only encountered in the Philippines. I bought this very cheaply on eBay as a pre-painted model that needed simple assembly. It lacks the detail of plastic or resin kits but works fine for gaming.
The Japanese made a lot of use of armoured cars, particularly in China, but I've had trouble finding models of these. They did acquire a Austin armoured cars although I'm uncertain if they saw much use after 1940. This is an Austin MkIV model from Master Box.
There is an excellent example of one of these in the Tank Museum at Bovington.
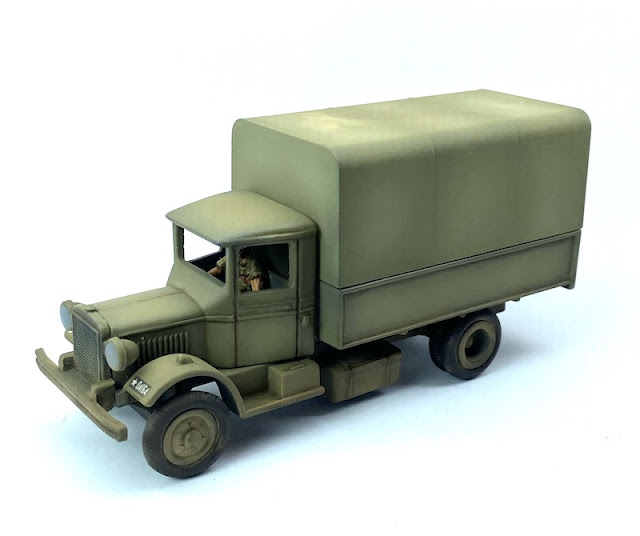
While there is not much need for soft skin models for skirmish level games trucks can be useful as either scatter terrain or for scenarios that involves escorting convoys etc. I acquired a few Lledo die cast trucks and have mostly converted those into commercial vehicles for the Far East. I had one left over and decided to paint it up as a Japanese captured/requisitioned vehicle that could be used for Chindit games set in Burma.
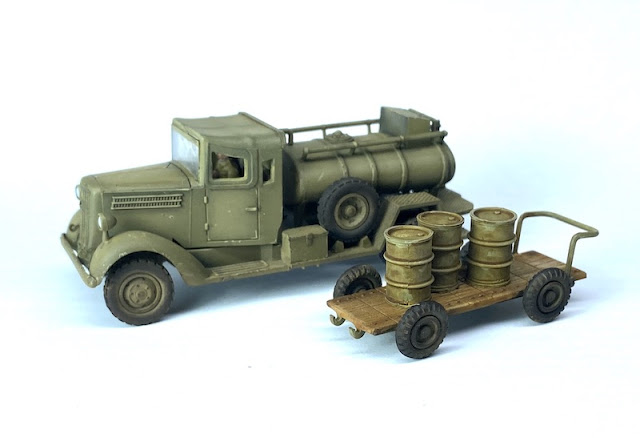
Hasegawa do a very nice Isuzu fuel truck that includes a trolley and petrol barrels.
IBG also do an Isuzu truck. The kit includes a full engine and so it seemed a shame not to have it visible. In this instance I've made it up as one that has broken down.
The diminutive Kurogane car is an unusual looking vehicle, almost toy like, although it was the very first four wheel drive car to be in service in any army. This one is from 172 Scale Miniatures.
For non-mechanised transport I have this team of three mules and their handlers from the 172 Miniatures range. I have in mind these might work well as one of the targets of a raid behind the lines by Chindits in Burma or by Chinese Communists in China.
The Far East Handbook introduces a Zero Attack as a Japanese support option. Like the pre-game barrage it is an abstracted portrayal of disruption to deployment caused by an air attack. There is no need to represent it on the table but if you read my AARs for our Early War campaigns in Europe you'll see I like to represent the Stuka Bombardment in the photographs and so I intend being able to the do the same for the Japanese. For that I have one of the very nice new tool Airfix 1/72 kits.
There is a Zero on display at the entrance to the museum at the Yasukini Shrine in Tokyo.
Last, but not least, I like to have patrol markers themed for all my nationalities and the Japanese are no exception. These were designed by John Bond. I print them out and attach to 40mm MDF round bases.

















Great stuff! I've just abandoned my 28mm CoC Japanese project as the number of required figures was too large and I'd lost motivation. I'd thought if I revisit it at some point I'd do it in 15mm but now I'm wondering about 20mm.
ReplyDeleteThanks. Don’t let me be responsible for tempting you into 20mm, that will be entirely your fault! I find it’s a good scale that works well on a 6x4 table and feels ‘right’. The painter in me loves the larger size and detail of 28mm but 20mm strikes the perfect balance between table scale and figure size.
DeleteGreat article. I have been switching over to 20mm scale. The cost of 28mm figures are a killer. Thanks for point out what companies made the figure.
ReplyDeleteThanks. 20mm does allow you to collect (and store) more than 28mm. Price and selection is great. I can also see lots of advantages to 15mm, but I’m too far down the 20mm path now.
DeleteThat's an epic post. Beautiful army and wonderfully photographed.A much under appreciated theatre of operations and an army not too often represented. This will be a valuable resource for others to refer to. Many thanks for sharing.
ReplyDeleteThank you, glad you found it useful. The scope of the war in this theatre is huge. China and the 1942 campaigns in Malaya, Burma etc have the appeal of early war, which then contrasts nicely with the later war battles of 44/45. You’ve got everything from jungle to urban warfare. You have British, Indian, American, Dutch, Australian, Chinese and even African units. Throw in unusual units like the Chindits, or the powerful US Marines and what’s not to like?
DeleteWhat a splendid post Mark, most informative and inspiring, I was toying with the idea of venturing into Burma next year, I will bookmark this post in case I do.
ReplyDeleteThanks Phil. I think Burma has great potential, both sides engaging in attack and defence. I think one reason the Pacific island campaigns lack gaming appeal is that the Japanese player doesn’t have much to do other than try to hold their ground to the last man, all the ‘fun’ is operating the Marines. On the other hand Burma is much more fluid and mobile with lots of options for both players to play sides that are more evenly matched than the island campaigns.
DeleteExcellent work Mark, esp like the JOP's
ReplyDeleteThanks John. That JoP was a repurposed company command stand I had made for Crossfire many years ago. Good to give it a new lease of life.
DeleteLovely painting and a great read as well. I keep promising myself to go 20mm should I start the PTO one day. Hopefully AB have a fully grown range of Japanese by then...
ReplyDeleteThanks Nick. I have mixed feelings about AB doing Japanese now my force is almost complete, I would be sooooo tempted to buy them. You know how it is......
ReplyDeleteVery comprehensive and useful for anyone wanting to do this period. Thanks.
ReplyDeleteThanks, it’s been an enjoyable journey and I’ve learned quite a bit along the way.
DeleteGreat post. I appreciate seeing your methodology and the model comparisons, both with each other and the real thing.
ReplyDeleteThanks. It’s always good to see the real thing to compare with the models I’ve made and I’ll go out of my way to visit a museum that might have a bit of kit I haven’t seen before.
DeleteGreat post and excellent work as usual. You encouraged me to start building my Japanese army and already ordered some from Eureka miniatures and Simon's Soldiers, next will be EWM and 172 Scale Miniatures... Do you mind sharing your painting technique and / or the paints you use on your figures. There isn't many information about painting Japanese uniforms and yours look Ace!... Thank you
ReplyDeleteHi Cem, glad you like them. They are all painted using Vallejo. The uniform has a base of Flat Earth and the main colour is Khaki Grey (despite the name it has just the right hint of green for Japanese uniforms). Highlights are then painted with a mix of Khaki Grey and Tan Yellow. I hope that's useful.
DeleteHi,
ReplyDeleteWhat figure do you use as artillery observer in the last scenario (Opium factory) ?
Thanks from Paris
John
Hi John, there are two figures on the base. One lying prone with binoculars is from the Waterloo/Italeri 70mm gun set, the other with a radio is from the Waterloo Japanese infantry set http://www.plasticsoldierreview.com/Review.aspx?id=1229
DeleteJoining the party 3 years late, but I've just started this period as a project (thanks to the new 'Far East Handbook' from the Too Fat Lardies). Your post is incredibly helpful, so thank you for compiling and posting it. I will be coming back here frequently!
ReplyDeleteIt’s never too late to join the party! Glad you’ve found the post helpful, I’ve really putting this force together.
DeleteFantastic article,
ReplyDeletePlanning on Japanese army for RF when I get around to it next year
Cheers
Matt