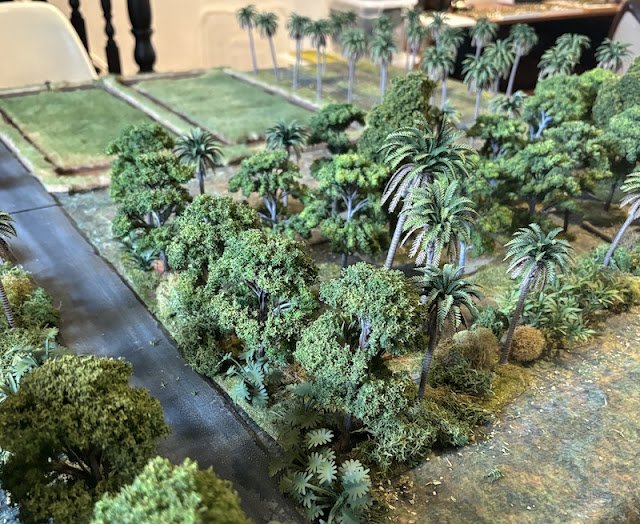
Embarking on a new campaign is always the perfect excuse to add new terrain and figures (well, in so far as we ever really need an excuse). It’s been a while since I’ve used my jungle terrain, so planning to play A Driving Charge, set in Malaya in 1941, gave me a chance to refresh what I had and make a few new pieces.
Rivers, creeks and paddy fields feature prominently in this campaign and they are all projects that I’ve been wanting to tackle for some time. I did make two lengths of river a few years ago. They were based on MDF with the banks sculpted from insulating foam. The problem was, I'd made only two straight sections and just enough to stretch four feet across a gaming table. Useful, but limited in so many other ways.
For the rivers and creeks in this campaign I've used painted plastic sheet and dressed the sides with off-cuts of teddy fur and other pieces of scatter terrain. I think it's a very versatile solution.
I like the idea of creating seamless waterways with no visible joins and painted plastic sheet is a simple solution (not to mention cheap!). As the first scenario in the campaign calls for a large river winding across the table this worked well.
Another terrain pieces I’ve been meaning to add is a substantial bridge and this campaign calls for a couple. Model railways were the obvious place to start looking. Tri-ang produced a very sturdy version that looked ideal and I managed to find one on eBay. Assembly was quick and simple as there are few parts. The road surface is a solid piece of wood into which the girder sides are screwed, making for a very solid game piece. The main effort required on my part was painting and weathering.
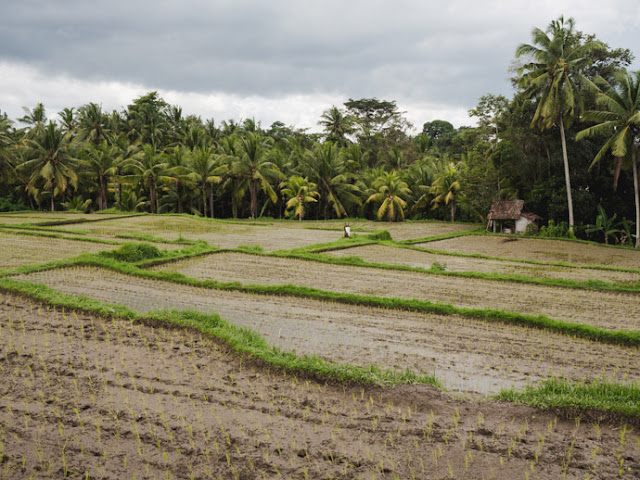
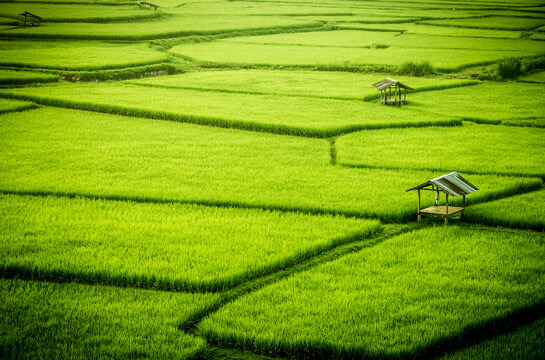
I made a few paddy fields several years ago and while I was very happy with the result they were not going to cover the sort of areas required for this campaign.
As you can see from the two maps below they call for a large area of the table to be covered. That's considerably more than my current collection can meet.
Not only that, if I was to make more paddy fields in a similar style I would find myself with significant storage issues. It called for an alternative solution and I think I found one.
My first thought was to base them on narrow strips of MDF, but in my experience they have a tendency to warp once they extend beyond about 200mm. After experimenting with a few options I think I've found a solution that meets my need and is easy to work with - pieces of carpet. I’d been using carpet tile to make ploughed fields and that would give me the extra height I wanted. Equally important, the rubber base had sufficient weight to hold them flat and in place. From there it was simply a matter of cutting them into suitably sized lengths and gluing the strips of teddy fur on top.
The final touch was to glue sand to the sides to add texture to the banks.
The sides were then painted in earth colours that match my existing terrain. That worked well, although I found they look a bit too angular when laid out in place. So I made pieces for the joins that gave the corners a more naturalistic look. It was a bit more extra effort but I liked the way it broke up the sharper angles. Lastly I thought about how to represent the rice plants themselves.
While those above have the rice plants almost filling the entire field it is also common to see them bordered by water like these below.
Once again pieces of teddy fur supplied the solution.
I can certainly see them working well to line the river edges when I want to create tropical jungle creeks and rivers in places like New Guinea.
Another new terrain type is barrier growth. In terms of game rules they are very similar to a European farm hedge and serve a similar purpose dividing homes and fields in the Far East. A short stretch of one of those is needed for one of the scenarios and once again I've tried to make this as versatile as possible. It will work as a length of barrier growth but could serve equally well as jungle fringe or simply as extra scatter within jungle.
I liked the idea of having a marker on the table as a reminder of when the effects of a Zero attack are in play, so what better than an actual model of a Zero? Fortunately I had one of those I had made many years ago and was able to adapt it and add a suitable base.
The model is not permanently attached to the base which will allow me to swap in other aircraft like a Stuka for France 1940 or a British Hurribomber for Burma in 1944.
While working on another project I had a bit of left over Milliput so tried my hand at sculpting a few pieces of scatter terrain in the form of household objects that I could add to my villages houses. Certainly not essential for playing this campaign but like all scatter terrain it helps add more character to the table.
I've chosen basic things like food and water containers. I can't say they are the finest sculpts but they work well enough in situ.
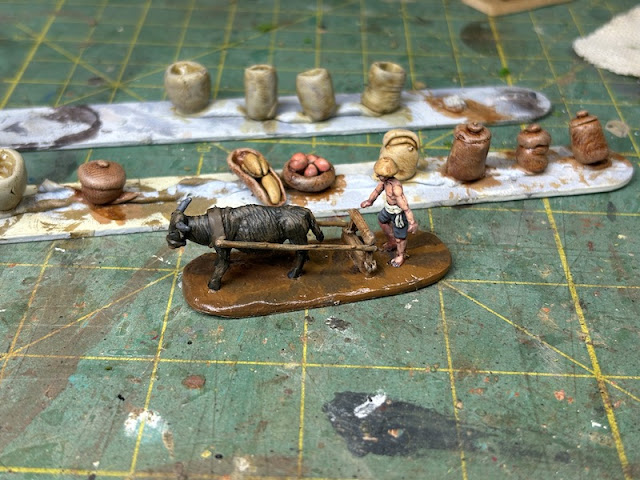
It was also an excuse to put some paint on a figure of a rice farmer and his buffalo. This is from a set of South East Asian civilians from 172 Scale Miniatures. Judging by the clothing I suspect these were created with rural Vietnamese civilians in mind but with this farmer stripped to his waist I think he could work in many settings.
I've painted the base in the same colours as the paddy fields and coated it with gloss varnish to help make it blend in.
Although I may well rebase them on a thinner piece of plastic as the base supplied with the figures is a bit on the thick side.
I've posted about this recently but one final addition was a marker for when a red dice is lost by a force and when they are required to move a unit back to a jump-off-point. They are painted wooden blocks from a craft shop but conveniently sized to fit comfortably in my force morale trackers.


Excellent terrain as always.
ReplyDeleteThank you!
DeleteLovely work and great ideas for Jungle terrain, which make for a great gaming table .
ReplyDeleteThanks and thanks for all the inspiration!
Deletecool!
ReplyDeleteThanks!
DeleteGreat collection of jungle terrain. I think your rice fields and bunds over the plastic sheet look excellent.
ReplyDeleteGlad you liked them, I think they work very well and allow a lot of flexibility.
DeleteThat river looks so convincing (great colour) as it bends round your equally impressive jungle. I am left so far behind, planning some 'gardens' to place buildings on, that I doubt my efforts can even be seen in your rear view mirror.
ReplyDeleteI think you're right to go for a thinner base for the farmer and buffalo - I wonder if you shaped to look like ripples, or a wake, it might blend in even better.
Thanks. I think rule No1 when it comes to rivers is don't paint them blue! I was a little concerned I'd gone too far with that one but once I'd set up the table and put it into a setting I thought it was very effective. I think the knack with tropical terrain is to have lots of it, this is a case when quantity does have a quality all of its own. I think I put nearly all my terrain progess down to the inspirational work of others, in particular Mark Luther and John Pilatos (Bond) both of whom have set the bar very high and given me something to aspire to. You know as well as I do this is a journey and we all get there at our own pace!
DeleteI think I'd go along with the no blue for tropical rivers which are usually very muddy, but if you look at satellite photos of European rivers they often have a blue component to them being various shades of bluey-grey/green with a hint of khaki?
DeleteThis looks amazing! It looks like you spray painted those plastic plants. I tried something similar and I have had issues with the paint chipping off. What color and type of paint did you use? Do you have any tips?
ReplyDeleteYes all the plants are sprayed using an airbrush. I have a tutorial on the palm trees here on the blog which you can find here http://thetacticalpainter.blogspot.com/2017/04/saturday-night-beneath-plastic-palm.html
DeleteI find giving them a really good wash in warm soapy detergent followed by a rinse in water helps. Also a good primer, I use Rust-oleum 2X Ultra Cover Flat Grey which they advertise as bonding to plastic (but do advise it may not work well with polyethylene). That said it doesn't work for all of the plants, I find some of the smaller aquarium plants still lose a bit of paint (and I suspect that's because they are made from polyethylene). It works a treat for the palm trees however.