I've been teaching a good friend Chain of Command and over the last twelve months we've played several campaigns. I haven't been writing them up for the blog for the simple reason I’ve been too busy teaching to make notes and take pictures. We are also playing where the lighting isn't great for photography. That said, for our most recent campaign - A Driving Charge - I have been taking pictures, just nowhere near as many as I would normally. I think I have enough to put together a series of abbreviated AARs.
The setting for this campaign is Malaya in 1941 and I’ve enjoyed bringing jungle terrain back to the table (there is a post all about putting the terrain together here). Although I do have one confession to make. The campaign calls for quite extensive rubber plantations and I don't have enough of the right trees to represent these. What I do have is a lot of palm trees that were created for palm plantations and I'll be substituting those for the rubber plantations. They look nothing like rubber trees but at least they fit the Far East theme.
A Driving Charge pits an aggressive and well trained Japanese force against a variety of British and Empire units as they attempt to stall the invasion of Malaya (note that for convenience I'll often refer to these forces as 'the British' even though they will represent Indian, Nepalese and British troops). I been playing the British and my friend Mark handled the Japanese.
The campaign is in two phases. The first is The Approach to Battle and covers the Japanese attempts to seize river crossings and maintain a fast tempo so their armour can advance rapidly through the British lines. What happens in this first phase of the campaign will influence the second stage where the Japanese confront the main positions of the Jitra line.
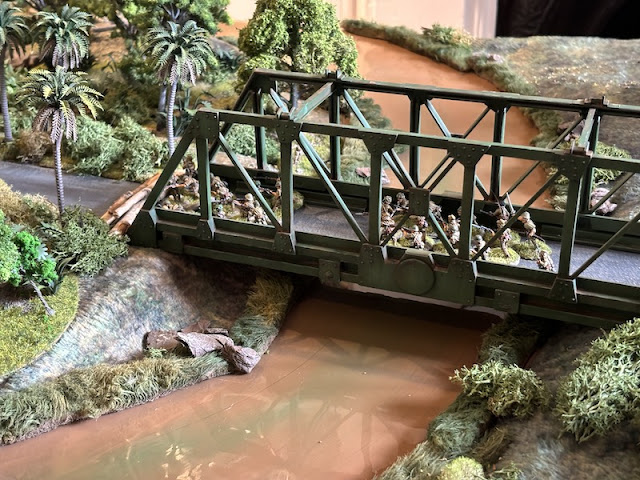
The first game is Probe At Changlun. Here the Japanese come up against a recruit Indian Army platoon trying to hold a bridge while engineers attempt its demolition. While it looks like an uneven contest - the Indians are green and poorly equipped facing a superior enemy - the Japanese appear to have few tactical options other than storming the bridge.
As a result of the British rout the campaign moved directly to the third scenario - Gurkhas at Assun. Here the Japanese chose to delay a turn to carry out reconnaissance and wait for their armour support to catch up with them. This scenario features the Gurkhas holding another bridge along the main trunk road to Jitra. Once again they can attempt to demolish it, although this will prove difficult unless they can drive the Japanese back.
With time on their side the Japanese pause to carry out reconnaissance allowed them to fight across the table instead of along its length. Once again they could be expected to be upon this second bridge very quickly. The chance of being confronted by Japanese armour was high and so I called on a 2 pounder AT gun for support and placed a roadblock on the bridge. Similarly AA MGs were on hand, as I fully expected to undergo a pregame Zero attack.
The game started in a monsoon downpour that gave the Japanese two free moves at the start of their patrol phase (as if they weren't close enough to the bridge already!). It also limited line of sight to 18".
The heavy rain turned the normally knee deep creek into one that's waist deep, making it a more difficult obstacle for the Japanese to cross. However their advantage in the patrol phase meant they had been able to place a jump-off-point on the opposite bank and so avoided having to cross it during the course of the game.
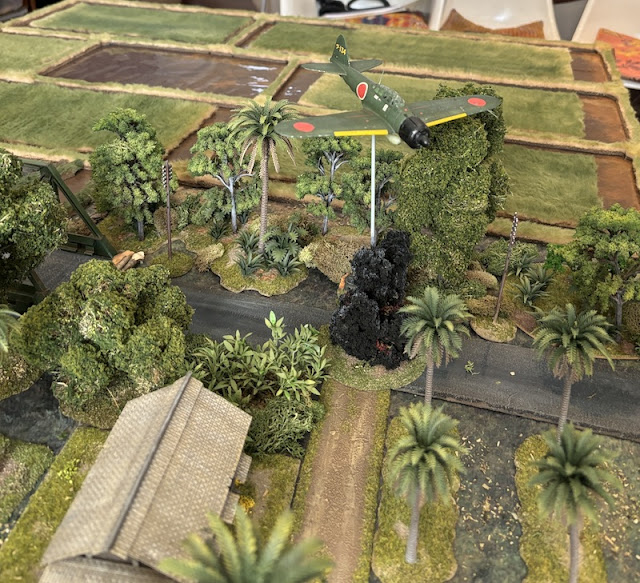
As I had predicted the British experienced the effects of a pre-game Zero Attack! so the AA MGs proved a wise precaution and would make that attack slightly less effective.
The Japanese had the initiative and were off to a good start with a double phase. Their following command roll included a 666. While a run of phases certainly worked in the Japanese favour the turn end did not. It meant the zero attack was no longer in effect and saw the lifting of visibility with the end of the downpour.
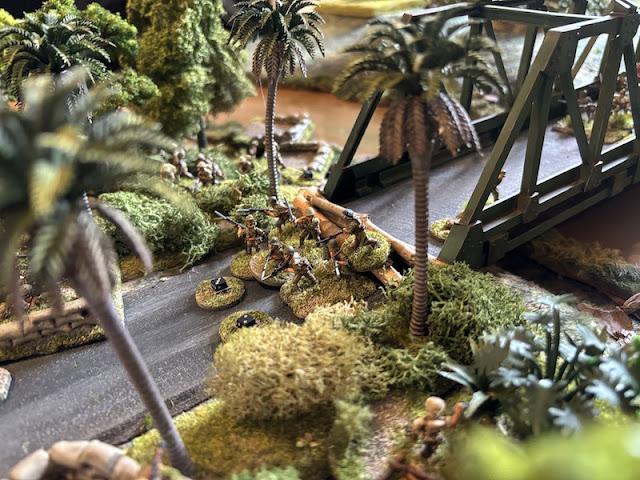
Having suffered quite high casualties when storming the bridge in the previous scenario the Japanese had opened the game by trying a flanking move. A scout team deployed from the jump-off-point by the creek and worked its way into the plantation. That presented quite a threat, but an entrenched Gurkha section covering the plantation soon had them pinned down.
With the attempted flank move stalled the Japanese decided to make a push for the bridge. Once again a support squad was given the unenviable task of leading the assault.
A Gurkha section deployed to the roadblock and immediately inflicted shock and casualties. It looked like this attack might also stall. Fortunately for the Japanese they had another double phase and the Gunso used his one-off ability to resort to corporal punishment to rally the men before leading them into an assault. Unfortunately he went too far and killed one of them. Things were not all going the way of the Japanese. The Gunso's brutality would prove costly.
He ordered the men to follow him. His decision to inspire them by resorting to corporal punishment had backfired. The shock they were suffering prevented them moving fast enough to make contact. They had used the crawlers ruse to send men forward with grenades to precede the attack, but once again fortune was cruel. Of the three grenades thrown only one hit the target and that managed to inflict only a single point of shock.
With a short distance to cover they did finally make contact in the following phase, but the close combat was brutal. Japanese losses combined with the shock they were suffering put them at a disadvantage against the Gurkhas who were in better shape and defending hard cover. All the Japanese were killed, including both the squad’s Gocho and the platoon’s Gunso. The Gurkhas also took casualties losing five men, but it left the survivors holding the roadblock. The severe Japanese losses saw their force morale take quite a blow.
Despite the setback the Japanese were determined to press the attack and a Chi Ha deployed onto the road.
The Japanese had found themselves bogged down in a protracted firefight. The entrenched defenders at the bridge were also able to target the grenade discharger squad and casualties began to mount.


These scenarios, being largely constrained to storming across a bridge, seem well suited to an abbreviated AAR. The aAARs do though give the impression of a much quicker game which leaves one wondering whether it took longer to set up the spectacular terrain than play the game?
ReplyDeleteI assume the comment about not having to cross the ditch in the second game because of the JOP means they just deployed on the other side? Not sure how I feel about that. It’s similar to my frustration with IAT teams deploying to fire at armour, and firing first even when you have the position under overwatch. One can add covering fire into the mix but shutting down the JOP is the obvious solution but sometimes not an option without armour support. Did you ever get a TFL ruling on deploying dug-in troops from JOPs that have been advanced?
Games were reasonably long in both cases. The abbreviated AAR as much driven by the pictures I had as my own recollections of what happened. Crossing the ditch via the jump off point in the other game was okay with me. Much of the campaign reflects the ability of the Japanese to move at a faster tempo and out manoeuvre the British. The fact they have found a way to 'appear' across the stream more rapidly than expected fits the narrative well in this case. I didn't get a ruling back from TFL on that but I fed it into their thoughts on v2 rules because they currently allow MMG teams to deploy dug in for free. It prevents the need to assign a squad to them as a meat shield to absorb hits which is gamey and artificial. Being dug in is a reasonable assumption that the gun team have found a suitable position prior to combat from which to site themselves. Hopefully they will address whether they or anyone else can do this from a recently moved JOP will be covered.
DeleteExcellent looking game and report. Love the period and the rules.
ReplyDeleteThanks!
DeleteThe Japanese ruse that allows you to use a scout team as a jump off point is a good option in the first scenario if like me you hate head on assaults.
ReplyDeleteIndeed, used that one myself recently in a game. However, quite unintentionally when I made up the table the river was wider than 6" which prevented a deployment across it from a jump-off-point or a scout team acting as one. Very convenient of me (he says guiltily!).
DeleteIn this campaign in the opening section I have made heavy use of it and what my opponent calls the jump off teleportation ruse. They allow the Japanese huge flexibility- provided that you can roll some 5’s obviously. My platoon reached scenario 4 with very few losses.
DeleteA terrific run of challenging games, a very entertaining read.
ReplyDeleteThanks Phil, it’s a well thought out little campaign that really captures the flavour of this theatre.
DeleteI do find in campaigns the use of a support squad to take a beating is a bit gamey and probably needs addressing in ‘the sharp end’ supplement rules, but in case of IJA, probably not as out of sync as normal. In this campaign the advantage of withdrawing in good order is a nice offset to defenders that won’t be reused in a scenario fighting until broken.
ReplyDeleteI agree. We include any casualties in the calculations for the men’s opinion but that still doesn’t account for the way those losses are used to cushion the overall losses to the core platoons. I like your idea below I think that prevents that gamey use of those supports, the alternative would be to assign a support pool with limited numbers of units that can be called upon.
DeleteOn that note, one of the campaigns has the effect that losses to a support squad are taken out of your reserve platoons. I think that is a good fix to the sacrificial support squad option.
ReplyDelete